Conquering Complexity: Advanced AFM Strategies for Heterogeneous Biomedical Sample Characterization
Atomic Force Microscopy (AFM) is a powerful tool for nanoscale characterization, yet heterogeneous biological samples present unique challenges in topography, mechanics, and composition.
Conquering Complexity: Advanced AFM Strategies for Heterogeneous Biomedical Sample Characterization
Abstract
Atomic Force Microscopy (AFM) is a powerful tool for nanoscale characterization, yet heterogeneous biological samples present unique challenges in topography, mechanics, and composition. This article addresses the complete workflow for researchers and drug development professionals, from foundational principles to advanced applications. It explores the core challenges of sample variability, provides methodological guidance for key modes like PeakForce Tapping and mechanical mapping, offers practical troubleshooting for artifacts and probe selection, and validates AFM data against complementary techniques. The guide synthesizes best practices for obtaining reliable, quantitative nanomechanical and topographical data from complex samples such as protein aggregates, cell membranes, tissue sections, and composite biomaterials to accelerate biomedical discovery.
Understanding the Nanoscale Puzzle: Core Challenges of Heterogeneous Samples in AFM
Troubleshooting Guides & FAQs
Q1: During AFM imaging of a heterogeneous protein mixture on mica, I observe uneven adsorption and aggregation, leading to poor resolution. How can I improve sample preparation?
A: This is a common issue caused by sample heterogeneity and surface-protein interactions. Implement a Buffer Optimization and Sequential Adsorption Protocol:
- Prepare a low-salt buffer (10 mM HEPES, pH 7.4) to reduce electrostatic-induced aggregation.
- Cleave fresh mica and functionalize with 10 µL of 0.1% poly-L-lysine for 2 minutes for more uniform charge distribution. Rinse gently with Milli-Q water.
- Dilute your protein sample to 5-10 µg/mL in the low-salt buffer.
- Apply 20 µL to the treated mica for 2 minutes only to prevent monolayer over-formation.
- Rinse with 1 mL of the same buffer (not water) to remove loosely bound proteins.
- Blot edge with filter paper and air-dry for 5 minutes in a desiccator.
Q2: My AFM force spectroscopy data on live cells shows extremely high variability. How do I distinguish true biological heterogeneity from experimental noise?
A: High variability often stems from inconsistent probe chemistry and poor contact point detection. Follow this Standardized Probe Functionalization and Analysis Workflow:
Experimental Protocol: Collagen-Coated Tip Preparation for Consistent Cell Adhesion Force Measurements
- Cantilever Cleaning: Plasma clean cantilevers (e.g., MLCT-BIO-DC) for 2 minutes.
- Amination: Incubate in 3-aminopropyltriethoxysilane (APTES) vapor (50 µL in a sealed container) for 1 hour.
- Cross-linking: Place a 10 µL droplet of 2.5% glutaraldehyde in PBS on Parafilm. Invert the cantilever chip and let the tips contact the droplet for 30 minutes.
- Ligand Attachment: Prepare a 0.1 mg/mL solution of Type I collagen in 0.1M acetic acid. Incubate tips in this solution for 1 hour at room temperature.
- Quenching: Incubate tips in 1M ethanolamine (pH 8.0) for 10 minutes to block unreacted aldehydes.
- Rinsing & Storage: Rinse 3x in PBS and store in PBS at 4°C for up to 48 hours.
For Analysis:
- Use a contact point detection algorithm that identifies the point of maximum curvature in the approach curve.
- Apply a constant trigger force threshold (e.g., 500 pN) for all measurements on a given cell type.
- Perform a minimum of 100 force curves per cell and a minimum of 10 cells per condition.
- Filter out curves where the adhesion event occurs after >50 nm of indentation, as this suggests probing the nucleus or sub-cellular structure.
Q3: How can I quantitatively compare the mechanical heterogeneity of a diseased tissue biopsy vs. a healthy control using AFM?
A: Employ a grid-based mapping protocol with spatial statistics. The key is to acquire enough data points to perform meaningful statistical comparisons.
Experimental Protocol: Tissue Stiffness Mapping
- Sample Preparation: Flash-freeze OCT-embedded tissue biopsies. Cryo-section at 10 µm thickness onto glass slides. Keep hydrated with PBS during AFM.
- Calibration: Use a pre-calibrated cantilever (e.g., Hertzian contact model, spherical tip). Confirm spring constant via thermal tune.
- Mapping: Define a 50x50 µm grid on a representative area. Perform a force-volume map with 32x32 points (1024 curves per map).
- Data Extraction: Fit the retract curve with the appropriate model (e.g., Sneddon for conical tips) to extract Young's Modulus (E) at each point.
- Analysis: Generate stiffness distribution histograms and calculate spatial autocorrelation (Moran's I index) to quantify heterogeneity.
Table 1: Quantitative Comparison of Tissue Heterogeneity Metrics
| Metric | Healthy Tissue (Mean ± SD) | Diseased Tissue (Mean ± SD) | Statistical Test (p-value) | Interpretation |
|---|---|---|---|---|
| Median Young's Modulus (kPa) | 12.5 ± 2.1 | 25.8 ± 7.4 | Mann-Whitney U (<0.001) | Tissue stiffening |
| Interquartile Range (IQR) (kPa) | 4.2 | 15.3 | Levene's Test (<0.01) | Increased heterogeneity |
| Skewness of Distribution | 0.31 | 1.85 | - | Positive skew indicates stiff outliers |
| Spatial Autocorrelation (Moran's I) | 0.65 | 0.18 | - | Loss of structural organization |
Research Reagent Solutions & Essential Materials
Table 2: Key Reagents for AFM of Heterogeneous Biomedical Samples
| Item | Function & Rationale |
|---|---|
| Freshly Cleaved Mica (V1 Grade) | Provides an atomically flat, negatively charged surface for adsorbing proteins, DNA, or vesicles. |
| Poly-L-Lysine (0.01%-0.1% solution) | Positively charged polymer for mica functionalization; promotes uniform adsorption of heterogeneous samples. |
| HEPES Buffer (10 mM, pH 7.4) | Low ionic strength buffer minimizes salt crystals and reduces electrostatic screening for clearer imaging. |
| APTES (3-Aminopropyltriethoxysilane) | Silane used to create an amine-functionalized surface on silicon tips/cantilevers for ligand conjugation. |
| BSA (Bovine Serum Albumin, 1% solution) | Used to block cantilevers and surfaces to minimize non-specific adhesion in force spectroscopy. |
| PBS (Phosphate Buffered Saline, Ca²⁺/Mg²⁺ free) | Standard physiological buffer for maintaining cell and tissue viability during live experiments. |
| Type I Collagen (0.1 mg/mL in 0.1M acetic acid) | Common extracellular matrix protein for functionalizing tips to measure integrin-mediated cell adhesion forces. |
| Ethanolamine (1M, pH 8.0) | Quenching agent to block unreacted aldehyde groups after cross-linking steps in tip functionalization. |
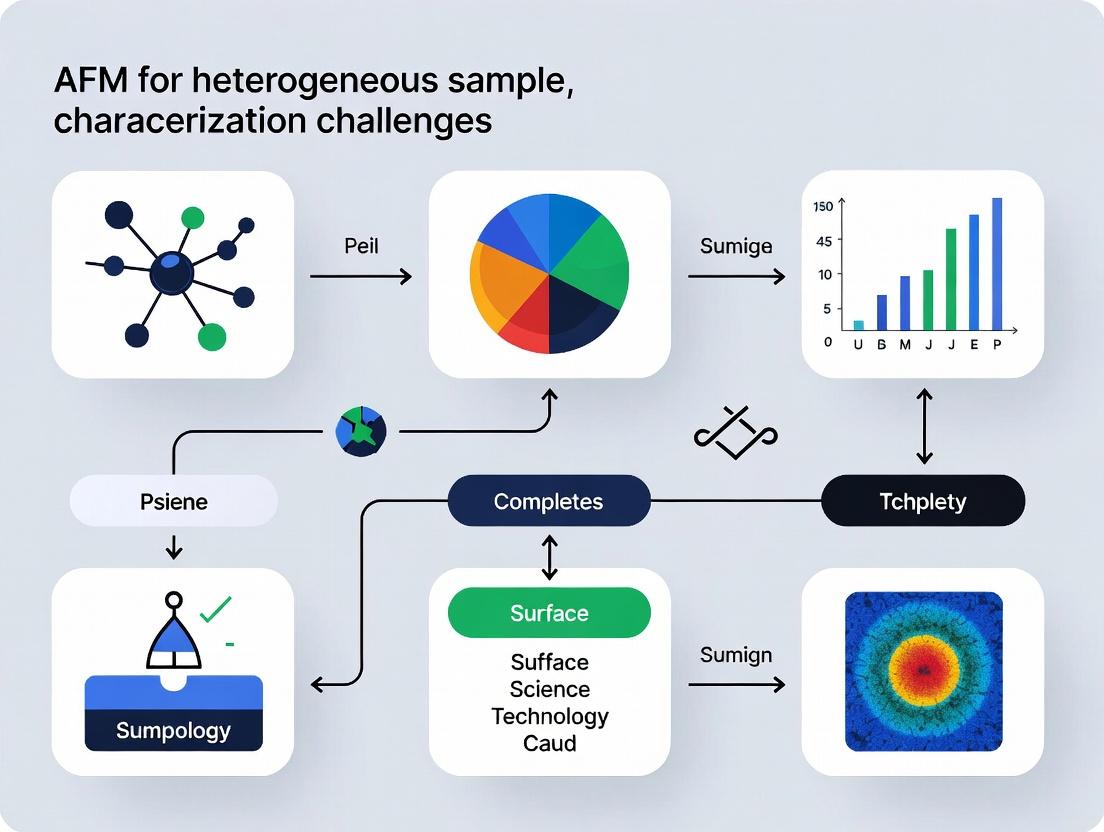
Visualization: Experimental Workflows and Relationships
Title: AFM Heterogeneity Characterization Workflow
Title: Heterogeneity Sources and AFM Readouts
Troubleshooting Guides & FAQs
Q1: My AFM cantilever shows unstable oscillation or poor phase contrast when switching from topography to mechanical property mapping on a soft, heterogeneous polymer blend. What could be the cause? A: This is often due to excessive free oscillation amplitude or inappropriate drive frequency in soft tapping mode. For heterogeneous samples, the shift in material properties can detune the cantilever.
- Troubleshooting Steps:
- Reduce the free amplitude (A0) to 80-100 nm to minimize tip-sample forces.
- Perform a careful frequency sweep to find the resonant peak on a stiff area, then adjust the drive frequency to 95-98% of this peak for operation.
- Ensure the cantilever has an appropriate spring constant (typically 1-10 N/m for soft materials) and a sharp tip (radius < 10 nm).
- Check for tip contamination by imaging a known clean, hard sample (e.g., mica).
Q2: When performing force volume adhesion mapping on live cells, the adhesion force values show extreme variability and the cell membrane is often punctured. How can I improve measurement reliability? A: This indicates inappropriate probe functionalization, excessive loading force, or too slow a retraction speed.
- Troubleshooting Steps:
- Probe: Use a soft cantilever (0.01-0.1 N/m) with a colloidal probe or a sharp tip functionalized with a specific ligand (e.g., fibronectin, RGD peptide) via a PEG linker to promote specific binding and reduce puncturing.
- Protocol: Set the trigger force below 200 pN. Limit the dwell time at maximum load to < 1 ms. Increase the retraction velocity to 1-5 µm/s to reduce dwell time on the membrane.
- Environment: Perform measurements in a controlled, buffered medium at 37°C with CO₂ stabilization for live cells.
Q3: The topography and Young's modulus maps on my protein aggregate sample are spatially misaligned, making direct correlation difficult. How do I fix this? A: Spatial drift between sequential scans is the primary culprit, especially for slow techniques like force volume.
- Troubleshooting Steps:
- Use a multimodal, single-pass technique like PeakForce QNM or PinPoint, which acquires topography and properties simultaneously, eliminating drift.
- If using a dual-pass technique, reduce the time per scan by lowering the resolution or using a faster ramp rate for force curves. Allow the microscope stage to thermally equilibrate for 30+ minutes before measurement.
- Apply real-time drift correction algorithms if available in your software.
Q4: During combined AFM-IR (infrared spectroscopy) and mechanical mapping, the IR laser seems to affect the measured modulus of my pharmaceutical formulation. Is this expected? A: Yes. Localized IR heating can alter material properties, especially for temperature-sensitive polymers or lipids.
- Troubleshooting Steps:
- Systematically vary the IR laser power and note its effect on the measured modulus in a control area. Establish a power threshold below which changes are minimal.
- Use a faster measurement cycle (e.g., higher resonance frequency for AFM-IR) to reduce localized heating time.
- Consider acquiring reference modulus maps before and after IR spectral mapping to quantify the effect.
Experimental Protocols
Protocol 1: Correlative Topography and Nanomechanical Mapping of a Polymer Composite
Objective: To simultaneously obtain surface morphology and localized Young's modulus of a polyurethane-carbon nanotube composite. Materials: See "Scientist's Toolkit" Table 1. Method:
- Sample Preparation: Spin-cast a 1% wt/wt polymer solution in DMF onto a clean silicon wafer. Anneal at 80°C for 1 hour.
- Cantilever Calibration: Install a silicon SPM probe with a nominal spring constant of 2 N/m and resonance frequency of 70 kHz. Perform thermal tune calibration in air to determine the exact spring constant (k) and sensitivity (InvOLS).
- Microscope Setup: Mount sample. Engage in PeakForce Tapping mode.
- Parameter Optimization: Set a PeakForce frequency of 1 kHz. Adjust the PeakForce setpoint to 10 nN. Set the amplitude to 100 nm.
- Data Acquisition: Scan a 5 µm x 5 µm area at 512x512 resolution. Simultaneously record the Height, PeakForce Error, DMT Modulus, and Adhesion channels.
- Data Analysis: Use the Derjaguin–Muller–Toporov (DMT) model in the analysis software to process the force curves and generate the modulus map. Apply a flattening command to the height image.
Protocol 2: Adhesion Force Mapping on Functionalized Lipid Bilayers
Objective: To quantify the distribution of specific ligand-receptor adhesion forces on a supported lipid bilayer. Materials: See "Scientist's Toolkit" Table 2. Method:
- Probe Functionalization: Incubate a gold-coated, tipless cantilever (0.1 N/m) in a 1 mM solution of thiolated PEG linker for 2 hours. Rinse and incubate in a 50 µg/mL solution of the target ligand (e.g., biotin) for 1 hour.
- Sample Preparation: Fuse small unilamellar vesicles containing 5% mol biotinylated lipids onto a freshly cleaved mica disk in a fluid cell.
- System Equilibration: Fill the fluid cell with PBS buffer. Allow the cantilever and sample to thermally equilibrate for 30 minutes.
- Force Volume Setup: Engage in contact mode at minimal force. Switch to force volume mode. Define a 10x10 grid over a 2 µm x 2 µm area.
- Parameter Settings: Set a trigger force of 300 pN, a ramp size of 500 nm, a dwell time of 0 ms, and a ramp rate of 1 Hz.
- Data Acquisition: Run the force volume scan. Repeat with a PEG-only functionalized control probe.
- Data Analysis: Use automated curve analysis software to detect adhesion events from retraction curves. Subtract the maximum adhesion force for each curve. Plot a histogram and map adhesion forces versus spatial position.
Data Presentation
Table 1: Typical Nanomechanical Properties of Common Biomedical Materials Measured via Multimodal AFM
| Material | Approx. Young's Modulus (E) | Typical Adhesion Force | Recommended AFM Mode |
|---|---|---|---|
| Mammalian Cell (Cytoplasm) | 0.5 - 10 kPa | 50 - 300 pN | PeakForce QNM, Force Volume |
| Collagen Fibril (Type I) | 2 - 5 GPa | 0.5 - 2 nN | Tapping Mode, HarmoniX |
| Lipid Bilayer (DPPC) | 100 - 300 MPa | 100 - 500 pN | PinPoint, Force Spectroscopy |
| Polyethylene (LDPE) | 100 - 300 MPa | 10 - 50 pN | PeakForce Tapping |
| Polystyrene (PS) | 2 - 4 GPa | 200 - 800 pN | Tapping Mode, PeakForce Tapping |
| Silicon (Reference) | ~130 GPa | 20 - 100 pN | Contact Mode |
Table 2: Key Parameters for AFM-IR on a Heterogeneous Pharmaceutical Blend
| Parameter | Optimal Value for Blend | Effect of Deviation |
|---|---|---|
| IR Laser Pulse Frequency | 250 kHz | Lower freq: Reduced SNR; Higher freq: Possible thermal damage. |
| AFM Contact Force | < 50 nN | Higher force: Sample deformation, altered IR absorption. |
| Scan Rate | 0.2 Hz | Faster rate: Poor IR signal; Slower rate: Increased drift, thermal effects. |
| Spectral Resolution | 4 cm⁻¹ | Lower resolution (e.g., 8 cm⁻¹): Loss of chemical detail. |
| QCL Wavenumber Range | 1650 - 1750 cm⁻¹ | Covers key carbonyl (C=O) stretch for polymer and API differentiation. |
Diagrams
Title: Troubleshooting Unstable AFM Oscillation Workflow
Title: Single-Pass Multimodal AFM Data Correlation
The Scientist's Toolkit
Table 1: Key Reagents & Materials for Polymer Composite Characterization
| Item | Function in Experiment | Example Product/Specification |
|---|---|---|
| Silicon SPM Probe | Interacts with sample to sense forces. Must match stiffness to sample. | Bruker RTESPA-150 (k ~5 N/m, f₀ ~150 kHz) |
| Clean Silicon Wafer | Provides an atomically flat, rigid substrate for spin-casting samples. | P-type, <100>, 1cm x 1cm piece |
| Polyurethane Pellet | The matrix polymer for composite formation. | Sigma-Aldrich, Pellethane 2363-80AE |
| Functionalized CNTs | Provide nanoscale reinforcement; alter local mechanics. | Cheap Tubes, COOH-SWNTs, 5% wt |
| Dimethylformamide (DMF) | Solvent for dissolving polyurethane and dispersing CNTs. | Anhydrous, 99.8% purity |
Table 2: Essential Materials for Bio-Adhesion Force Spectroscopy
| Item | Function in Experiment | Example Product/Specification |
|---|---|---|
| Gold-Coated Tipless Cantilever | Substrate for thiol-based chemical functionalization. | Bruker MLCT-O10 (k=0.03 N/m) |
| Heterobifunctional PEG Linker | Spacer molecule that reduces non-specific adhesion. | "SH-PEG-NHS" (e.g., 3.4 kDa) |
| Target Ligand (Biotin) | The specific binding molecule attached to the probe. | Biotinamidohexanoic acid NHS ester |
| Supported Lipid Bilayer Kit | Model membrane system containing receptor lipids. | Avanti Polar Lipids, DOPC with 5% Biotinyl Cap PE |
| Phosphate Buffered Saline (PBS) | Isotonic, pH-stable imaging buffer. | 1X, pH 7.4, without calcium/magnesium |
This technical support center provides troubleshooting guides and FAQs for researchers working on Atomic Force Microscopy (AFM) characterization of heterogeneous samples, addressing challenges related to Topographical Disparity, Soft-Hard Boundaries, and Dynamic Environments.
FAQs & Troubleshooting Guides
Q1: During imaging of a mixed polymer and ceramic sample, my AFM tip consistently gets stuck or drags material at the boundary between phases. How can I improve imaging at these soft-hard boundaries? A: This is a common artifact due to high lateral forces. Implement the following protocol:
- Switch to a non-contact or tapping mode: Use Frequency Modulation (FM) or Amplitude Modulation (AM) AFM to minimize tip-sample contact.
- Optimize drive amplitude and setpoint: Use a lower drive amplitude and set the setpoint to >90% of the free amplitude for very soft phases, reducing it slightly for harder phases.
- Use ultra-sharp, high-frequency probes: Employ probes with a resonant frequency >300 kHz in air (>1 MHz in liquid) and a tip radius <10 nm (e.g., Olympus AC160TS-R3 or Bruker ScanAsyst-Fluid+).
- Procedure: First, engage in the softest region. Perform a force spectroscopy array (32x32) over a boundary area to map adhesion and modulus. Use this data to define a topography-feedback-offset per location for subsequent imaging.
Q2: My sample has extreme height variations (>5 µm) alongside nanoscale surface features of interest. How can I capture both the large-scale topography and fine details without crashing the tip or losing resolution? A: This topographical disparity requires a multi-pass or lift-mode technique.
- Solution: ScanAsyst Auto or PeakForce Tapping with Topography Compensation: These modes automatically adjust parameters in real-time.
- Experimental Protocol for Dual-Pass Lift Mode:
- First Pass: Use contact mode with a low-resolution scan (1-2 lines/sec) and a soft cantilever (k ~0.4 N/m) to trace the gross topography. Save this trace.
- Second Pass: The system lifts the tip to a user-defined height (e.g., 50-100 nm) above the saved topography trace and performs a second, higher-resolution scan in tapping mode. This maintains a constant tip-sample interaction despite large Z-variations, preserving high resolution on sloped features.
Q3: I am trying to image lipid bilayer dynamics or protein conformational changes in liquid. How can I stabilize imaging in such a dynamic environment to reduce noise and drift? A: Environmental control and high-speed AFM (HS-AFM) techniques are key.
- Thermal Enclosure: Use an acoustic and thermal isolation enclosure. Allow the AFM and sample to equilibrate for at least 45 minutes after loading.
- Buffer Conditions: Ensure your fluid cell is sealed and thermalized. Use a low evaporation buffer (e.g., add 1-2% glycerol) and degas all buffers to minimize bubble formation.
- Protocol for Dynamic Imaging:
- Use small cantilevers (k ~0.1 N/m, f₀ ~1 MHz in fluid) designed for HS-AFM.
- Reduce scan size to ≤ 500 nm and pixel resolution to 100x100 to increase frame rate (>5 fps).
- Employ active drift compensation software (if available) that tracks a stable feature and adjusts the scan coordinates in real-time.
Q4: How do I quantitatively compare modulus or adhesion across a heterogeneous sample surface with high reliability? A: Use PeakForce QNM or a similar quantitative nanomechanical mapping mode with strict calibration.
- Calibration Protocol:
- Spring Constant: Calibrate the cantilever using the thermal tune method before each session.
- Tip Radius: Characterize the tip using a certified reference sample (e.g., TGT1 grating or a polystyrene-polyethylene blend) before and after the experiment.
- Deflection Sensitivity: Calibrate on a clean, rigid surface (sapphire) in the same medium as your experiment.
- Data Validation: Always collect a reference material (e.g., a known polymer) alongside your sample as an internal control. The table below summarizes key parameters for common sample types.
Table 1: Recommended AFM Parameters for Heterogeneous Sample Characterization
| Sample Type | Primary Challenge | Recommended Mode | Cantilever Type | Key Parameter Ranges |
|---|---|---|---|---|
| Polymer Blend | Soft-Hard Boundaries | PeakForce QNM | k=0.2-2 N/m, f₀=70-90 kHz | PeakForce Setpoint: 50-500 pN; Rate: 0.5-1 kHz |
| Cell in Buffer | Dynamic Environment | Fast Tapping (AM) in Fluid | k=0.1-0.6 N/m, f₀=20-60 kHz in fluid | Drive Amp: 50-100 mV; Setpoint: 0.95-0.98 V |
| Composite Material | Topographical Disparity | Dual-Pass Lift Mode | 1st Pass: k=0.4 N/m; 2nd Pass: k=40 N/m | Lift Height: 50-150 nm; Scan Rate (2nd): 2-5 Hz |
| Protein on Mica | Dynamic Environment | High-Speed AFM | Small Cantilever (k~0.1 N/m, f₀>1MHz) | Scan Rate: 5-15 fps; Pixel: 50x100 |
The Scientist's Toolkit: Research Reagent Solutions
Table 2: Essential Materials for AFM Heterogeneous Sample Characterization
| Item | Function & Rationale |
|---|---|
| Bruker PFQNM-LC-A-CAL Probe | A pre-calibrated probe for quantitative nanomechanical mapping in liquid, ensuring consistent modulus and adhesion measurements. |
| OTR4-10 & OTR8-10 Test Samples | Calibration gratings for verifying lateral scan accuracy and characterizing tip radius/shape before/after experiments. |
| NTA-Modified Mica (e.g., Ni²⁺ NTA) | Functionalized substrate for immobilizing His-tagged proteins or complexes in a controlled orientation for dynamic studies. |
| Supported Lipid Bilayer (SLB) Kit | Contains vesicles and buffers for creating a flat, fluid membrane mimic on mica, essential for studying membrane-protein interactions. |
| Polymer Blend Reference Sample (PS-LDPE) | A sample with known, distinct modulus domains for validating mechanical contrast and tip condition. |
| Vibration Isolation Platform | Active or passive isolation table to dampen environmental noise, crucial for high-resolution imaging on all samples. |
| In-line Buffer Degasser | Removes dissolved gases from imaging buffers, preventing bubble formation in the fluid cell during long experiments. |
Experimental Workflow & Pathway Diagrams
AFM Protocol Selection for Heterogeneous Samples
Relationship Between AFM Challenges and Required Solutions
Critical Sample Preparation Considerations for Preserving Native Heterogeneity
Technical Support Center: Troubleshooting Guides & FAQs
Q1: My AFM images show flattened, featureless surfaces despite using a heterogeneous protein mixture. What went wrong? A: This is often due to non-specific adsorption and dehydration during sample drying. To preserve native 3D conformation:
- Protocol: Use a freshly cleaved mica surface functionalized with APTES ((3-Aminopropyl)triethoxysilane).
- Expose mica to APTES vapor (2 µL on a filter paper in a sealed container with mica) for 2 hours.
- Rinse thoroughly with anhydrous ethanol and dry under a gentle nitrogen stream.
- Apply 20 µL of your sample in a physiologically relevant buffer (e.g., PBS with 1-2 mM Mg²⁺) for 2 minutes.
- Rinse gently with 2 mL of the same buffer to remove loosely bound particles.
- Image immediately under liquid (Buffer) using tapping mode AFM. Do not allow the sample to dry.
- Protocol: Use a freshly cleaved mica surface functionalized with APTES ((3-Aminopropyl)triethoxysilane).
Q2: How do I prevent the dissociation of weakly bound complexes during AFM rinse steps? A: Implement a chemical crosslinking step prior to adsorption, using a short, controllable linker.
- Protocol: BS³ (bis(sulfosuccinimidyl) suberate) Crosslinking.
- Prepare your native complex in PBS, pH 7.4.
- Add BS³ to a final concentration of 0.5-1.0 mM. Incubate on ice for 30 minutes.
- Quench the reaction by adding Tris-HCl, pH 7.5, to a final concentration of 20 mM and incubate for 15 minutes on ice.
- Desalt the mixture immediately using a spin column equilibrated with your imaging buffer to remove excess quencher and linker.
- Proceed with adsorption and liquid AFM imaging as in A1.
- Protocol: BS³ (bis(sulfosuccinimidyl) suberate) Crosslinking.
Q3: My samples aggregate on the substrate. How can I achieve optimal surface coverage for single-particle analysis? A: Aggregation is typically caused by too high a concentration or incorrect buffer ionic strength.
- Protocol: Optimizing Adsorption Density.
- Perform a serial dilution series of your sample.
- Prepare identical functionalized mica discs.
- Apply 20 µL of each dilution for the same adsorption time (e.g., 2 min).
- Rinse and image. Target a coverage where particles are separated by at least their diameter.
- Protocol: Optimizing Adsorption Density.
Key Quantitative Parameters for Sample Preparation Table 1: Optimized Parameters for Common Sample Types
| Sample Type | Recommended Substrate | Optimal Concentration (for adsorption) | Incubation Time | Critical Buffer Additive | Imaging Mode |
|---|---|---|---|---|---|
| Soluble Proteins | APTES-mica | 0.5 - 2 µg/mL | 1-3 min | 1-10 mM MgCl₂ | Liquid, Tapping |
| Lipid Bilayers | Plain mica (fusion) | 0.1 mg/mL lipid | 10-30 min (vesicle fusion) | 2 mM CaCl₂ | Liquid, Tapping |
| Protein-DNA Complexes | APTES- or Ni²⁺-NTA-mica | 1-5 nM complex | 5 min | 5-50 mM NaCl | Liquid, Tapping |
| Small Drug-Loaded Nanoparticles | Poly-L-lysine coated mica | 10-50 µg/mL | 5 min | None (PBS) | Liquid, Tapping |
Essential Research Reagent Solutions Table 2: The Scientist's Toolkit for Native Heterogeneity AFM
| Reagent/Material | Function & Critical Consideration |
|---|---|
| Freshly Cleaved Muscovite Mica | Atomically flat, negatively charged substrate. Must be cleaved immediately before functionalization. |
| APTES (3-Aminopropyl triethoxysilane) | Creates a positively charged amine-functionalized surface to electrostatically trap biomolecules. Must be anhydrous. |
| BS³ Crosslinker | Amine-reactive, membrane-impermeable, cleavable linker. Stabilizes transient complexes prior to surface attachment. |
| PBS (Physiological Buffer) | Maintains native pH and ionic strength. Add 1-2 mM Mg²⁺ to promote adhesion to mica. |
| Size Exclusion Spin Columns | For rapid buffer exchange and desalting after crosslinking, removing unreacted reagents. |
| Liquid AFM Cell | Enables imaging in buffered solution, preventing dehydration and preserving soft, native structures. |
Visualization: Workflow for Native Complex Preservation
Diagram Title: Native Heterogeneity Preservation Workflow for AFM
Troubleshooting Guides & FAQs
Q1: Why am I unable to resolve individual fibrils in my amyloid sample with AFM? A: This is often due to tip convolution or poor sample preparation. Ensure sample dilution and adsorption time are optimized. Use a high-resolution tip (e.g., ultra-sharp silicon nitride, k ~0.4 N/m) and engage with low contact force (< 1 nN). For quantitative data, see Table 1.
Q2: My AFM images of biofilms show a flattened, featureless morphology. What went wrong? A: This typically indicates sample dehydration. Biofilms must be kept hydrated. Use a liquid cell or fluid tip holder. Engage in PeakForce Tapping mode in fluid. The buffer should match the biofilm's native growth medium (e.g., LB broth). Image immediately after preparation.
Q3: How can I accurately measure the modulus of individual drug delivery nanoparticles when they aggregate? A: Aggregation prevents single-particle analysis. To disperse particles:
- Use a fresh, filtered (0.02 µm) solvent (e.g., PBS, milli-Q water).
- Apply brief, low-power sonication (e.g., 10 W for 30 sec) immediately before deposition.
- Use a plasma-cleaned, freshly cleaved mica substrate functionalized with poly-L-lysine (0.01% w/v) for 5 minutes to promote adhesion. Perform Force Volume or PeakForce QNM mapping on isolated particles. Calibrate the tip sensitivity and spring constant daily.
Q4: I get inconsistent adhesion force measurements on heterogeneous samples. How do I improve reliability? A: Inconsistent adhesion often stems from tip contamination. Implement a rigorous cleaning protocol:
- Before each experiment, clean the tip/cantilever in a UV-ozone cleaner for 15 minutes.
- In liquid, perform approach-retract cycles on a clean area of the substrate to stabilize the tip.
- Use a functionalized tip (e.g., with a specific ligand) only for a limited number of measurements (< 50 force curves). Always include a control surface in your experiment.
Q5: What is the best AFM mode for imaging delicate, non-adherent biofilm structures without disruption? A: PeakForce Tapping in fluid is generally recommended. Alternatively, use a non-contact mode like AC mode in fluid with a very soft cantilever (k ~0.1 N/m). Set a low amplitude (~5 nm) and high setpoint (>90% of free amplitude) to minimize interaction forces.
Experimental Protocols
Protocol 1: Sample Preparation for Amyloid Fibril Imaging on Mica
- Substrate Preparation: Cleave a sheet of muscovite mica using adhesive tape to expose a fresh, atomically flat surface.
- Sample Dilution: Dilute the fibril solution (e.g., Aβ1-42) in a compatible buffer (e.g., 20 mM HEPES, pH 7.4) to a final concentration of 0.1-1 µM.
- Adsorption: Apply 20-30 µL of the diluted sample onto the mica surface. Incubate for 5-10 minutes at room temperature.
- Rinsing: Gently rinse the surface with 2 mL of filtered milli-Q water to remove salts and unbound material.
- Drying: Dry the sample under a gentle stream of nitrogen or argon gas. Note: For hydrated imaging, skip step 5 and proceed directly to fluid cell loading.
Protocol 2: Quantitative Nanomechanical Mapping (QNM) of Drug Delivery Particles
- Calibration: Calibrate the cantilever's deflection sensitivity on a clean, rigid substrate (sapphire). Perform thermal tune to determine the spring constant.
- Tip Selection: Use a silicon SPM-sensor with a nominal spring constant of ~0.4 N/m and a resonant frequency of ~150 kHz in liquid.
- Engagement: Engage on a particle-free area of the substrate in your desired fluid medium using PeakForce Tapping mode.
- Parameter Setting: Adjust the PeakForce setpoint to ensure a maximum applied force of 1-5 nN. Set the PeakForce frequency to 0.5-1 kHz.
- Mapping: Scan an area containing isolated particles at a resolution of 256x256 pixels.
- Analysis: Use the instrument's software (e.g., NanoScope Analysis) to derive the DMT modulus for each particle, ensuring to fit only the retract curve's elastic region.
Data Presentation
Table 1: AFM Operational Parameters for Complex Samples
| Sample Type | Recommended Mode | Optimal Cantilever k (N/m) | Key Imaging Parameter | Typical Resolution (Height) | Key Challenge Addressed |
|---|---|---|---|---|---|
| Amyloid Fibrils (dry) | Tapping Mode | 20-50 | Low amplitude (~0.5 V), Low scan rate (0.8 Hz) | 0.2 nm | Preventing fibril displacement |
| Amyloid Fibrils (hydrated) | PeakForce Tapping | 0.1-0.4 | PeakForce Amplitude = 10 nm, Setpoint = 100 pN | 0.5 nm | Maintaining fibril structure |
| Bacterial Biofilm | PeakForce Tapping in Fluid | 0.7 | Scan Rate = 0.3 Hz, Setpoint = 300 pN | 2-5 nm | Preventing deformation |
| PLGA Drug Nanoparticles | Force Volume / PeakForce QNM | 0.4 | Trigger Threshold = 2 nN, Points/curve = 512 | 1 nm (modulus map) | Measuring single-particle mechanics |
Table 2: Common Artifacts and Solutions in Complex Sample AFM
| Artifact | Probable Cause | Immediate Solution | Preventive Action |
|---|---|---|---|
| Streaking/ Smearing | Tip contamination or damaged apex | Replace or clean the tip (UV-ozone). | Sonicate sample before deposition; filter buffers. |
| "Double Tip" Images | Tip has multiple asperities | Image a known sharp feature (e.g., TGT1 grating) to confirm; change tip. | Use sharper, high-quality tips from a new box. |
| Periodic Noise | Acoustic or electronic interference | Enable the acoustic hood; check for grounding issues. | Isolate the AFM from floor vibrations; use an active anti-vibration table. |
| Sample Drift | Poor sample adhesion or thermal instability | Allow the system to equilibrate for 30 min after loading. | Use a more adhesive substrate (e.g., functionalized mica); control lab temperature. |
Visualizations
AFM Workflow Decision Tree for Complex Samples
Troubleshooting Path for AFM Image Resolution
The Scientist's Toolkit: Research Reagent Solutions
| Item | Function/Application in AFM of Complex Samples |
|---|---|
| Muscovite Mica (V1 Grade) | Provides an atomically flat, negatively charged substrate for adsorbing proteins, fibrils, and particles via electrostatic interactions. |
| Poly-L-Lysine Solution (0.01% w/v) | Coats mica/silicon to create a positively charged surface, enhancing adhesion for negatively charged samples like cells, DNA, or some nanoparticles. |
| HEPES Buffer (20 mM, pH 7.4) | A biologically compatible, non-coordinating buffer for diluting and incubating protein/peptide samples without interfering with adsorption. |
| Ultrafiltration Tubes (e.g., 100 kDa MWCO) | Used to concentrate, buffer-exchange, and purify protein/fibril samples to remove salts and small aggregates prior to AFM. |
| UV-Ozone Cleaner | Critically cleans AFM tips and substrates by removing organic contaminants, improving tip sharpness and sample adhesion. |
| Calibration Grating (e.g., TGT1, 10μm pitch) | Verifies scanner accuracy and tip condition. Essential for diagnosing tip artifacts and ensuring quantitative dimensional measurements. |
| Silicon Nitride Cantilevers (k=0.1-0.7 N/m) | Soft levers for imaging in liquid and performing nanomechanical mapping on delicate samples like biofilms and vesicles. |
| Sharp Silicon Tips (k=20-50 N/m, f>300 kHz) | High-resolution tips for tapping-mode imaging of dry samples like amyloid fibrils or synthetic polymers. |
Mastering the Modes: Practical AFM Techniques for Mapping Heterogeneity
Troubleshooting Guides & FAQs
Q1: During imaging of a heterogeneous polymer blend, I see significant sample deformation and dragging in Contact Mode. What is the likely cause and solution?
A: This is a classic issue with heterogeneous samples where varying mechanical properties exist. The cause is the constant lateral shear force applied by the tip in Contact Mode, which displaces softer material phases. The recommended solution is to switch to an oscillatory mode. For quantitative nanomechanical mapping (QNM), use PeakForce Tapping. For high-resolution topography on delicate samples with moderate heterogeneity, use Tapping Mode. Ensure your scan rate is appropriately reduced (often below 1 Hz) when transitioning to softer materials.
Q2: My Tapping Mode phase images on a protein-drug aggregate sample show poor contrast between components. How can I improve material differentiation?
A: Poor phase contrast in Tapping Mode often stems from an improperly set amplitude setpoint or drive frequency. First, ensure you are operating in the attractive force regime by setting the amplitude setpoint to 80-90% of the free-air amplitude. This enhances material sensitivity. If contrast remains low, the interaction may be too complex for standard phase imaging. Switch to PeakForce Tapping, which directly controls and measures tip-sample force at each pixel, providing simultaneous, quantitative modulus and adhesion maps that are more directly interpretable for heterogeneous biological aggregates.
Q3: When using PeakForce Tapping on a mixed lipid bilayer, I get inconsistent modulus readings. What troubleshooting steps should I follow?
A: Inconsistent nanomechanical data typically points to tip contamination or inappropriate PeakForce parameters.
- Perform a tip check: Image a known, hard standard (e.g., clean silicon wafer). If the modulus value is off or image is noisy, clean or replace the tip.
- Optimize PeakForce parameters:
- PeakForce Frequency: Reduce it (to 0.25-1 kHz) for softer samples to allow full viscoelastic response.
- PeakForce Setpoint: Systematically increase it until gentle, consistent contact is made. Start very low (~100 pN).
- Scan Rate: Must be significantly lower than the PeakForce Frequency (e.g., a 0.7 kHz frequency requires a scan rate < 0.5 Hz).
- Ensure sample is firmly immobilized on the substrate to prevent movement.
Q4: For imaging catalysts with both hard (metal oxide) and soft (carbon/polymer) support regions, which mode minimizes tip wear while maintaining resolution?
A: Tapping Mode is traditionally favored for this compromise. However, for the most detailed characterization, a sequential imaging approach is recommended. First, use PeakForce Tapping with a stiff tip (e.g., diamond-coated) at a low force to map topography and modulus, identifying all regions. Then, on a fresh tip if necessary, use Tapping Mode at a low amplitude setpoint for high-resolution imaging of the soft support structures. Avoid Contact Mode on such composites to prevent damaging the soft phase and rapid tip blunting.
Comparative Data Table
The following table summarizes the key operational characteristics of the three AFM modes, critical for selecting the appropriate mode for heterogeneous samples.
Table 1: Quantitative Comparison of AFM Imaging Modes for Heterogeneous Samples
| Parameter | Contact Mode | Tapping Mode | PeakForce Tapping (QNM) |
|---|---|---|---|
| Tip-Sample Interaction | Constant physical contact, lateral shear forces. | Intermittent contact, oscillating tip. | Controlled, transient force "taps" at a set maximum force. |
| Typical Force Applied | 0.5 - 100 nN (high, difficult to control). | 0.1 - 10 nN (moderate, via amplitude feedback). | ~10 - 500 pN (very low, directly and quantitatively controlled). |
| Lateral Forces | Very High (causes dragging/smearing). | Negligible. | Negligible. |
| Best for Sample Type | Very rigid, flat, homogeneous surfaces. | Soft, adhesive, heterogeneous samples (e.g., polymers, cells). | Extremely soft, delicate, or highly heterogeneous/mixed samples (e.g., lipids, live cells, polymer blends). |
| Primary Data Output | Topography (height). | Topography (height) & Phase (qualitative material contrast). | Topography, Quantitative Modulus (DMT), Adhesion, Deformation, Dissipation maps. |
| Typical Resolution | High (in air, on hard samples). | High (in air & fluid). | High, but can be limited on very stiff materials by tip radius. |
| Tip Wear | High due to constant friction. | Moderate. | Low due to minimized lateral forces and controlled impact. |
| Key Challenge for Heterogeneous Samples | Deforms/displaces soft phases; poor material contrast. | Phase image interpretation can be ambiguous; force control is indirect. | Parameter optimization is crucial; slower scan speeds required. |
Experimental Protocol: Nanomechanical Mapping of a Polymer Blend
This protocol details the use of PeakForce Tapping for quantitative characterization of a heterogeneous polymer blend, a common challenge in materials science for drug delivery system development.
Objective: To obtain simultaneous high-resolution topography and quantitative nanomechanical property maps (Young's Modulus, Adhesion) of a PS-LDPE polymer blend film.
Materials:
- Atomic Force Microscope (Bruker Dimension Icon or equivalent with PeakForce QNM capability).
- ScanAsyst-Air or RTESPA-150 probes (silicon nitride, nominal spring constant ~0.4 N/m, tip radius ~2 nm for ScanAsyst).
- Polymer blend sample (Polystyrene (PS) / Low-Density Polyethylene (LDPE)) spin-coated onto a silicon wafer.
- Clean silicon wafer for tip calibration.
Procedure:
- Probe Calibration: Mount the cantilever and perform thermal tuning to determine its accurate spring constant. Perform a tip qualification scan on a clean calibration grating.
- Sample Mounting: Secure the polymer blend sample on the magnetic AFM stage using double-sided tape.
- Microscope Setup: Engage the laser and adjust the photodetector to achieve a sum signal near vendor specification.
- PeakForce Tapping Parameter Initialization:
- Set the PeakForce Frequency to 1 kHz.
- Set the Scan Rate to 0.25 Hz (must be << Frequency/256).
- Set the PeakForce Setpoint to a very low value (e.g., 50 pN).
- Engagement and Optimization:
- Engage the tip using the automated routine.
- Increase the PeakForce Setpoint gradually until the topography trace shows stable contact with surface features. For polymers, a final setpoint of 100-300 pN is typical.
- Optimize the Feedback Gains to achieve stable tracking without oscillation.
- Data Acquisition:
- Acquire a 5 µm x 5 µm scan at 512 samples/line resolution.
- The system will simultaneously record Height, Young's Modulus (DMT), Adhesion, and Deformation channels.
- Post-Processing:
- Apply a first-order flatten to the height image.
- Use the nanoanalysis software to generate modulus and adhesion histograms. Select regions of interest (ROIs) on different phases to extract average and standard deviation values.
Visualization: AFM Mode Selection Workflow
Title: Decision Workflow for Selecting AFM Imaging Mode
The Scientist's Toolkit: Key Reagents & Materials
Table 2: Essential Research Reagent Solutions for AFM of Heterogeneous Samples
| Item | Function/Benefit | Example Use Case |
|---|---|---|
| Functionalized AFM Probes (e.g., COOH, NH2, PEG) | Chemically-specific force spectroscopy; maps adhesion forces based on molecular recognition. | Mapping ligand-receptor distribution on a cell membrane or drug particle surface. |
| PeakForce QNM Calibration Kit | Contains standard samples with known modulus for quantitative calibration. | Essential for validating modulus measurements on a polymer blend or hydrogel. |
| Muscovite Mica (V1 Grade) | Atomically flat, negatively charged substrate for sample deposition. | Preparing supported lipid bilayers (SLBs) or immobilizing protein complexes. |
| APES ((3-Aminopropyl)triethoxysilane) | Silane coupling agent for creating positively charged, adhesive surfaces on glass/oxide substrates. | Firmly immobilizing DNA, cytoskeletal filaments, or negatively charged nanoparticles. |
| Poly-L-lysine Solution | Creates a uniform, positively charged coating on substrates to enhance cell or tissue adhesion. | Immobilizing live cells or brain tissue slices for mechanical mapping. |
| Bruker ScanAsyst-Fluid+ Probes | Optimized silicon nitride probes with reflective coating for stable operation in liquid. | Imaging biological samples in physiological buffer using PeakForce Tapping or Tapping Mode. |
| Probe Cleaning Solution (e.g., piranha etch, UV/Ozone) | Removes organic contaminants from AFM tips, restoring performance and data reliability. | Critical step before any quantitative force measurement or after imaging dirty samples. |
Frequently Asked Questions (FAQs)
Q1: Why do I get inconsistent stiffness values when mapping a heterogeneous biological sample? A: Inconsistent stiffness measurements often arise from poor tip-sample contact. For heterogeneous samples, the setpoint and cantilever oscillation amplitude must be optimized for each region. Use a dynamic force curve mode (e.g., QI or FORCE) to first perform a single-point measurement on a stiff reference area and a soft area to establish ideal parameters before mapping. Ensure the scan rate is low enough (typically 0.5-1.0 Hz) for the feedback loop to respond to sudden changes in topography and stiffness.
Q2: How do I prevent sample damage during high-resolution adhesion mapping? A: To prevent damage, prioritize force control over spatial resolution. Use a cantilever with a low spring constant (< 0.5 N/m) and a very sharp tip (nominal radius < 10 nm). Reduce the maximum applied force to the minimum required to obtain a reliable pull-off signal (often 1-5 nN). Employ the "Lift Mode" technique, where topography is traced first, and the adhesion map is collected on a second pass at a defined height above the sample surface.
Q3: What causes adhesion maps to show "shadow" artifacts of the topography? A: Topography crosstalk in adhesion maps is typically caused by an incorrect lift height during the second pass. If the lift height is too low, the tip collides with sample features. If it's too high, adhesion forces become undetectable. Optimize by taking a force curve at the highest feature on your scan line and set the lift height to 100-120% of the maximum repulsive deflection encountered.
Q4: How should I calibrate my cantilever for quantitative stiffness mapping? A: Accurate calibration is a three-step process, summarized in the table below:
Table 1: Cantilever Calibration Protocol for Quantitative Stiffness Mapping
| Step | Parameter | Method | Key Consideration |
|---|---|---|---|
| 1. Spring Constant (k) | Thermal Tune | Use the thermal noise spectrum in fluid. | Perform calibration in the same medium as the experiment. |
| 2. Deflection Sensitivity (InvOLS) | Force Curve on Rigid Substrate | Use a clean, dry sapphire or glass slide. | Check sensitivity periodically; it changes with laser alignment. |
| 3. Tip Radius | Post-Scan or Reference Sample | Image a sharp, known standard (e.g., TGT1 grating) or use a blind reconstruction method. | A worn tip overestimates contact area, reducing calculated adhesion and stiffness. |
Troubleshooting Guides
Issue: Poor Correlation Between Stiffness and Known Sample Features
- Check 1: Verify the linearity of the photodetector. Perform a force curve on a rigid substrate; the approach curve should be a straight line in the contact region. Non-linearity indicates incorrect detector alignment.
- Check 2: Adjust the force curve fitting range. The stiffness (slope of the force curve) should be calculated from the initial 20-50% of the contact region, avoiding the non-linear zone at the point of contact and the region of high indentation.
- Check 3: Ensure the modulus fit model (e.g., Hertz, Sneddon, Derjaguin-Muller-Toporov) matches your tip geometry and sample type (e.g., use a conical model for cells, not a spherical one).
Issue: Adhesion Force Values Are Noisy or Unrepeatable
- Check 1: Monitor tip contamination. Perform a control adhesion measurement on a clean, homogeneous area (e.g., mica) at the start and end of your experiment. A significant change indicates contamination—replace or clean the tip.
- Check 2: Increase dwell time. Allow the tip to be in contact with the sample for 100-500 ms before retracting to allow for molecular bonding and system stabilization.
- Check 3: Control environmental humidity. Capillary forces dominate in ambient air. For consistent biological adhesion measurements, perform experiments in a fluid cell with a controlled buffer solution.
Experimental Protocols
Protocol 1: Sequential Stiffness and Adhesion Mapping on a Live Cell
- Objective: To map the nanomechanical properties of a cell membrane with correlated stiffness and adhesion data.
- Materials: See "The Scientist's Toolkit" below.
- Method:
- Mount a functionalized, tipless cantilever onto the AFM head.
- Assemble the fluid cell with the cell culture in appropriate medium.
- Approach the surface and locate a cell using optical microscopy.
- Optimize Imaging Parameters: Set a low scan rate (0.3 Hz), a low setpoint (≤ 100 pN), and a Z-limit of 1-2 µm.
- Acquire a topographic image in contact or PeakForce Tapping mode.
- Without moving the tip, switch to force volume mode. Define a 32x32 grid over the area of interest.
- For each point, acquire a force curve with the following optimized parameters: Max force = 300 pN, approach/retract velocity = 1 µm/s, dwell time = 200 ms.
- Post-process using the AFM software to extract the Young's Modulus (from the approach curve) and the adhesion force (minimum of the retract curve) for each pixel. Render as correlated maps.
Protocol 2: Optimizing Parameters for a Polymer Blend Stiffness Map
- Objective: To distinguish stiff and soft polymer phases with high contrast.
- Method:
- Use a standard silicon tip with a moderate spring constant (~5 N/m).
- Perform a single-point force curve array on a known location containing both phases.
- Systematically vary the maximum indentation force from 100 nN to 2000 nN. Plot the calculated modulus vs. force for each phase.
- Identify the force range where the modulus values plateau for each phase—this is the optimal, material-independent indentation force.
- Set this force as the mapping parameter. Use a rapid force mapping mode (e.g., PeakForce QNM) with a scan rate of 1-2 Hz and a high spatial resolution (512x512 pixels) to capture phase boundaries.
Visualizations
Diagram 1: AFM Workflow for Stiffness & Adhesion Mapping
Diagram 2: Specific Adhesion Measurement Mechanism
The Scientist's Toolkit: Research Reagent Solutions
Table 2: Essential Materials for AFM Nanomechanical Mapping
| Item | Function/Brand Example | Critical Application Note |
|---|---|---|
| Biolever Mini (BL-AC40TS, Olympus) | Silicon nitride cantilever with ultra-low spring constant (~0.09 N/m) and sharp tip. | Ideal for mapping live cells without indentation damage. |
| PNP-TR (NanoWorld) | Conductive diamond-coated silicon tip with high force constant (~250 N/m). | Essential for stiff materials like bone, composites, or some polymers. |
| Functionalization Kit (e.g., PEG linker, NHS ester) | Chemically tether ligands (e.g., RGD peptides) to the tip for specific adhesion mapping. | Enables measurement of receptor-specific forces, not just non-specific adhesion. |
| Sodium Cacodylate Buffer (0.1M, pH 7.4) | A common, non-coordinating buffer for biological AFM in fluid. | Maintains physiological pH without interfering with tip-sample interactions. |
| Polystyrene/Polyethylene (PS/PE) Blend | A well-characterized, heterogeneous polymer reference sample. | Used for daily validation of stiffness and adhesion mapping performance and tip shape. |
| Calibration Grating (TGT1) | Grid of sharp spikes for tip shape characterization and lateral calibration. | Regular use is mandatory to monitor tip wear and ensure mapping accuracy. |
Troubleshooting Guides & FAQs
Q1: Why am I getting unstable feedback or tip crashing on a sample with both hard and soft domains? A1: This is common on mixed surfaces due to inconsistent interaction forces. First, ensure you are using an appropriate cantilever. For such samples, a high-frequency non-contact cantilever (e.g., 300 kHz) is often better than a standard contact mode tip. Increase your integral and proportional gains by 15-20% to improve response on softer areas. Use a slower scan speed (e.g., 0.5 Hz) to allow the feedback loop to adjust. A force-distance curve on each domain type prior to imaging can help set the optimal baseline deflection or amplitude setpoint.
Q2: How do I minimize phase artifacts and improve true height accuracy on heterogeneous materials? A2: Phase artifacts arise from variations in material properties. For AFM modes like tapping, use a higher setpoint ratio (≥0.9) to minimize tip-sample interaction forces, reducing property-based contrast. Perform a thermal tune immediately before imaging to ensure the correct resonance parameters. For quantitative height, consider using PeakForce Tapping or PINNING mode if available, as they directly control and measure force, decoupling topography from adhesion.
Q3: What is the best strategy for choosing scan angle and size when features are directionally aligned? A3: Always perform an initial large, slow scan (e.g., 50µm) in a fast-scan axis perpendicular to the suspected feature alignment. This minimizes lateral force build-up and shear damage. For high-resolution imaging, reduce the scan size sequentially. Rotate the scan angle (often 90°) for the final high-res image to distinguish true topography from scanning-induced artifacts.
Q4: How can I verify if my tip is still sharp during a long session on an abrasive mixed surface? A4: Implement periodic tip integrity checks. Every 3-4 scans, image a known sharp reference sample (e.g., a silicon grating with sharp edges). A drop in resolution or the appearance of "double tips" indicates wear or contamination. For abrasive samples, consider using diamond-coated conductive tips or high-wear-resistant silicon nitride tips, even if resolution is slightly compromised.
Q5: My images show "halos" or elevation at soft-hard boundaries. Is this real or an artifact? A5: This is often a tracking artifact. The feedback loop may lag when transitioning from a compliant material (where it indents) to a rigid one. To mitigate, use a lower scan rate and a more aggressive feedback setting (higher gains). Post-scan, apply a first-order flattening algorithm only if the artifact is consistent across scan lines. For critical measurements, use a non-contact or interleave mode where the tip spends less time in contact.
Key Experimental Protocols
Protocol 1: Optimized Tapping Mode for Polymer-Blend Topography
- Cantilever Selection: Mount a silicon tip with a force constant of ~40 N/m and a resonant frequency of ~300 kHz in air.
- Tuning: Perform an automated thermal tune in the imaging environment (air/liquid) to find the resonant peak. Set the drive frequency to the peak frequency.
- Setpoint Optimization: Engage at an amplitude setpoint of ~100 nm. Reduce the setpoint slowly until the tip just maintains contact (typically 70-80% of the free amplitude). On mixed samples, use the Setpoint Ramp function to find the highest setpoint that gives stable imaging on the softest domain.
- Feedback Parameters: Start with proportional gain (P) = 0.5 and integral gain (I) = 0.3. Adjust upwards until feedback oscillation is minimal.
- Imaging: Scan at 0.8-1.0 Hz with 512 samples/line. Use a Multi-Pass or Interleave mode if subsequent property mapping is planned.
Protocol 2: PeakForce Tapping Calibration for True Height
- Tip Calibration: Perform the spring constant calibration (thermal tune method) and optical lever sensitivity (deflection sensitivity) on a clean, rigid sapphire surface.
- PeakForce Setpoint: Set the maximum peak force (e.g., 100 pN to 1 nN) using the Force Ramp feature. Start high and reduce until the softest features are not deformed.
- Frequency: Set the PeakForce frequency to 0.5-2 kHz.
- Feedback Gains: Adjust the PeakForce feedback gains to maintain the set force. Higher gains provide better tracking on rough areas.
- Direct Topography Capture: The height channel in this mode is largely free of adhesion artifacts, providing a reliable topographic image.
Table 1: Recommended AFM Settings for Common Mixed Surface Types
| Sample Type (Hard/Soft) | Recommended Mode | Cantilever Type (k, f) | Optimal Scan Rate | Key Parameter Tip |
|---|---|---|---|---|
| Polymer Blend (PS-PMMA) | Tapping Mode | Si, 40 N/m, ~300 kHz | 0.8-1.2 Hz | Setpoint > 0.8, Low Drive Amplitude |
| Lipid Bilayer on Mica | Contact Mode (Fluid) | Si₃N₄, 0.1 N/m, - | 3-5 Hz | Low Force (≤100 pN), Deflection Setpoint < 0.5 V |
| Protein Aggregates on Glass | PeakForce Tapping | Scanasyst-Fluid+, 0.7 N/m | 0.5-1.0 Hz | Peak Force ~100-300 pN |
| Nanocomposite (Ceramic/Folymer) | Tapping Mode | High-Freq. Si, 130 N/m, ~800 kHz | 0.3-0.6 Hz | High Gains, Small Scan Size (≤5µm) |
Table 2: Troubleshooting Parameter Adjustments
| Symptom | Probable Cause | Immediate Action | Long-term Solution |
|---|---|---|---|
| Tip Crashing on Soft Areas | Setpoint too low, Gains too high | Retract, re-engage with 15% higher setpoint. | Use a softer cantilever; switch to force-controlled mode. |
| Streaking in Scan Direction | Feedback too slow (low gains), Scan too fast | Reduce scan speed by 50%; increase P and I gains by 20%. | Perform on-sample frequency sweep to optimize drive. |
| "Shadow" or Doubling | Tip contamination or damage | Perform in-situ cleaning (UV, plasma). Image a reference sample. | Use more wear-resistant tips; implement regular cleaning protocol. |
| Inconsistent Height Data | Thermal drift, Humidity changes | Allow 30 min thermal equilibration after engagement. | Use environmental control chamber; employ active drift compensation. |
The Scientist's Toolkit: Essential Research Reagents & Materials
| Item | Function in Mixed-Surface AFM |
|---|---|
| PPP-FMAuD (Nanoworld) | Conductive gold-coated silicon SPM probe for electric force microscopy on mixed conductive/insulating samples. |
| SCANASYST-AIR (Bruker) | Silicon tip on a nitride lever with a proprietary coating for consistent imaging in PeakForce Tapping with minimal adhesion. |
| Ultra-sharp Silicon Tips (e.g., ATEC-NC) | Tips with radius < 10 nm for achieving true atomic resolution on flat, hard domains within a mixed matrix. |
| Muscovite Mica (V1 Grade) | An atomically flat, cleavable substrate for immobilizing soft biological samples or polymer films for reference calibration. |
| PS/LDPE Blend Reference Sample | A well-characterized heterogeneous sample with known domain sizes and moduli for system calibration and method validation. |
| Anti-vibration Table | A passive or active isolation system to reduce environmental noise, critical for high-resolution imaging on any surface. |
| Plasma Cleaner (O₂/Ar) | For decontaminating tips and substrates in-situ, removing organic adsorbates that cause spurious adhesion forces. |
Experimental Workflow & Logical Diagrams
Diagram 1: General AFM Workflow for Mixed Surfaces (100 chars)
Diagram 2: Troubleshooting Path for Unstable Feedback (100 chars)
Technical Support Center: Troubleshooting Guides & FAQs
FAQ 1: How do I distinguish between a genuine material property and an artifact on my non-uniform sample in KPFM measurements? Answer: Artifacts often correlate with topographical features. Perform a correlation analysis between your topography and contact potential difference (CPD) maps. A genuine property will have a distinct electrical signature independent of height. For example, on a polymer blend, a phase-separated region should show a consistent CPD shift (>100 mV) across its area, not just at edges. Implement a double-pass technique with increased lift height (e.g., 50-100 nm) on the second pass to minimize capacitive coupling to topography.
FAQ 2: My MFM signal is weak and noisy on my heterogeneous biological sample. What are the primary optimization steps? Answer: Weak MFM signal on soft, non-uniform samples is common. First, ensure your probe is properly magnetized. Second, optimize the lift height through a sensitivity vs. resolution trade-off: start at 30 nm and increase in 10 nm increments until signal-to-noise improves, but rarely exceed 100 nm for fine features. Use high-coercivity, low-moment probes (e.g., CoCr-coated) to minimize sample perturbation. Increase the drive amplitude slightly (e.g., 10-20%) to enhance oscillation in non-contact mode.
FAQ 3: EFM phase signal shows inverse contrast on different grains of my perovskite film. Is this a real work function variation or a setup issue? Answer: This is likely a real variation. On polycrystalline samples, different crystal facets or compositions have different work functions. Verify by ensuring a uniform, conductive substrate grounding. Calibrate using a known standard (e.g., highly ordered pyrolytic graphite (HOPG) or gold) on the same sample holder. Check that your AC voltage frequency (typically 10-100 kHz) is not near a mechanical resonance of the cantilever-sample system.
FAQ 4: How do I set the optimal drive frequency for EFM on a sample with mixed conductive and insulating domains? Answer: Perform a frequency sweep in a representative area. The optimal drive frequency avoids topographic crosstalk and sample resonances. A standard protocol is:
- Engage in tapping mode to find the resonant frequency (f0).
- For EFM, use a drive frequency below f0 (often f0 - 10% to 20%) to minimize excitation of mechanical resonances.
- For a cantilever with f0 = 300 kHz, start testing at 240-270 kHz.
- Lock-in amplifier time constant should be increased (e.g., 30-100 ms) for better SNR on insulating areas.
Table 1: Troubleshooting Common Artifacts on Non-Uniform Samples
| Symptom | Possible Cause | Diagnostic Test | Corrective Action |
|---|---|---|---|
| KPFM CPD stripes | 1. 2x line scan frequency interference. 2. Slow feedback. | Check CPD profile perpendicular to scan direction. | 1. Shield cables, ground microscope. 2. Increase KPFM gain/proportionality. |
| MFM halo around features | Long-range magnetic forces or capacitive coupling. | Image at multiple lift heights (30, 50, 80 nm). | Increase lift height; use lower moment probe; apply sample bias to nullify electrostatic force. |
| EFM signal saturates | Tip-sample voltage too high or gain too high. | Reduce AC voltage amplitude stepwise from 10V to 1V. | Lower AC voltage (V_ac) to 1-3 V; reduce lock-in amplifier gain. |
| Correlation between topography and property maps | Tip convolution or crosstalk. | Scan the same line in forward and reverse directions. | Use higher aspect ratio tips; increase lift height in second pass; use interleave mode. |
Experimental Protocols
Protocol 1: Correlative Topography and KPFM on a Polymer-Fullerene Blend Objective: To map nanoscale phase separation and work function distribution in an organic photovoltaic film. Materials: Conductive AFM probe (Pt/Ir coating, k ~ 2-5 N/m, f0 ~ 75 kHz), grounded ITO substrate. Procedure:
- Engage: Engage in amplitude modulation tapping mode to obtain topography.
- First Pass: Record topography line.
- Second Pass (KPFM): Retrace topography at a constant lift height (20-30 nm). Apply an AC bias (V_ac = 2-3 V, f = 17 kHz) to the tip. Use a nulling DC bias feedback loop to minimize the first harmonic oscillation.
- Data: The applied nulling DC bias equals the negative CPD. Map CPD across the sample.
- Analysis: Use histogram analysis of CPD map to identify distinct peaks corresponding to polymer and fullerene domains.
Protocol 2: MFM on Magnetic Nanoparticles in a Cellular Matrix Objective: To localize and characterize magnetic nanoparticles within a fixed cell. Materials: Low-moment magnetic probe (CoCr coating, k ~ 2-5 N/m), fixed cell sample on glass slide. Procedure:
- Topography: Image in tapping mode in air. Use low setpoint (∼0.8 V) to minimize sample deformation.
- Probe Magnetization: Magnetize the tip using a strong bar magnet in a consistent direction perpendicular to sample.
- MFM Lift Mode: Set lift height to 50 nm. The system retraces the recorded topography at this height.
- Phase Detection: Monitor the phase shift of the oscillating cantilever, which is proportional to the magnetic force gradient.
- Control: Scan a nanoparticle-free area to establish background phase.
Visualizations
Title: KPFM Two-Pass Measurement Workflow
Title: MFM Signal Optimization Decision Tree
The Scientist's Toolkit: Research Reagent Solutions
Table 2: Essential Materials for Electrical & Magnetic AFM on Heterogeneous Samples
| Item | Function | Example & Key Specification |
|---|---|---|
| Conductive AFM Probes | For KPFM/EFM; provides electrical contact to apply/measure bias. | Pt/Ir-coated Si probe, resonance frequency ~75 kHz, force constant ~2-5 N/m. |
| Low-Moment MFM Probes | For MFM on soft samples; minimizes magnetic perturbation of sample. | CoCr-coated probe, low coercivity, "low-moment" designated. |
| Conductive Substrate Tape | Grounds non-conductive sample substrates for KPFM/EFM. | Double-sided carbon tape or silver paint. |
| Work Function Reference Sample | Calibrates absolute CPD values in KPFM. | Freshly cleaved HOPG or evaporated gold film. |
| Magnetic Reference Sample | Verifies probe magnetization and MFM performance. | Standard magnetic tape with known domain pattern. |
| Vibration Isolation Enclosure | Minimizes acoustic/floor vibration noise critical for lift modes. | Acrylic or foam enclosure for the AFM stage. |
| Electromagnetic Shield | Reduces 50/60 Hz and radio frequency interference for KPFM. | Copper mesh box or shielded room. |
Troubleshooting Guides & FAQs
FAQ 1: Why is my fluorescence signal weak or bleached when performing correlative AFM-Fluorescence imaging?
- Answer: This is often due to photobleaching from excessive exposure or laser intensity before AFM scanning. Ensure you use an antifade mounting medium for fixed samples. For live-cell imaging, consider environmental control (CO₂, temperature) and oxygen scavenging systems. Optimize your fluorescence acquisition settings (lower intensity, shorter exposure) to preserve the sample before the typically longer AFM scan. Verify that the AFM cantilever or laser is not obscuring or shadowing the fluorescence excitation/emission path.
FAQ 2: How do I achieve precise spatial correlation (pixel-to-pixel registration) between the AFM topograph and the fluorescence image?
- Answer: Precise registration requires fiducial markers visible in both modalities. Use fluorescent nanoparticles (e.g., TetraSpeck microspheres) that are also topographically distinct. Follow this protocol:
- Apply a sparse distribution of fiducial markers onto your substrate or sample.
- Acquire a low-magnification fluorescence map to locate your region of interest (ROI) and markers.
- Acquire a high-resolution fluorescence image of the ROI.
- Without moving the sample, engage the AFM tip and scan the exact same ROI.
- Use software (e.g., in Gwyddion, Fiji with plugins) to align the two images based on the marker positions, applying translational and rotational transforms.
FAQ 3: My AFM tip is contaminating or dragging the fluorescently labeled structures. How can I prevent this?
- Answer: This indicates excessive tip-sample force or adhesion.
- Forces: Calibrate your AFM cantilever spring constant accurately. Use the lowest possible setpoint force in contact or tapping mode. In PeakForce Tapping or QI mode, explicitly set the maximum peak force to < 100 pN for soft biological samples.
- Adhesion: Use sharp, clean tips. Consider hydrophilic tips for aqueous environments to reduce capillary forces. For lipid or membrane samples, ensure the imaging buffer is appropriate (e.g., includes Ca²⁺ or Mg²⁺ for stabilization if needed).
- Speed: Reduce the scan speed to allow the tip to track the surface accurately without displacing material.
FAQ 4: The fluorescence focus drifts during long AFM scans, degrading correlation. How can I stabilize it?
- Answer: Drift is typically thermal or mechanical. Implement the following:
- Environmental Control: Enclose the microscope and use a thermal equilibration period (≥ 30 mins) after sample loading.
- Hardware: Use a microscope stage with active drift compensation or a closed-loop scanner for the AFM.
- Software: Employ real-time drift correction software if available. As a practical method, frequently re-acquire a quick fluorescence snapshot of a distinct feature to monitor drift and manually pause to re-register if necessary.
- Protocol: Design your experiment to acquire the critical fluorescence data after the AFM scan if the sample is fixed, to avoid pre-scan bleaching.
FAQ 5: What are the best sample preparation methods for correlative AFM-Fluorescence on live cells?
- Answer: The key is to maintain cell viability while ensuring fluorescence expression and a stable AFM scan.
- Substrate: Use #1.5 glass-bottom dishes/plates coated appropriately (e.g., poly-L-lysine, collagen).
- Labeling: Use bright, photostable fluorescent proteins (e.g., mNeonGreen, mScarlet) or dyes. For membranes, consider lipophilic dyes (DiI, FM dyes); for cytoskeleton, use transfected actin-GFP or similar.
- Buffer: Use phenol-red free imaging medium, supplemented with HEPES if without CO₂ control.
- Protocol: Seed cells 24-48 hrs prior. Transfer to imaging medium 1 hr before experiment. Locate a healthy, moderately expressing cell. Use low-light fluorescence to find the ROI. Switch to AFM, engage using the lowest possible force in fluid, and begin scanning. Interleave brief fluorescence checks.
Data Presentation
Table 1: Common AFM Modes for Correlative Fluorescence Experiments and Their Parameters
| AFM Mode | Typical Force | Scan Speed | Best For | Key Consideration for Correlation |
|---|---|---|---|---|
| Contact Mode | 0.1 - 5 nN | Fast (1-10 Hz) | Fixed, stiff samples (e.g., bone, polymers) | High lateral forces can distort or sweep away labeled structures. |
| Tapping/AC Mode (Air) | Low (setpoint ~ 0.8 V) | Medium (0.5-2 Hz) | Fixed biological samples, polymers | Good for soft samples; ensure fluorescence laser doesn't interfere with cantilever oscillation. |
| Tapping/AC Mode (Fluid) | Very Low (setpoint ~ 0.9 V) | Slow (0.1-1 Hz) | Live cells, membrane proteins, lipids | Optimal for viability. Use low amplitude to minimize disturbance. |
| PeakForce Tapping | Programmable (50-500 pN) | Medium (0.2-2 Hz) | Heterogeneous samples (mixed stiffness), live cells | Direct force control minimizes damage. Simultaneous mechanical mapping correlates with fluorescence. |
Table 2: Troubleshooting Summary: Symptoms, Causes, and Solutions
| Symptom | Likely Cause | Immediate Solution | Preventive Action |
|---|---|---|---|
| No AFM topography on fluorescent region | Tip contamination, ROI not found | Retract, check cantilever under optical view, re-engage. | Use fiducial markers. Clean tips before use. |
| Fluorescence blurry after AFM scan | Sample pushed or indented | Retract tip immediately. | Reduce imaging force by 50-80%. Use softer cantilevers (0.01-0.1 N/m). |
| Mismatched image scales | Different pixel resolutions | Record exact scan sizes and pixel dimensions for both modalities. | Use software that records metadata for both instruments in one file. |
| Strange topographical features | Contaminated tip or debris on sample | Perform tip check scan on a known standard (e.g., grating). | Filter buffers, use clean substrates, store tips in a clean environment. |
Experimental Protocols
Protocol 1: Correlative AFM-Fluorescence on Fixed Cultured Cells with Fiducial Markers Objective: To correlate actin cytoskeleton architecture (fluorescence) with nanoscale topography and stiffness (AFM). Materials: See "The Scientist's Toolkit" below. Procedure:
- Sample Preparation:
- Plate cells on a sterilized, coated glass-bottom dish.
- Fix cells with 4% PFA for 15 min at room temperature (RT).
- Permeabilize with 0.1% Triton X-100 for 5 min.
- Block with 1% BSA for 30 min.
- Stain with Phalloidin-Alexa Fluor 488 (1:200) for 1 hr at RT, protected from light.
- Dilute TetraSpeck beads 1:1000 in PBS, apply a 10 µL drop for 1 min, then gently wash 3x with PBS.
- Mount in PBS or antifade medium.
- Correlative Imaging:
- Fluorescence First: Place dish on inverted microscope. Using a low-magnification objective (e.g., 20x), locate a cell with clear beads nearby. Acquire a high-resolution (60x/100x) z-stack of the fluorescence signal.
- Registration: Note the stage coordinates.
- AFM Integration: Mount the dish on the AFM stage (compatible with the microscope). Using the optical view of the AFM, navigate to the recorded stage coordinates.
- Tip Engagement: Align the laser, engage the cantilever in fluid using very low setpoint/force.
- AFM Scan: Perform a PeakForce Tapping or Tapping mode scan over the registered area (typically 20x20 µm to 50x50 µm). Ensure the scan rate is slow enough for good tracking (0.3-0.5 Hz).
- Data Correlation: Export both images. Use the TetraSpeck beads as alignment points in correlation software (e.g., Correlia, or manual alignment in Fiji).
Protocol 2: Live-Cell Membrane Dynamics and Topography Objective: To link membrane protein localization (fluorescence) with local membrane physical properties (AFM). Materials: Live cells expressing a membrane protein-GFP fusion, fluid AFM cantilevers, CO₂-independent imaging medium. Procedure:
- Setup: Equilibrate the live-cell imaging system (temperature at 37°C, CO₂ if available) for ≥30 min.
- Locate Cell: Using widefield fluorescence with very low excitation, find a cell with moderate GFP expression.
- Initial Fluorescence: Acquire a snapshot and a brief time-lapse (5 frames, 10-sec interval) to confirm activity.
- AFM Engagement: Switch to AFM optics. Engage the cantilever in the medium away from the cell. Navigate the tip to a position near the cell of interest.
- Correlative Time-Lapse:
- Start a simultaneous acquisition script if available.
- AFM: Begin a continuous, slow scan (e.g., 1 line/sec) over a small region (10x10 µm) of the cell membrane.
- Fluorescence: Interleave GFP images every 30-60 seconds using minimal exposure.
- Duration: Continue for 15-30 minutes, monitoring for drift.
- Analysis: Align time-stamped images. Correlate fluorescence puncta appearance/disappearance with changes in topography (e.g., protrusions) or stiffness.
Mandatory Visualization
Title: Correlative AFM-Fluorescence Workflow
Title: Troubleshooting Correlation Problems
The Scientist's Toolkit
Table 3: Essential Research Reagents & Materials for Correlative AFM-Fluorescence
| Item | Function/Application | Example/Notes |
|---|---|---|
| Glass-Bottom Dishes (№1.5) | High-resolution imaging substrate compatible with both oil-immersion objectives and AFM tip approach. | MatTek dishes, Ibidi µ-Dishes. Ensure glass is coverslip thinness (≈170 µm). |
| Fluorescent Fiducial Markers | Provide spatial landmarks for precise image registration between optical and AFM images. | TetraSpeck microspheres (0.1 µm or 0.2 µm), visible in multiple fluorescence channels and topographically distinct. |
| Antifade Mounting Medium | Preserves fluorescence intensity in fixed samples by reducing photobleaching. | ProLong Diamond, Vectashield. Critical for long AFM scans post-fluorescence. |
| BSA (Bovine Serum Albumin) | Used as a blocking agent to reduce non-specific binding of fluorescent labels in fixed sample prep. | Typically used at 1-5% w/v in PBS. |
| Live-Cell Imaging Medium | Maintains cell health and fluorescence during live correlative experiments, often without phenol red. | Leibovitz's L-15 Medium (no CO₂ required), FluoroBrite DMEM. |
| Soft AFM Cantilevers (Fluid) | Minimizes sample damage and obtains accurate nanomechanical data on soft biological samples. | Spring constant: 0.01 - 0.1 N/m. Tips: MSNL, Biolever Mini, ScanAsyst-Fluid+. |
| Photostable Fluorescent Dyes/Proteins | Enable tracking of specific structures with minimal bleaching during the correlative process. | For actin: Phalloidin conjugates (Alexa Fluor dyes). For live cells: mNeonGreen, HaloTag ligands. |
| Cleaning Solutions for AFM Tips | Ensures uncontaminated tips for reliable topography and reduced sample drag. | Piranha solution (H₂SO₄:H₂O₂) Handle with extreme care, UV-Ozone cleaner, or plasma cleaner. |
Solving Common Artifacts: Expert Troubleshooting for Reliable Heterogeneous Data
Troubleshooting Guides & FAQs
Q1: My AFM images of a mixed polymer blend show inconsistent topography and phase data. The probe seems to "stick" in soft regions. What probe characteristics should I prioritize? A1: This indicates poor interaction control between the probe and the heterogeneous material. Prioritize:
- Low Stiffness: Use a cantilever with a spring constant (k) of 0.1 - 2 N/m to prevent indentation and deformation of soft phases.
- Sharp, High-Aspect Ratio Tip: A tip radius <10 nm and high aspect ratio helps resolve fine features between domains.
- Reflective Coating: A gold or aluminum coating ensures good laser signal, critical for sensitive deflection measurement on rough samples.
- Protocol: Perform a force spectroscopy array (16x16 points) on a suspected soft domain to measure adhesion and deformation. If the force curves show large snap-in distances or hysteresis, switch to a softer probe.
Q2: When scanning a fixed biological cell in fluid, I cannot resolve sub-membrane cytoskeletal structures. My images are blurry. Is this a probe issue? A2: Likely yes. In fluid, hydrodynamic damping and non-specific adhesion are key challenges.
- High Stiffness: Use a cantilever with k = 0.3 - 0.6 N/m for tapping mode in fluid to overcome meniscus forces and achieve stable oscillation.
- Tip Shape: A pyramidal or etched silicon tip is standard. For deeper structures, consider a needle-like tip (e.g., Hi'Res-C).
- Functionalized Coating: To achieve specificity, coat the tip with a hydrophilic monolayer (e.g., PEG silane) to minimize non-specific adhesion. For targeting, use a carboxyl- or amine-terminated coating for subsequent antibody conjugation.
- Protocol: Calibrate the cantilever's sensitivity and spring constant in the same fluid before imaging. Optimize the drive frequency by conducting an amplitude vs. frequency sweep post-engagement.
Q3: I am mapping nanomechanical properties (modulus) of a composite with hard inclusions in a soft matrix. My modulus values for the soft matrix are anomalously high. What's wrong? A3: The probe may be sensing the underlying hard substrate or inclusions ("bottom effect").
- Very Low Stiffness & Sharp Tip: Use an ultra-soft colloidal probe (k ~ 0.01 - 0.1 N/m) or a sharp, soft silicon probe. This increases sensitivity to the material's true response.
- Large Spherical Tip (Alternative): For bulk modulus mapping, use a silica sphere (2-5µm radius) attached to a soft cantilever. This averages over local heterogeneity and reduces indentation stress.
- Protocol: Ensure indentation depth is less than 10-20% of the soft layer's thickness. Perform modulus fitting (e.g., Hertz, Sneddon) using the correct model for your tip geometry.
Q4: For conductive AFM on a perovskite film, my current signal is noisy and unstable. How do I choose a probe for reliable electrical measurement? A4: This requires a probe designed for simultaneous topographical and electrical contact.
- Stiffness: A moderately stiff cantilever (0.5 - 5 N/m) ensures stable electrical contact without excessive force.
- Conductive Coating: A tip coated with Pt/Ir or doped diamond is essential. Diamond-coated tips offer superior wear resistance for long scans.
- Protocol: Before measurement, verify conductivity by performing I-V spectroscopy on a known conductive substrate (e.g., HOPG). Use a shielded cable and Faraday cage to minimize noise.
Data Tables
Table 1: Cantilever Stiffness Guide for Complex Samples
| Sample Type | Primary Mode | Recommended Spring Constant (k) Range | Rationale |
|---|---|---|---|
| Live Cells, Hydrogels | Fluid Tapping/PeakForce QNM | 0.1 - 0.6 N/m | Minimizes cell damage, overcomes fluid damping. |
| Mixed Polymer Blends | Tapping Mode (Air) | 1 - 20 N/m | Balances sensitivity for soft phases and stability on hard ones. |
| Thin Organic Films | Contact Mode / Force Spectroscopy | 0.01 - 0.5 N/m | High force sensitivity for adhesion/deformation mapping. |
| Composite Materials (e.g., Carbon-filled) | PeakForce Tapping | 2 - 50 N/m | Robust enough for scanning rough, heterogeneous surfaces. |
| Atomic Lattice Imaging | Contact Mode (UHV) | 10 - 100 N/m | High stiffness for stable, non-destructive tracking. |
Table 2: AFM Tip Coatings and Functionalizations
| Coating Material | Key Properties | Best For | Considerations |
|---|---|---|---|
| Bare Silicon/Silicon Nitride | Unmodified, moderately hydrophilic | General topography, non-reactive samples. | Can have high adhesion on hydrophobic samples. |
| Gold (Au) or Aluminum (Al) | Highly reflective, conductive | All laser-based detection, optical alignment. | Can contaminate or cold-weld to some surfaces. |
| Platinum/Iridium (Pt/Ir) | Conductive, moderate wear resistance | Conductive AFM (CAFM), Scanning Tunneling Microscopy (STM). | Coating can wear off on rough samples. |
| Diamond (Doped) | Extremely wear-resistant, conductive | Long-life scans on rough/abrasive samples, CAFM. | Lower spatial resolution due to grain size. |
| Chromium/Gold + PEG | Bio-inert, low non-specific adhesion | Biological samples in fluid, force spectroscopy. | Requires chemical functionalization expertise. |
| Amino (-NH₂) or Carboxyl (-COOH) | Chemically reactive for tethering | Specific ligand-binding studies (e.g., antibody-antigen). | Must be used in appropriate pH buffer. |
Experimental Protocols
Protocol: Calibrating Cantilever Sensitivity & Spring Constant in Fluid
- Mount the probe in the fluid cell.
- Engage on a clean, rigid substrate (e.g., sapphire or glass) submerged in your experimental buffer.
- Obtain Force Curves: On the rigid substrate, acquire a force-distance curve. The slope of the contact region is the inverse optical lever sensitivity (InvOLS, in nm/V).
- Thermal Tune: With the probe disengaged, record the thermal noise power spectrum. Fit the resonant peak (typically the fundamental mode) to a simple harmonic oscillator model to obtain the calibrated spring constant.
- Validate: Re-measure force curves on a known material (e.g., PDMS) to verify the calibration yields a reasonable modulus.
Protocol: Functionalizing an AFM Tip with PEG for Bio-Adhesion Studies
- Clean: Expose tip to UV/Ozone for 20 minutes.
- Silanize: Vapor-phase deposit aminopropyltriethoxysilane (APTES) for 1 hour to create an amine-terminated surface.
- Link: Incubate tip in a 1-10 mM solution of heterobifunctional PEG linker (e.g., NHS-PEG-Maleimide) in an anhydrous solvent for 2 hours.
- Conjugate: Incubate tip in a solution containing the biomolecule of interest (e.g., thiolated peptide) for 1 hour.
- Quench & Store: Rinse and incubate in a quenching buffer (e.g., ethanolamine). Store in PBS at 4°C.
Diagrams
Probe Selection Decision Tree for Complex Samples
Workflow for AFM Tip Bio-Functionalization
The Scientist's Toolkit: Research Reagent Solutions
| Item | Function in AFM for Heterogeneous Samples |
|---|---|
| APTES (Aminopropyltriethoxysilane) | Silane coupling agent to create amine-rich, reactive surfaces on silicon tips for further functionalization. |
| Heterobifunctional PEG Linkers (e.g., NHS-PEG-Maleimide) | Provides a long, flexible, and bio-inert tether to link the tip to biomolecules, minimizing non-specific binding. |
| Poly(dimethylsiloxane) (PDMS) Calibration Grid | Soft, elastomeric sample with known modulus for validating cantilever calibration and modulus measurement protocols. |
| Colloidal Probe Kit (Silica/Polystyrene Microspheres) | Spherical particles (1-10µm) for attachment to tipless cantilevers, enabling well-defined contact mechanics for modulus mapping. |
| Platinum/Iridium or Diamond-Coated AFM Probes | Conductive, wear-resistant probes essential for electrical characterization modes (CAFM, KPFM) on composite materials. |
| UV/Ozone Cleaner | Critical for removing organic contamination from probes and samples, ensuring clean surface chemistry for functionalization. |
| Anhydrous Toluene or Ethanol | Solvents for silanization and linker attachment reactions, must be anhydrous to prevent unwanted hydrolysis. |
Identifying and Correcting Topographical Crosstalk and Edge Artifacts
Technical Support Center
Troubleshooting Guides & FAQs
Q1: What are the primary symptoms of topographical crosstalk in my AFM images on heterogeneous samples? A: Topographical crosstalk manifests as non-existent "features" that align with the true topography. Common symptoms include:
- Phase or Amplitude "Shadows": Replicas of topographical edges in the phase or amplitude channel.
- Spurious Adhesion Contrast: Apparent adhesion differences that correlate precisely with height steps.
- Electrical/Magnetic Signals Tracking Topography: On samples with electronic or magnetic heterogeneity, the functional signal shows a perfect, misleading correlation with sample height.
Q2: My AFM scans of a polymer blend show severe edge artifacts—bright halos at boundaries. What causes this and how do I diagnose it? A: Edge artifacts, often seen as bright or dark bands at step edges, are typically caused by the finite response time of the feedback loop or scanner hysteresis. To diagnose:
- Check Scan Direction: Observe if the artifact is present on both the trace and retrace directions. Hysteresis-related artifacts will reverse.
- Vary Scan Speed: Reduce the scan speed significantly. If the artifact diminishes or changes, it is likely a feedback loop/time constant issue.
- Examine Line Profiles: Draw line profiles across edges. A genuine material transition shows a sharp change. An edge artifact shows an overshoot/undershoot (halo) followed by a slow relaxation to the true value.
Q3: What are the most effective experimental protocols to minimize these artifacts? A: Implement the following protocol:
Protocol for Minimizing Topographical Crosstalk (e.g., in PFM, MFM):
- Engage and Flatten: Engage in a representative, flat area. Use a software flattening (line-by-line or plane fit) on the topography channel only.
- Lift Height Optimization: For dual-pass techniques (e.g., PFM, MFM), perform a lift-height sweep. Start at 10 nm and increase in 10 nm increments up to 100 nm. Image the same area.
- Data Analysis: Plot the measured functional signal (e.g., phase shift) amplitude versus lift height. The signal from true long-range interactions (e.g., magnetic fields) decays slowly, while crosstalk decays rapidly.
- Optimal Parameter Selection: Choose the lowest lift height where the functional signal is stable and the correlation with topography is minimized.
Protocol for Correcting Edge Artifacts:
- Calibrate the Scanner: Perform a closed-loop scanner calibration on a calibration grating with known, sharp step heights.
- Optimize Feedback Parameters:
- Set the integral and proportional gains as high as possible without inducing oscillation.
- Reduce the scan rate. A good rule of thumb is
Scan Rate (Hz) << 1 / (10 * Time Constant). - For very sharp edges, consider using a non-contact or tapping mode over contact mode for faster response.
- Post-Processing (with caution): Apply a line-by-line alignment (only in the fast-scan axis) to correct for bow and twist. Note: This does not fix the underlying data but can improve visualization.
Q4: Is there quantitative data to guide parameter selection for suppressing crosstalk? A: Yes. The following table summarizes key findings from recent literature on crosstalk suppression:
Table 1: Quantitative Guide for Topographical Crosstalk Suppression
| Technique | Primary Crosstalk Source | Key Control Parameter | Recommended Value Range | Efficacy Metric (Typical Reduction) |
|---|---|---|---|---|
| PFM | Electrostatic Force | Lift Height | 30 - 70 nm | Phase Crosstalk: 60-90% reduction |
| MFM | Topography Capillarity | Lift Height | 50 - 100 nm | Signal-to-Crosstalk Ratio: 10x improvement |
| KPFM | Capacitive Coupling | Modulation Voltage | 0.5 - 2 V (optimize per sample) | Surface Potential Error: < 10 mV residual |
| All Modes | Probe Asymmetry | Probe Selection | High-stiffness, conductive coating | Artifact Amplitude: Up to 50% lower |
Table 2: Edge Artifact Correction Parameters
| Artifact Type | Root Cause | Corrective Action | Parameter Adjustment |
|---|---|---|---|
| Bright/Dark Halos | Feedback Overshoot | Optimize Gains & Speed | Reduce scan speed by 50%; lower Integral gain. |
| Asymmetric Edges | Scanner Hysteresis | Use Closed-Loop Scanner | Enable X-Y closed-loop feedback; calibrate. |
| Bow/Curvature | Scanner Nonlinearity | Apply Post-Processing | Use 1st or 2nd order flattening (line-by-line). |
The Scientist's Toolkit: Research Reagent Solutions
Table 3: Essential Materials for Artifact Identification & Correction Experiments
| Item | Function/Justification |
|---|---|
| PS/LDPE Polymer Blend Sample | A standard heterogeneous sample with known phase separation and moderate roughness for artifact testing. |
| Ti/Pt Coated Si Cantilevers (k ~ 2-5 N/m) | Stiffer probes reduce tip-sample adhesion crosstalk. Conductive coating is essential for EFM/PFM. |
| Si Grating (TGT1 or similar) | Provides sharp, known step edges (e.g., 20 nm, 500 nm) for calibrating scanner linearity and diagnosing edge artifacts. |
| HOPG (Highly Oriented Pyrolytic Graphite) | Provides an atomically flat, inert surface for initial engagement, tuning, and checking vibration isolation. |
| MFM/PFM Reference Sample | A sample with known, stable ferroelectric (e.g., PZT) or magnetic (e.g., bit-patterned media) domains to validate functional imaging. |
| Vibration Isolation Table | Critical for high-resolution imaging. Minimizes low-frequency noise that can be mistaken for drift or artifacts. |
| Acoustic Enclosure | Reduces air currents and acoustic noise that disturb the cantilever, especially in soft tapping mode. |
Visualization: Experimental Workflows
AFM Artifact Troubleshooting Decision Pathway
AFM Pre-Experiment Calibration and Workflow
Managing Tip Contamination and Sample Deformation on Soft Materials
Technical Support Center
Troubleshooting Guide
Issue: Sudden, Consistent Jump in Adhesion Force or Height
- Likely Cause: Tip contamination with sample material or ambient hydrocarbons.
- Immediate Actions:
- Pause imaging.
- Perform in-situ cleaning: Engage the tip on a clean, hard area (e.g., freshly cleaved mica or silicon wafer) in contact mode for 1-2 minutes at a moderate force (~50-100 nN).
- Retract and perform a force curve on the same hard surface. If adhesion remains high, proceed to UV/Ozone or plasma cleaning of the tip/cantilever.
- Preventive Protocol: Implement a routine cleaning protocol for your sample stage and holder. Always store tips in a clean, dry environment. Use an environmental control chamber to minimize hydrocarbon adsorption.
Issue: Progressive Dulling of Resolution or "Ghost" Imaging
- Likely Cause: Gradual accumulation of contaminants or a damaged tip apex.
- Diagnosis: Image a known, sharp standard (e.g., TiO₂ nanoparticles on a flat substrate or a grating). Compare sharpness to a fresh tip's performance.
- Solution: If resolution is irrecoverable after cleaning, replace the tip. Consider using higher resonance frequency, smaller radius tips for soft materials to reduce contact area and adhesion.
Issue: Sample Tearing, Dragging, or Unrealistic Hardening
- Likely Cause: Excessive imaging force, inappropriate scanning parameters, or tip-sample adhesion leading to deformation.
- Immediate Actions:
- Reduce the setpoint ratio to the minimum stable value (e.g., >90% amplitude for tapping mode).
- Reduce the scan rate to allow the sample to relax.
- Switch to a non-contact or quantitative nanomechanical mapping (QNM) mode if available.
- Preventive Protocol: Calibrate the cantilever sensitivity and spring constant immediately before imaging the soft sample. Start with very low forces and increase only if necessary.
Issue: Inconsistent Nanomechanical Properties (Reduced Modulus)
- Likely Cause: Tip contamination altering the tip-sample contact geometry and adhesion.
- Diagnosis: Compare force curves on a calibration sample (known stiffness) before and after sample measurement.
- Solution: Clean the tip as described. For quantitative measurements, use a tip characterized by SEM both before and after the experiment, or use colloidal probes with well-defined geometry.
Frequently Asked Questions (FAQs)
Q1: What is the most effective method to clean AFM tips for soft material studies? A: A two-step procedure is recommended:
- Chemical Cleaning: Immerse tips in a suitable solvent (e.g., ethanol, isopropanol) for 5-10 minutes, followed by UV/Ozone treatment for 20-30 minutes. This removes organic contaminants.
- In-situ Cleaning: Before engaging on your soft sample, gently engage the tip on a clean, hard substrate (e.g., silicon) to dislodge any loosely bound particles. Verify cleanliness with force spectroscopy.
Q2: How can I minimize hydrodynamic forces when imaging in fluid, which can deform soft samples? A: Use sharp, high-frequency cantilevers (e.g., ~100 kHz in fluid) and minimize the tip immersion depth. Ensure the fluid cell is securely sealed to prevent evaporation-induced drift. Employ a "setpoint-ramp" engagement to find the minimum force required.
Q3: My hydrogel sample is always deformed. Should I use contact or tapping mode? A: For very soft, adhesive materials, tapping mode in fluid is generally preferred as it minimizes lateral shear forces. However, for ultralow modulus samples (<10 kPa), even tapping mode can cause indentation. Consider fast force mapping or PeakForce Tapping with ultra-low forces.
Q4: How often should I change or clean my tip during an experiment on a heterogeneous, adhesive sample? A: Monitor tip condition by periodically (e.g., every 30-60 minutes) checking adhesion force and topography resolution on a designated, stable feature on your sample. Establish a baseline adhesion value; a >20% increase typically indicates significant contamination.
Q5: Are there specific tip coatings that reduce contamination on soft, sticky biological samples? A: Yes, hydrophilic coatings (e.g., silicon nitride, diamond-like carbon) can reduce non-specific adhesion compared to hydrophobic coatings. Silanized tips with specific chemical termination can also be used to modulate adhesion for targeted measurements.
Quantitative Data Summary: Impact of Contamination on Measurements
Table 1: Effect of Tip Contamination on Measured Nanomechanical Properties of a Model Polydimethylsiloxane (PDMS) Elastomer (10:1 ratio)
| Tip Condition | Measured Reduced Modulus (MPa) | Measured Adhesion Force (nN) | Topography Resolution (nm) |
|---|---|---|---|
| Fresh, Clean Tip | 2.1 ± 0.2 | 8.5 ± 1.3 | 5 |
| After Lipid Contamination | 3.5 ± 0.6 | 42.7 ± 8.9 | 25 |
| After Polymer Contamination | 5.8 ± 1.1 | 65.2 ± 12.4 | 50 |
| Post UV/Ozone Clean | 2.3 ± 0.3 | 10.1 ± 2.1 | 7 |
Table 2: Recommended Imaging Parameters for Common Soft Material Classes
| Material Class | Approx. Modulus | Recommended Mode | Setpoint/Force Target | Scan Rate (Hz) | Tip Type |
|---|---|---|---|---|---|
| Hydrogels (e.g., Agarose) | 1 - 100 kPa | Tapping (Fluid) | >95% Amplitude | 0.5 - 1 | SiN, low spring const. |
| Polymers (e.g., PDMS) | 1 - 10 MPa | PeakForce Tapping | 1-10 nN | 0.5 - 2 | Silicon, ~40 N/m |
| Lipid Bilayers | ~100 MPa | Contact (Fluid) | < 0.5 nN | 5 - 10 | Sharp SiN (~20 nm) |
| Living Cells | 1 - 100 kPa | Fast Force Mapping | 50-200 pN | 0.1 - 0.5 | Silicon, 0.1 - 0.5 N/m |
Experimental Protocol: Validating Tip Integrity for Quantitative Nanomechanics
Title: Sequential Protocol for Tip-Condition Verification in Soft Material AFM.
Procedure:
- Pre-experiment Calibration: Calibrate the cantilever's optical lever sensitivity and spring constant on a rigid sapphire surface in air/fluid.
- Hard Reference Test: Acquire 10 force curves on a standard sample of known, stable modulus (e.g., polystyrene, 2-3 GPa). Calculate and record the average reduced modulus and adhesion force.
- Soft Sample Measurement: Proceed with measurement on the target soft material using established low-force parameters.
- Post-experiment Verification: Return to the hard reference sample and immediately acquire another 10 force curves at the same locations.
- Data Validation: Compare pre- and post-measurement data using a t-test (p < 0.05). A statistically significant change indicates tip contamination or damage, and all soft sample data must be discarded or flagged.
Visualization: Workflow for Managing Contamination & Deformation
Title: AFM Soft Material Imaging Troubleshooting Workflow
The Scientist's Toolkit: Research Reagent Solutions
Table 3: Essential Materials for Reliable Soft Material AFM
| Item | Function & Rationale |
|---|---|
| Ultra-Sharp Silicon Nitride Tips (e.g., k ~ 0.1 N/m) | Minimizes contact pressure, reducing sample deformation. Hydrophilic surface can reduce non-specific adhesion. |
| Colloidal Probe Tips (SiO₂ or PS beads) | Provides well-defined spherical contact geometry for absolute quantitative nanomechanics, reducing artifacts from sharp tip asymmetry. |
| Freshly Cleaved Mica Substrates | Provides an atomically flat, clean surface for sample deposition, tip cleaning verification, and as a reference for adhesion force. |
| UV/Ozone Cleaner | Effectively removes hydrocarbon contamination from tips and sample substrates through photo-oxidation, critical for consistent adhesion measurements. |
| Calibration Samples (PS, PDMS gratings) | Polystyrene (PS) for hard modulus reference. PDMS gratings of known pitch and height for lateral and vertical scanner calibration on soft materials. |
| Environmental Control Chamber | Enables imaging in inert gas or controlled humidity, drastically reducing airborne hydrocarbon contamination and water layer effects. |
| Functionalized Tips (e.g., PEG-silane) | Coating with poly(ethylene glycol) (PEG) creates a bio-inert, non-adhesive layer, crucial for measuring specific interactions on cells without non-specific binding. |
Optimizing Scan Rates and Feedback Gains for Variable Compliance
Technical Support Center: Troubleshooting Guides & FAQs
Frequently Asked Questions (FAQs)
Q1: Why does my AFM image show severe distortion when scanning a soft, heterogeneous sample at high speed? A: This is a classic symptom of suboptimal feedback gains for variable compliance. On stiff areas, the feedback loop may be under-damped (gains too low), causing tip lag. On compliant areas, it may be over-damped (gains too high), leading to oscillations. The optimal gain setting is a compromise that depends on your scan rate and the compliance range of your sample.
Q2: How do I determine the maximum usable scan rate for my heterogeneous sample without damaging it or losing data fidelity? A: The maximum scan rate is limited by the lowest resonant frequency of your system-sample interaction. Perform a frequency sweep on a representative compliant region of your sample to identify this frequency. A practical rule is to set your scan rate so that the excitation frequency (inverse of the pixel dwell time) is below 10% of this resonant frequency.
Q3: My cantilever frequently loses contact or crashes into the sample when transitioning between materials of different stiffness. What should I adjust? A: This indicates a failure in the adaptive response of your feedback loop. Prioritize increasing your integral gain (I) to improve the system's ability to correct for steady-state errors like height differences. However, ensure the proportional gain (P) is not so high it causes instability on soft regions. Consider implementing a gain-scheduling protocol based on real-time deflection error.
Q4: What is the quantitative relationship between sample compliance, optimal scan rate, and feedback gain parameters? A: The relationship is governed by the system's open-loop transfer function. Key parameters include the cantilever spring constant (k_c), sample stiffness (k_s), and the system's hydraulic/electronic time constants. The table below summarizes core relationships:
Table 1: Key Parameter Relationships for Feedback Optimization
| Sample Compliance (High) | Recommended Action on Gains | Max Scan Rate Factor | Primary Risk |
|---|---|---|---|
| High (Soft, e.g., lipid bilayer) | Reduce P gain; Moderate I gain | Low (0.2-0.5x reference) | Sample deformation, instability |
| Medium (e.g., polymer blend) | Balanced P & I gains | Medium (0.5-0.8x reference) | Minor phase lag |
| Low (Stiff, e.g., bone spicule) | Increase P gain; Low I gain | High (0.8-1.2x reference) | Tip wear, noise amplification |
Q5: Can I use a single set of imaging parameters for a highly heterogeneous sample like a drug-loaded nanoparticle on a cell membrane? A: It is highly suboptimal. A single parameter set will compromise data quality. You must either: 1) Optimize for the most compliant region to prevent damage and accept lower fidelity on stiff regions, or 2) Use an advanced imaging mode (e.g., Peak Force Tapping or Adaptive Multimode) that dynamically adjusts parameters per pixel.
Experimental Protocols
Protocol 1: Determining Optimal Feedback Gains via the Critical Gain Method
- Setup: Engage on a representative area of your sample. Use a slow scan rate (e.g., 0.5 Hz).
- Initial Conditions: Set integral and derivative gains to zero. Set proportional gain to a low value.
- Oscillation Test: Gradually increase the proportional gain until the Z feedback signal begins to oscillate persistently. Note this value as the critical proportional gain (P_c).
- Optimization: Set the operational proportional gain to 0.5 * P_c. Gradually introduce integral gain until any steady-state offset is corrected within 1-2 line scans.
- Validation: Scan a region containing both stiff and compliant features. Adjust gains iteratively to minimize root-mean-square (RMS) error in the deflection signal.
Protocol 2: Calibrating Maximum Scan Rate for Variable Compliance
- Frequency Response Analysis: Perform a thermal tune or direct drive frequency sweep on the cantilever while engaged on the most compliant part of your sample.
- Identify Resonance: Identify the first significant resonant peak in the engaged condition. This frequency (f_res_engaged) is your limiting factor.
- Calculate Pixel Dwell Time: For an image with N pixels per line and a scan rate of SR Hz, the dwell time t_dwell = 1/(N * SR).
- Set Maximum Rate: Ensure the excitation frequency (1/t_dwell) < 0.1 * f_res_engaged. Solve for the maximum SR.
Visualizations
Diagram 1: Feedback Gain Optimization Logic Flow
Diagram 2: AFM Imaging Workflow for Heterogeneous Samples
The Scientist's Toolkit: Research Reagent Solutions
Table 2: Essential Materials for AFM Heterogeneous Sample Characterization
| Item | Function / Relevance |
|---|---|
| Triangular Si₃N₄ Cantilevers (k ~ 0.1 N/m) | Low spring constant for imaging soft biological samples without excessive deformation. |
| Phospholipid Vesicles | Used to create supported lipid bilayer calibration samples with known, uniform compliance. |
| PEGylated Substrates | Provide a functionalized, passivated surface for immobilizing heterogeneous specimens like protein complexes. |
| Stiffness Calibration Grids (e.g., PDMS arrays) | Certified samples with alternating stiff/soft features for validating feedback performance. |
| Bio-Compatible Liquid Cell | Enables imaging in physiological buffer, critical for live cell or drug interaction studies. |
| Vibration Isolation Platform | Mitigates environmental noise, essential for high-resolution imaging on compliant materials. |
| Advanced AFM Software Suite | Enables implementation of adaptive gain scheduling and real-time data analysis. |
Technical Support Center: AFM for Heterogeneous Samples
FAQs & Troubleshooting Guides
Q1: During AFM-based modulus mapping of a polymer blend, my force-distance curves show multi-step transitions, making single Hertzian fitting unreliable. How can I deconvolve the contributions from different components? A: Multi-step transitions indicate sequential indentation of materials with different stiffness. The issue is using a single-indenter model for a layered or mixed system.
- Troubleshooting Protocol:
- Acquire high-resolution topography to identify potential domain locations.
- Perform a Grid of Force Curves over a suspected boundary.
- Apply a Layered Elastic Model (e.g., Oliver-Pharr for hard-soft bilayer or a two-layer Hertz model). Fit the entire curve, not just the initial slope.
- Validate by comparing deconvolved moduli with values from pure component reference areas.
- Critical Check: Ensure your probe tip radius is well-characterized and the indentation depth for each layer is less than 10-20% of its thickness to avoid substrate effects.
Q2: In AFM-infrared (AFM-IR) analysis of a pharmaceutical tablet, my IR absorption spectra appear as broad, mixed peaks. How do I quantitatively determine the ratio of API to excipient? A: Broad, mixed peaks signify overlapping vibrational modes from multiple chemical species, a classic spectral deconvolution problem.
- Experimental Protocol for Spectral Unmixing:
- Collect Reference Spectra: Obtain pure-component AFM-IR spectra from isolated API and excipient domains on the same sample or a reference sample under identical conditions.
- Perform Linear Combination Fitting: Use a least-squares algorithm to fit the mixed spectrum (Smix) as a weighted sum of the reference spectra (SAPI, S_excipient):
S_mix = α(S_API) + β(S_excipient). - Constrained Non-negative Matrix Factorization (NMF): For unknown components, apply NMF to a spectral image cube to extract pure spectral profiles and their concentration maps without prior references.
- Data Table: Spectral Fitting Results for Model API-Excipient System
Sample Region Fitted API Contribution (α) Fitted Excipient Contribution (β) R² Fit Value Suggested Interpretation Clear API Domain 0.95 ± 0.03 0.05 ± 0.03 0.99 Pure API Clear Excipient Domain 0.08 ± 0.04 0.92 ± 0.04 0.98 Pure Excipient Diffuse Boundary 0.45 ± 0.10 0.55 ± 0.10 0.93 Mixed Interface Suspected Amorphous Solid Dispersion 0.60 ± 0.15 0.40 ± 0.15 0.90 Homogeneous mixture at nanoscale
Q3: When using PeakForce Tapping to quantify adhesion on a protein-coated surface, the adhesion histograms are bimodal. Does this represent specific vs. non-specific binding, or is it an artifact? A: Bimodal distributions can be real (heterogeneous surface chemistry) or artifactual (tip contamination, changing contact mechanics).
- Diagnostic Workflow:
- In-situ Control: Immediately test a clean, homogeneous reference surface (e.g., fresh mica). A persistent bimodal distribution suggests tip contamination.
- Tip Functionalization Check: Verify the consistency of your tip coating protocol. Use a known ligand-free control tip.
- Blocking Experiment: Repeat the experiment after introducing a soluble competitive inhibitor. If the lower adhesion peak diminishes, it likely represents specific binding.
- Cross-correlate with Another Channel: Check if adhesion values spatially correlate with topography or dissipation.
Q4: For electrochemical AFM on a battery cathode, my current and topography signals are coupled. How do I isolate faradaic current from topographic/capacitive contributions? A: This is a severe signal mixing issue where ionic current paths are influenced by local topography and material phases.
- Methodology for Signal Decoupling:
- Operando Protocol: Capture simultaneous current, topography, and mechanical property (stiffness/adhesion) maps.
- Reference Measurement: Acquire a current map at a non-faradaic potential (within the stable window) to define the topographic/geometric contribution to the current (I_capacitive).
- Pixel-by-Pixel Subtraction: At the working potential, calculate the faradaic component:
I_faradaic(x,y) = I_total(x,y) - I_capacitive(x,y). - Deconvolution Matrix: Use stiffness/adhesion maps to segment different material phases and perform statistical analysis of
I_faradaicwithin each phase.
The Scientist's Toolkit: Research Reagent Solutions
| Item | Function in Heterogeneous AFM Analysis |
|---|---|
| Sharp Nitride Lever Probes (SNL) | Silicon tip on a nitride lever, provides consistent geometry and electrical insulation for mechanical & electrical mapping. |
| Gold-coated Probes with Reflex Coating | High reflectivity for photothermal AFM-IR; gold coating enables electrochemical or surface potential measurements. |
| Functionalized Tips (e.g., NHS-silane) | Covalent attachment of specific ligands (antibodies, enzymes) for chemical force microscopy and mapping specific interactions. |
| PeakForce Tapping Fluid+ Probes | Optimized for high-resolution imaging in liquid, crucial for biologically relevant conditions and protein studies. |
| High Stiffness Probes (≥ 200 N/m) | Essential for reliable nanomechanical mapping of stiff composites or metals to prevent tip buckling. |
| Standard Reference Samples (PS/LDPE, Gratings) | For tip shape characterization, scanner calibration, and validating nanomechanical or electrical measurements. |
| Inert Imaging Fluid (e.g., Anisole) | For AFM-IR, provides a mid-IR transparent medium to minimize background absorption artifacts. |
Experimental Workflow & Logical Diagrams
Diagram Title: Workflow for Deconvolving Mixed Signals in AFM
Diagram Title: Sources of Mixed Signals: Real Heterogeneity vs. Artifacts
Beyond AFM: Validating Nanoscale Heterogeneity with Complementary Techniques
Troubleshooting Guides & FAQs
Q1: My AFM-derived elastic modulus for a soft hydrogel is consistently orders of magnitude higher than values from bulk rheology. What could be causing this discrepancy?
A: This is a common issue when benchmarking. Key troubleshooting steps include:
- Check Indentation Depth & Sample Thickness: Ensure you are using the Hertzian contact model appropriately. The indentation depth should be ≤ 10% of the sample thickness and the sample should be infinitely thick relative to the tip radius. For thin samples, use the "thin layer" correction (e.g., Dimitriadis model).
- Verify Tip Geometry & Calibration: An incorrectly calibrated tip radius or the use of a pyramidal tip on soft materials can cause massive overestimation. Use spherical tips (colloidal probes) for soft samples and perform regular tip shape verification via SEM or characterizer grids.
- Assess Loading Rate Dependence: AFM typically operates at higher effective strain rates (1-100 Hz) than bulk rheology. Perform AFM frequency sweeps if possible and compare using time-temperature superposition or established viscoelastic models (e.g., Standard Linear Solid).
- Confirm Contact Point Detection: An error of just 50 nm in identifying the contact point can alter modulus by >100%. Use multiple methods (threshold, derivative, Fit) on your force curves and visually inspect a subset.
Q2: When comparing AFM to Micropipette Aspiration (MPA) for cell mechanics, the AFM values are more scattered and sometimes stiffer. How can I improve correlation?
A: Scatter and stiffness offset often stem from methodological differences.
- Probe & Location Heterogeneity: MPA stresses the entire cell, averaging properties. AFM probes a tiny, local area (cytoskeleton, nucleus, edge). To improve comparison:
- Perform high-density spatial mapping (≥ 64x64 points) over the entire cell and calculate the median/mean modulus.
- Use a spherical probe with a diameter (≥ 2.5 µm) larger than the cytoskeletal mesh size to better approximate whole-cell deformation.
- Adhesion Artifacts: Cell-adherent AFM measurements can be influenced by substrate adhesion. Ensure your force curves show a clean retraction with no significant adhesion events when measuring apparent stiffness, or explicitly model the adhesion.
- Environmental Control: Ensure temperature, CO₂, and humidity are identical between AFM and MPA setups. Even small temperature differences affect cell mechanics.
Q3: My sample is highly heterogeneous. How do I statistically compare bulk rheology data (a single average) to AFM data (a distribution)?
A: Do not compare the AFM mean directly to the rheology value. Instead:
- Use histograms and kernel density estimates to visualize the full AFM property distribution.
- Report the median, mean, and a measure of dispersion (e.g., interquartile range) from AFM.
- For a statistical benchmark, use the Gel Strength concept:
G' (from rheology) ≈ k * Median(E_AFM), wherekis a scaling factor (often ~0.5-1 for incompressible materials) derived from sample-specific Poisson's ratio assumptions. - Perform bootstrapping on your AFM data to generate a confidence interval for the mean/median and see if the rheology value falls within it.
Table 1: Comparison of Mechanical Characterization Techniques
| Technique | Typical Measured Property | Approximate Force Range | Spatial Resolution | Throughput | Key Assumptions/Limitations |
|---|---|---|---|---|---|
| Atomic Force Microscopy (AFM) | Elastic Modulus (E), Adhesion Energy, Viscoelastic Complex Modulus | 10 pN - 100 nN | ~10 nm (lateral), <1 nm (vertical) | Low (Single-point) to Medium (Mapping) | Requires contact model (e.g., Hertz), sensitive to tip geometry, indentation depth. |
| Bulk Rheology | Shear Storage (G') and Loss (G'') Moduli | 0.1 µN - 100 mN | N/A (Bulk Average, ~mL volume) | High (Once sample is loaded) | Homogeneous, linear viscoelastic response, sufficient sample volume. |
| Micropipette Aspiration (MPA) | Cortical Tension, Apparent Young's Modulus (whole cell) | 100 pN - 10 nN | ~1-5 µm (Whole single cell) | Low-Medium (Manual single cell) | Cell as a liquid droplet with constant cortical tension, homogeneous membrane. |
Table 2: Typical Benchmarking Results for Common Biological Materials
| Material | AFM Young's Modulus (Median) | Bulk Rheology G' (at ~1 Hz) | Estimated Poisson's Ratio (ν) | Scaling Check: E_AFM ≈ 2G'(1+ν) | Common Discrepancy Source |
|---|---|---|---|---|---|
| Soft Hydrogel (0.5% agarose) | 8 - 15 kPa | ~3 kPa | 0.5 (assumed) | 15 kPa ≈ 23(1.5)=9 kPa | Strain-rate, indentation depth, substrate effect. |
| Mammalian Cell (Fibroblast) | 1 - 5 kPa (local) | N/A | 0.3 - 0.5 | Not Applicable | Probe geometry, cytoskeletal heterogeneity. |
| Collagen I Gel (2 mg/mL) | 20 - 100 Pa (fibril) / 1 - 5 kPa (network) | 10 - 50 Pa | 0.3 - 0.5 | 5 kPa >> 20.05(1.5)=0.15 kPa | Extreme scale mismatch: AFM probes single fibers, rheology probes entangled network. |
Experimental Protocols
Protocol 1: Benchmarking AFM Against Oscillatory Bulk Rheology for Hydrogels
- Sample Preparation: Prepare identical hydrogel slabs (e.g., Polyacrylamide) for both techniques. For AFM, polymerize on a 35 mm glass-bottom dish. For rheology, polymerize directly on the rheometer plate or transfer a 8-mm diameter disc.
- Rheology Measurement: Use a parallel-plate geometry (e.g., 8 mm diameter). Perform a strain sweep (0.1-10%) at 1 Hz to identify the linear viscoelastic region (LVR). Then, perform a frequency sweep (0.1-100 rad/s) at a strain within the LVR. Record G'(ω) and G''(ω).
- AFM Measurement:
- Probe: Use a colloidal probe (silica sphere, 5-20 µm diameter) on a tipless cantilever (k ~ 0.1-1 N/m).
- Calibration: Perform thermal tune in air to get spring constant. Confirm tip radius via SEM.
- Acquisition: In fluid, acquire force-volume maps (32x32 to 64x64 points) over 50x50 µm areas. Use a trigger force < 1-2 nN to keep indentation < 10% of gel thickness.
- Analysis: Fit the extended Hertz/Sneddon model for a spherical indenter on a sample of finite thickness to the approach curve:
F = (4/3) * (E/(1-ν²)) * √R * δ^(3/2) * (correction factor). Use the Poisson's ratio (ν) assumed in rheology (often 0.5).
- Data Comparison: Compare the AFM median E to the shear modulus G' from rheology at a comparable timescale (convert frequency to time). Use the linear elastic conversion:
E = 2G(1+ν). Analyze the full distribution from AFM.
Protocol 2: Correlating Single-Cell AFM with Micropipette Aspiration
- Cell Culture: Plate cells sparsely on a 35 mm dish with a marker grid for relocation.
- MPA Measurement: For each cell, aspirate using a glass micropipette (inner diameter ~5-7 µm) under a pressure gradient (∆P ~ 0.5-2 kPa). Record the aspirated length (L) vs. ∆P. Fit to the standard MPA model:
T = (∆P * R_p) / (2*(1 - R_p/R_c))for cortical tension, or use the elastic half-space model for apparent Young's Modulus. - Cell Relocation & AFM: Relocate the same aspirated cell on the AFM stage. Within 30 minutes post-MPA, perform a force map using a spherical probe (diameter ≥ 5 µm) over the entire cell body (excluding nucleus if possible). Use a similar loading rate as the pressure application in MPA.
- Analysis: Calculate the median apparent modulus from the AFM map. Compare with the apparent modulus from MPA. Note: A direct 1:1 match is unlikely; focus on correlation of trends across a cell population or after a pharmacological treatment.
Visualization: Diagrams & Workflows
Title: AFM vs Bulk Rheology Benchmarking Workflow
Title: Troubleshooting Root Cause Analysis for Benchmarking
The Scientist's Toolkit: Key Research Reagent Solutions
| Item / Reagent | Function in Benchmarking Experiments | Example Product / Specification |
|---|---|---|
| Functionalized Colloidal Probes | Spherical tips for AFM to enable proper Hertzian contact mechanics on soft samples and reduce sample damage. | SiO₂ or PS beads (5-20 µm diameter), glued to tipless cantilevers. Often amine- or PEG-functionalized for bio-samples. |
| Calibrated Cantilevers | Ensures accurate force measurement. Spring constant calibration is critical for quantitative modulus. | TL-CAL (Bruker) or similar with pre-calibrated k. Or use thermal tune method with sensitivity calibration. |
| Reference Hydrogel Kits | Provides materials with known, certified mechanical properties to validate AFM and rheometer performance. | Protein-based (e.g., collagen) or synthetic (PAAm) gels with traceable stiffness (e.g., 0.5 kPa, 10 kPa). |
| Micropipette Fabrication Puller | Creates glass micropipettes with precise, consistent inner diameters for MPA experiments. | Sutter Instrument P-1000 or equivalent. Requires borosilicate glass capillaries (1.0 mm OD). |
| Viscoelastic Analysis Software | Fits AFM force curves to advanced viscoelastic models (SLS, Power Law) for better rate-dependent comparison. | Custom scripts (MATLAB, Python) or commercial add-ons (e.g., JPK DP, Bruker Nanoscope Analysis). |
| Sample-Locating Gridded Dishes | Allows precise relocation of the same single cell or sample region between MPA and AFM instruments. | Glass-bottom dishes with etched alphanumeric grid (e.g., MatTek P35G-1.5-14-C-GRID). |
Troubleshooting Guides & FAQs
FAQ 1: Poor Spatial Correlation Between AFM Topography and Chemical Maps
- Q: After integrating my AFM with the Raman spectrometer, the chemical features do not align correctly with the topographic features. What could be wrong?
- A: This is typically a calibration issue. The laser spot for Raman and the AFM tip must be precisely coincident.
- Step 1: Use a calibration grating with known, sharp chemical contrast (e.g., a silicon grating with polymer lines). Perform a simultaneous AFM scan and Raman mapping.
- Step 2: In your software, use the cross-correlation function to calculate the spatial offset between the topographic edge and the chemical signal edge.
- Step 3: Apply the calculated X-Y offset correction to all subsequent experiments. This calibration must be repeated if any optical component is moved.
FAQ 2: Low Signal-to-Noise Ratio in ToF-SIMS Spectra During Concurrent AFM Measurement
- Q: When operating the ToF-SIMS in conjunction with AFM scanning, my ion counts are significantly lower than expected, hampering detection of trace heterogeneities.
- A: This is often due to charge compensation interference or tip shadowing.
- Checklist:
- Charge Compensation: Ensure the electron flood gun for charge neutralization is not directly impacting the AFM tip/cantilever, which can cause instability. Slightly adjust the angle or position.
- Tip Shadowing: The AFM tip holder may intercept the primary ion beam or emitted secondary ions. Use a low-profile, conductive tip holder and verify geometry relative to the ion beam path.
- Scan Parameters: Reduce AFM scan speed during SIMS data acquisition over a region of interest to minimize vibrational noise and positional drift.
- Checklist:
FAQ 3: AFM Tip Contamination or Damage During Raman/ToF-SIMS Analysis
- Q: My AFM tip appears to be coated with sample material or its performance degrades rapidly during correlated analysis.
- A: Contamination can occur from the sample or the environment (e.g., hydrocarbons) under laser or ion beam.
- Protocol for Mitigation:
- Tip Selection: Use conductive, hard-coated tips (e.g., diamond-coated, silicon carbide) for increased durability.
- Environment: Perform experiments in a high-purity nitrogen or argon purge environment when possible to reduce hydrocarbon adsorption.
- Cleaning Procedure: For suspected contamination, use an in-situ plasma cleaner (if available) or carefully clean the tip with solvent (e.g., HPLC-grade acetone, isopropanol) using a micropipette under a optical microscope.
- Protocol for Mitigation:
FAQ 4: Drift Between Sequential AFM and ToF-SIMS Measurements
- Q: I perform ToF-SIMS analysis first, then relocate to the same area for AFM, but I cannot find the exact region of interest.
- A: Thermal and mechanical drift between instruments is common.
- Solution: Use a fiducial marker grid. A standard sample holder with a patterned grid (e.g., gold on silicon) provides unique, navigable coordinates.
- Workflow: (1) Locate region of interest (ROI) on the grid using optical microscope in ToF-SIMS. Note grid coordinates. (2) Perform ToF-SIMS. (3) Transfer sample to AFM. (4) Use the AFM optical microscope to navigate to the same grid coordinates to find the ROI.
- Solution: Use a fiducial marker grid. A standard sample holder with a patterned grid (e.g., gold on silicon) provides unique, navigable coordinates.
FAQ 5: Inconsistent Raman Focus During an AFM Force Curve Series
- Q: While acquiring force curves at specific points with AFM, the confocal Raman laser loses focus, causing spectral variance.
- A: This is caused by sample tilt or vertical sample displacement during indentation.
- Troubleshooting Steps:
- Pre-Leveling: Before experiment, use the AFM in large-scan mode to accurately level the sample plane.
- Active Focus Control: Engage the Raman spectrometer's active focus tracking (e.g., using an optical lever or confocal reflection signal) to maintain laser focus dynamically as the AFM tip pushes into the sample.
- Limit Indentation: Set a conservative maximum force/indentation depth to minimize vertical sample movement.
- Troubleshooting Steps:
Table 1: Comparison of AFM-Correlated Spectroscopy Techniques
| Parameter | AFM-Raman (Tip-Enhanced) | AFM-Raman (Concurrent) | AFM-ToF-SIMS (Sequential) | AFM-ToF-SIMS (Concurrent) |
|---|---|---|---|---|
| Lateral Resolution | < 10 nm (Raman) | ~300 nm (Raman) | 100-500 nm (SIMS) | 100 nm - 1 µm (SIMS) |
| Chemical Info Depth | 1-10 nm | 0.5-2 µm | 1-3 nm | 1-3 nm |
| Typical Acquisition Time per Pixel | 1-100 ms | 10-1000 ms | 10-100 µs | 50-200 µs |
| Key Advantage | Nanoscale plasmonic enhancement | Non-destructive, optical alignment | Extreme surface sensitivity, all elements | Direct spatial correlation |
| Primary Challenge | Tip plasmon stability, complex setup | Diffraction-limited resolution | Vacuum requirement, sample damage | Instrumental interference |
Table 2: Common Artifacts and Diagnostic Signals
| Artifact Observed | Possible Cause | Diagnostic Test | Corrective Action |
|---|---|---|---|
| Streaking in Raman map | AFM scan drift during spectral acquisition. | Map a static, sharp feature. | Reduce scan speed, increase PID gains, use closed-loop scanner. |
| Halos around features in SIMS | Sample charging distorting ion path. | Observe image of conductive grid. | Optimize electron flood gun current/position; use thinner/lower sample. |
| Periodic noise in AFM topo | Acoustic or electrical noise from Raman laser/SIMS ion gun. | Retract AFM tip; observe noise floor. | Use acoustic enclosure, shield cables, synchronize instrument clocks. |
Detailed Experimental Protocols
Protocol 1: Co-localized AFM-Raman Mapping on a Polymer Blend
- Objective: To correlate nanoscale mechanical properties with chemical composition in a PS-PMMA blend.
- Materials: See "Scientist's Toolkit" below.
- Method:
- Sample Preparation: Spin-cast a 100 nm film of PS/PMMA blend (e.g., 50/50) onto a clean silicon wafer. Anneal at 120°C for 2 hrs under vacuum to induce phase separation.
- System Setup: Mount sample in integrated AFM-Raman system. Use a 532 nm laser. Align the Raman laser spot using a silicon reference peak (520 cm⁻¹) and the integrated video microscope.
- Tip-Coalignment Calibration: Use a sharp, isolated feature (e.g., a gold nanoparticle) to fine-tune co-localization. Perform a Raman line scan across the feature while simultaneously imaging with AFM. Adjust the laser position until the maximum Raman signal (e.g., from a carbon coat on the nanoparticle) coincides with the topographic peak.
- Correlated Mapping: Define a 10 µm x 10 µm scan area. Set AFM to Tapping Mode. Configure the Raman spectrometer to collect a spectrum (e.g., 600-3200 cm⁻¹) at each pixel in a predefined grid (e.g., 64x64 pixels). Synchronize the AFM pause/engage with the Raman acquisition sequence.
- Data Analysis: Generate maps by integrating characteristic peaks (1002 cm⁻¹ for PS, 812 cm⁻¹ for PMMA). Overlay these chemical maps with AFM topography and Phase images.
Protocol 2: Sequential ToF-SIMS and AFM Analysis of a Drug-Loaded Lipid Particle
- Objective: To first obtain surface chemical maps, then correlate with nanomechanical properties at identical locations.
- Materials: See "Scientist's Toolkit" below.
- Method:
- Fiducial Marker Preparation: Use a silicon substrate with a lithographically patterned Au grid (5 µm spacing). Deposit your lipid particle suspension onto this grid by drop-casting.
- ToF-SIMS Analysis (Vacuum):
- Load sample into ToF-SIMS.
- Use the instrument's optical camera to locate a grid square with particles.
- Acquire high-resolution mass spectra (e.g., negative ion mode for lipids) and generate maps for key fragments (e.g., m/z 255 for palmitate, m/z 281 for oleate, and a specific fragment for the drug).
- Note the precise X-Y stage coordinates of the analyzed grid square.
- Atmospheric Transfer: Vent the ToF-SIMS chamber and carefully transfer the sample to the AFM. Do not disturb the sample holder.
- AFM Relocation and Measurement:
- Mount the holder in the AFM. Use the AFM's optical microscope to navigate to the same grid square using the unique pattern.
- Locate the specific particles analyzed by ToF-SIMS.
- Perform PeakForce QNM or Force Volume mapping to obtain modulus, adhesion, and deformation maps on the exact same particles.
- Correlation: Use the fiducial grid pattern and particle morphology to digitally overlay the ToF-SIMS chemical maps and AFM property maps.
Visualizations
Title: Integrated AFM-Chemical Analysis Workflow
Title: Common Troubleshooting Pathways
The Scientist's Toolkit: Essential Research Reagents & Materials
Table 3: Key Materials for AFM-Chemical Correlation Experiments
| Item | Function & Specification | Example Use Case |
|---|---|---|
| Gold Nanoparticles (60-100 nm) | High Raman scatterer for co-localization calibration. Coated with a thin polymer (e.g., PVP) or biphenylthiol for strong Raman signal. | Creating a sharp, isolated feature to align the AFM tip and Raman laser spot. |
| Patterned Silicon Gratings | Provide topographical and chemical reference. e.g., Si grating with PMMA lines, or Au patterns on Si. | Calibrating spatial resolution and verifying correlation accuracy for both AFM-Raman and AFM-SIMS. |
| Conductive AFM Probes | Diamond-coated Si or SiCr tips for durability; Pt/Ir-coated Si for electrical modes. | Necessary for TERS and for reducing charging in SIMS environments. Low-profile designs minimize shadowing. |
| Fiducial Marker Grids | Substrates with lithographically defined, unique coordinate patterns (e.g., Au on Si, etched Si). | Enables precise relocation of the same Region of Interest (ROI) between sequential instruments (e.g., SIMS -> AFM). |
| Reference Polymer Blends | Well-characterized heterogeneous systems. e.g., Polystyrene (PS) / Poly(methyl methacrylate) (PMMA). | Validating instrument performance and data processing pipelines for chemical phase separation. |
| Charge Neutralization Reference | Thin, insulating film known to charge. e.g., 100 nm PMMA on Si. | Optimizing electron flood gun settings in ToF-SIMS to prevent image distortion without disrupting AFM operation. |
| High-Purity Solvents | ACS grade or better Acetone, Isopropanol, Toluene. | Cleaning substrates and AFM tip holders without leaving residues that interfere with surface-sensitive techniques. |
Technical Support Center
Troubleshooting Guides & FAQs
Q1: Our AFM nanoindentation data on a polymer blend shows high variance in Young's modulus measurements, making statistical comparison unreliable. What sampling strategy should we use? A: High variance in heterogeneous samples requires a systematic, grid-based sampling protocol rather than random point selection. For a 10µm x 10µm scan area, implement a 5x5 measurement grid, ensuring at least 25 indents per distinct phase (visually identified). Calculate the intra-class correlation coefficient (ICC) to assess measurement consistency within phases. An ICC > 0.75 indicates sufficient phase homogeneity for separate statistical analysis.
Q2: How do we determine if our AFM tip is contributing to measurement drift and non-reproducible roughness data? A: Perform a daily tip characterization protocol using a reference grating (e.g., TGZ1 or TGX1). Capture a 1µm x 1µm image and calculate the tip broadening factor. Compare the obtained tip radius to the manufacturer's specification. A change >15% indicates significant wear. Implement a control chart for tip radius (see Table 1).
Q3: Our force-volume maps on living cells show inconsistent adhesion forces between experimental repeats. How can we standardize the protocol? A: Inconsistency often stems from variable environmental control and probe functionalization. Follow this protocol:
- Probe Calibration: Perform thermal tune in fluid before each map. Record spring constant (k) and sensitivity (InvOLS).
- Environmental Stabilization: Allow cell culture to equilibrate in the AFM fluid cell for 30 minutes at 37°C before measurement.
- Functionalization Consistency: For ligand-coated tips, use UV-Vis spectroscopy to verify batch-to-batch coating density. Acceptable CV is <10%.
- Sampling Rate: Use a trigger threshold of 50nN and a sampling rate of 4kHz per curve to avoid oversampling-induced drift.
Q4: When performing statistical analysis on particle sizes from AFM height images, what is the minimum "n" to ensure robustness against outliers? A: The required "n" depends on the underlying distribution's skewness. For log-normal distributions common in nanoparticle samples, use the following table based on a desired confidence level and acceptable margin of error:
Table 1: Minimum Sample Sizes for Particle Analysis
| Expected Skewness | Confidence Level | Margin of Error | Minimum N (particles) |
|---|---|---|---|
| Low (< 0.5) | 95% | 10% | 96 |
| Moderate (0.5-1.0) | 95% | 10% | 135 |
| High (>1.0) | 95% | 15% | 175 |
Always use robust statistical estimators (median, median absolute deviation) for reporting.
Q5: How do we validate that our image processing (flattening, plane fitting) isn't introducing artifactual trends in roughness (Rq) calculations? A: Conduct a sensitivity analysis:
- Process the same raw data line-by-line (1st order), plane fit (3rd order), and with no flattening.
- Calculate Rq for each method on 5 representative 500nm x 500nm sub-areas.
- Perform a one-way ANOVA on the Rq values. A non-significant result (p > 0.05) indicates processing artifacts are minimal. If p < 0.05, adopt the method yielding the median Rq value and document it precisely in the methods section.
Experimental Protocols
Protocol 1: Representative Site Selection for Heterogeneous Tissue Sections
- Objective: To obtain statistically representative nano-mechanical maps from a heterogeneous biological sample (e.g., bone trabecula).
- Materials: AFM with liquid cell, calibrated probe (e.g., Bruker MSNL), phosphate-buffered saline (PBS), fresh tissue section (< 5µm thick).
- Method:
- Using optical microscopy (integrated with AFM), capture a low-magnification (10X) image of the entire section.
- Digitally superimpose a grid dividing the image into 100 equal sectors.
- Use a random number generator to select 10 sectors for scanning.
- In each selected sector, acquire a 50µm x 50µm topographic scan to identify sub-regions of interest (ROI).
- For each distinct material phase (e.g., mineralized bone, osteoid), perform a 10µm x 10µm force-volume map (32x32 points) within the ROI.
- Pool data from equivalent phases across all sampled sectors for statistical analysis.
Protocol 2: Daily Reproducibility Checklist for Quantitative AFM
- Objective: To ensure instrumental consistency for longitudinal studies.
- Steps:
- Vibrational Noise Floor: Measure the Z-sensor RMS noise on a rigid substrate (e.g., sapphire) with the engaged feedback. Acceptable threshold: < 0.2nm RMS over 60s.
- Scanner Linearization: Perform a closed-loop scan on a calibration grating (step height 100nm). Measured height must be within ±2% of nominal value.
- Thermal Drift Assessment: Engage on a fixed point for 120s, record Z-drift. Acceptable threshold: < 0.05 nm/s.
- Laser Spot Alignment: Verify sum and difference signals are within manufacturer's optimal range.
The Scientist's Toolkit: Research Reagent Solutions
Table 2: Essential Materials for Robust AFM of Heterogeneous Samples
| Item | Function | Critical Specification |
|---|---|---|
| TGQ1 Calibration Grating | Lateral (X-Y) scanner calibration. | Nominal pitch: 3µm ± 0.1µm. Use for daily grid alignment. |
| PFQNE-LC Probe | High-resolution force mapping in liquid. | Spring constant (k): 0.1 N/m. Requires individual thermal calibration before each use. |
| Sodium Hydroxide (0.1M) | Probe cleaning to remove organic contaminants. | ACS grade. Sonicate probes for 5 mins, rinse with DI water 3x. |
| NHS-PEG-Biotin Linker | Functionalizing tips for specific ligand binding studies. | Spacer arm length: 20nm. Ensures proper ligand presentation. |
| Collagen Type I Reference Sample | Positive control for soft material nanoindentation. | Known reduced modulus: 2.5 ± 0.5 GPa (dry). Batch certification required. |
| Vibration Isolation Platform | Minimizes environmental acoustic noise. | Resonant frequency: < 1.5 Hz. Essential for high-resolution imaging. |
| Desiccant Capsules | Controls humidity in sample chamber for air measurements. | Maintains relative humidity at 35-45% to minimize capillary forces. |
Visualizations
Robust AFM Sampling & Analysis Workflow
Key Pillars of AFM Data Reproducibility
Troubleshooting Guides & FAQs
FAQ 1: Why is my AFM-based modulus mapping showing high variance within a single material phase on my polymer blend?
- Answer: This is a common issue in heterogeneous sample characterization. The likely cause is tip contamination or wear, which alters the tip-sample contact geometry and skews Young's modulus calculation via Derjaguin–Muller–Toporov (DMT) or Hertzian models. A blunt or dirty tip overestimates contact area, leading to erroneously high modulus readings and increased intra-phase variance. First, perform a tip characterization scan on a reference sample with known, sharp features (e.g., TGT1 grating). If resolution is lost, replace the probe. Implement in-situ cleaning protocols (e.g., UV-ozone treatment) before each experiment.
FAQ 2: How do I distinguish nanoscale surface adhesion variations from topographical artifacts in PeakForce QNM data?
- Answer: Adhesion force can be heavily influenced by local slope. To isolate chemical adhesion, you must decouple topographic effects. Use the following protocol: (1) Acquire high-resolution topography and adhesion maps simultaneously. (2) Post-process using a correlation analysis. Plot adhesion vs. slope data for a homogeneous control region. (3) Apply a correction algorithm (e.g., slope-based linear correction) to the adhesion channel. Genuine chemical heterogeneity will show adhesion variations independent of the corrected slope. Always report the correlation coefficient (R²) between adhesion and slope for your sample in your supplementary data.
FAQ 3: My statistical analysis of particle sizes on a rough substrate is unreliable. What metrics should I report?
- Answer: On rough substrates, traditional threshold-based particle analysis fails. You must implement a robust reporting standard. Use a two-step protocol: First, apply a non-planar background subtraction (e.g., 3rd order polynomial fitting). Second, use a watershed segmentation algorithm, not a simple height threshold. Report the following metrics in a table: Number Density (particles/µm²), Circularity Index (mean ± SD), Height Distribution (mean, median, D10, D90), and Areal Coverage (%). Crucially, always include the segmentation method and parameters in your methodology.
FAQ 4: What are the minimum sample sizes (n) and reporting standards for quantitative mechanical property comparisons?
- Answer: Under-sampling is a critical flaw. For heterogeneous samples, you cannot rely on a single map. Follow this experimental design: Acquire a minimum of n=5 independent maps from different sample locations (not just zooming in). For each map, analyze properties from at least n=50 discrete features per phase of interest. Report data as: Mean ± 95% Confidence Interval (CI), not just standard deviation. Include a table comparing the intra-map variance and inter-map variance. Use ANOVA testing to confirm that observed differences are statistically significant (p < 0.05) between phases, not just within them.
| Metric Category | Specific Parameter | Recommended Measurement Technique | Key Reporting Standard | Typical AFM Mode |
|---|---|---|---|---|
| Topography | Root-Mean-Square Roughness (Rq) | ISO 25178 compliant analysis on 5+ areas | Report scan size, filtering (S-F/L-F), tip radius. | TappingMode, PeakForce Tapping |
| Mechanical | Young's Modulus (E) | Force-volume or PeakForce QNM with DMT model | State tip radius, calibration method, Poisson's ratio assumed. Include modulus histogram. | Force Spectroscopy, PeakForce QNM |
| Adhesion | Adhesion Force (Fadh) | PeakForce QNM or force-volume mapping | Report pull-off force, debonding velocity, humidity. Decouple from topography. | PeakForce QNM |
| Morphological | Phase Area Fraction (%) | Image segmentation (watershed, Otsu) | Disclose segmentation algorithm, threshold criteria, and pixel/bin size. | Phase Imaging, PeakForce Tapping |
| Statistical | Spatial Correlation Length | Autocorrelation function analysis | Report correlation decay constant and the mathematical model used for fitting. | Any high-resolution topographical map |
Experimental Protocols
Protocol 1: Calibrated Nanomechanical Mapping for Heterogeneous Polymer Films
- Objective: To quantitatively map and compare Young's modulus of different phases.
- Materials: AFM with PeakForce QNM capability, proprietary Bruker RTESPA-150 probes (k ~5 N/m), PS-LDPE reference sample, software (Nanoscope Analysis, SPIP).
- Method:
- Tip Calibration: Perform thermal tune in air to obtain precise spring constant (k). Calibrate tip radius (R) and deflection sensitivity on a clean, rigid sapphire surface.
- Reference Measurement: Acquire a modulus map on the PS-LDPE reference. Verify that the measured moduli fall within 2.5-3.5 GPa for PS and 0.1-0.3 GPa for LDPE.
- Sample Measurement: On your sample, set PeakForce Amplitude to 100-150 nm and frequency to 0.5-1 kHz. Optimize PeakForce Setpoint to maintain stable, non-destructive contact.
- Data Processing: Apply a modulus filter (typically 0.1 GPa to 50 GPa) to remove artifacts. Use histogram analysis to segment phases and extract mean modulus and 95% CI for each phase from 5 independent 10x10 µm scans.
Protocol 2: Correlative Adhesion-Topography Analysis for Protein Aggregates
- Objective: To measure genuine adhesion variations of protein aggregates on mica.
- Materials: Sharp nitride lever (PNP-TR, k ~0.32 N/m), freshly cleaved mica, PBS buffer, liquid cell, image analysis software (Gwyddion, ImageJ).
- Method:
- Sample Prep: Adsorb protein solution (0.01 mg/mL) onto mica in PBS for 10 min. Rinse gently and image in PBS.
- Data Acquisition: In fluid, using PeakForce QNM, simultaneously capture topography and adhesion maps at 512x512 resolution. Ensure a low peak force (< 100 pN) to prevent sample deformation.
- Decoupling Analysis: Export raw height and adhesion matrices. In Gwyddion, calculate the local slope from the height data. Generate a 2D plot of adhesion force vs. slope.
- Correction: If a correlation exists (R² > 0.4), apply a linear correction to the adhesion map. The residual adhesion map represents chemical adhesion heterogeneity.
Mandatory Visualization
Workflow for Quantitative AFM Analysis of Heterogeneous Samples (98 chars)
Decoupling Adhesion from Topography Artifacts (63 chars)
The Scientist's Toolkit: Research Reagent Solutions
| Item | Function in Heterogeneous Sample AFM |
|---|---|
| Bruker RTESPA-150 Probes | Silicon probes with a consistent, sharp tip radius (~8 nm) and moderate spring constant (~5 N/m) for reliable quantitative nanomechanical (QNM) mapping in air. |
| ScanAsyst-Fluid+ Probes | Sharp silicon nitride probes optimized for PeakForce Tapping in fluid. Coating minimizes drift and biological adhesion, crucial for soft, hydrated samples. |
| PS-LDPE Reference Sample | A well-defined polymer blend with known, discrete mechanical phases. Essential for validating tip condition and the accuracy of modulus measurements before/after experiments. |
| TGT1 Test Grating | A calibration grating with sharp, pyramidal spikes. Used for critical tip shape characterization to diagnose tip wear or contamination that invalidates quantitative data. |
| UV-Ozone Cleaner | For in-situ tip and sample cleaning. Removes organic contaminants that cause spurious adhesion forces and modifies surface hydrophilicity for consistent imaging in air. |
| NanoScope Analysis v2.0+ | Proprietary software for advanced data acquisition and processing, including particle analysis, modulus fitting, and histogram-based phase segmentation. |
| Gwyddion (Open Source) | Powerful, free SPM analysis software. Used for advanced data processing, including autocorrelation, grain analysis, and custom script-based filtering not available in vendor software. |
Conclusion
Effectively characterizing heterogeneous biomedical samples with AFM requires a strategic integration of foundational understanding, optimized methodology, rigorous troubleshooting, and multi-technique validation. By embracing advanced modes like PeakForce QNM and implementing robust protocols to mitigate artifacts, researchers can transform AFM from a simple imaging tool into a quantitative nanomechanical platform. This capability is pivotal for elucidating structure-function relationships in complex systems, from protein misfolding diseases to next-generation biomaterials and targeted drug delivery vehicles. Future directions point toward increased automation, higher-speed mapping for dynamic processes, and deeper integration with machine learning for pattern recognition in heterogeneous data, solidifying AFM's role as an indispensable tool in translational biomedical research.