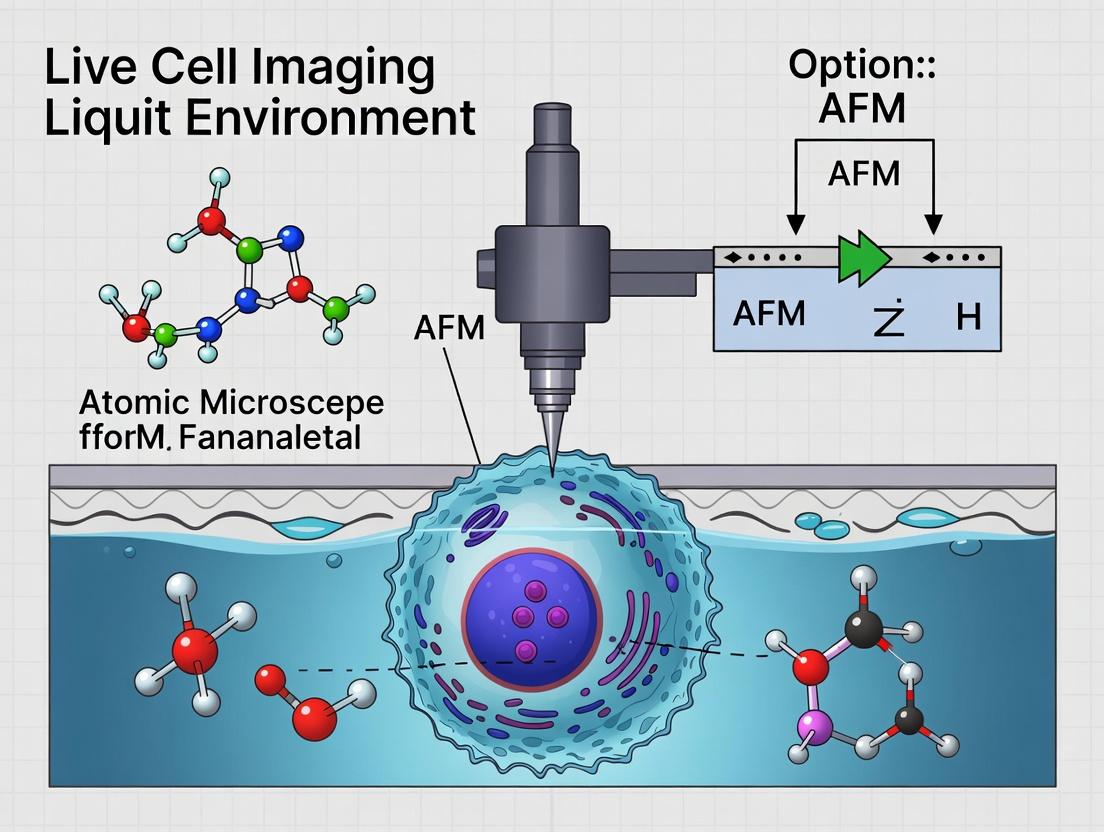
Visualizing Life at the Nanoscale: A Complete Guide to AFM for Live Cell Imaging in Liquid
This article provides a comprehensive exploration of Atomic Force Microscopy (AFM) for live cell imaging in physiologically relevant liquid environments.
Visualizing Life at the Nanoscale: A Complete Guide to AFM for Live Cell Imaging in Liquid
Abstract
This article provides a comprehensive exploration of Atomic Force Microscopy (AFM) for live cell imaging in physiologically relevant liquid environments. It begins by establishing the foundational principles of AFM that enable nanoscale visualization of living cells, moving to detailed methodologies and cutting-edge applications in biomedical research and drug discovery. We address common challenges, troubleshooting strategies, and optimization techniques for obtaining high-fidelity data. Finally, we validate AFM's capabilities by comparing it with complementary imaging modalities and discussing best practices for data interpretation. This guide is tailored for researchers, scientists, and drug development professionals seeking to implement or enhance their use of AFM for dynamic, quantitative cell biology.
The Why and How: Core Principles of AFM for Imaging Living Systems
Atomic Force Microscopy (AFM) has become indispensable for nanoscale cell biology, providing capabilities far beyond traditional light microscopy. Within the thesis of AFM for live cell imaging in liquid, its unique value lies in quantifying the structural, mechanical, and functional dynamics of living cells under near-physiological conditions at nanometer resolution. Unlike optical techniques, AFM does not rely on fluorescence labeling or optical diffraction limits, enabling the direct measurement of topography, stiffness, adhesion, and molecular forces on the cell surface in real-time. This application note details critical protocols and analyses that demonstrate AFM's essential role.
Application Notes & Key Data
Topography and Mechanical Mapping of Live Cells
AFM generates high-resolution 3D topographic maps while simultaneously measuring local mechanical properties like Young's modulus via force-distance curves. This allows correlating membrane structures (e.g., microvilli, lamellipodia) with underlying cytoskeletal changes during processes such as migration or drug response.
Table 1: Quantitative Mechanical Properties of Mammalian Cell Lines
| Cell Type | Average Young's Modulus (kPa) | Condition | Key Finding |
|---|---|---|---|
| MCF-7 (Breast Cancer) | 1.2 ± 0.3 | Standard Culture | Softer phenotype correlates with metastatic potential. |
| NIH/3T3 (Fibroblast) | 7.5 ± 1.8 | Standard Culture | Higher stiffness indicative of robust actin cortex. |
| MCF-7 | 2.8 ± 0.7 | Post-Cytochalasin D (1 µM, 30 min) | ~133% stiffness increase confirms actin disruption. |
| Primary Osteoblast | 15.4 ± 3.2 | On Bone Mimetic Surface | Mechanotransduction response to stiff substrate. |
Single-Molecule Force Spectroscopy (SMFS) on Cell Surfaces
AFM tips functionalized with specific ligands (e.g., antibodies, RGD peptides) probe the distribution and binding kinetics of cell surface receptors. This quantifies drug-target interactions and receptor clustering at the single-molecule level.
Table 2: SMFS Data for Receptor-Ligand Interactions on Live Cells
| Receptor (Tip Functionalization) | Ligand/Cell Type | Unbinding Force (pN) | Off-rate, k_off (s⁻¹) | Application |
|---|---|---|---|---|
| Anti-HER2 Antibody | HER2/MCF-7 Cell | 125 ± 35 | 0.85 | Trastuzumab efficacy screening. |
| RGD Peptide | Integrin αVβ3/HT-29 Cell | 75 ± 20 | 1.25 | Metastasis & adhesion studies. |
| Anti-CD20 Antibody | CD20/Raji B-cell | 95 ± 25 | 0.65 | B-cell cancer therapy development. |
Real-Time Dynamics of Cellular Processes
AFM can monitor dynamic events like pore formation by immune proteins, exocytosis/endocytosis, and cell swelling/apoptosis with sub-second temporal resolution.
Table 3: Temporal Resolution of AFM vs. Light Microscopy for Live-Cell Events
| Cellular Event | AFM Temporal Resolution | Confocal Microscopy Resolution | AFM Advantage |
|---|---|---|---|
| Membrane Pore Formation (Perforin) | 50-100 ms | 500-1000 ms (limited by label kinetics) | Direct mechanical readout, no label. |
| Exocytic Vesicle Fusion | 100 ms | 300-500 ms | Measures vesicle collapse & force. |
| Drug-Induced Membrane Blebbing | 2-5 sec | 10-30 sec | Quantifies bleb height/mechanics. |
Detailed Experimental Protocols
Protocol 1: Correlative AFM-Confocal Live-Cell Imaging for Mechanobiology
Objective: To correlate nanomechanical properties with fluorescently labeled cytoskeletal components in live cells.
Materials: See "The Scientist's Toolkit" below. Procedure:
- Cell Preparation: Seed cells (e.g., NIH/3T3 expressing LifeAct-GFP) on a 35mm glass-bottom dish. Culture for 24-48 hrs to ~60% confluence.
- Microscope Integration: Mount dish on a temperature-controlled (37°C) and CO₂-regulated stage of an integrated AFM-confocal system.
- AFM Probe Selection & Calibration: Use a silicon nitride cantilever (k ~0.1 N/m). Calibrate spring constant via thermal tune method in fluid. Determine deflection sensitivity on a clean, rigid substrate (e.g., glass) in culture medium.
- Engagement & Imaging: Engage the AFM tip onto the cell periphery in contact mode at minimal force (<0.5 nN). Set scan size to 20x20 µm² at 0.5-1 Hz scan rate.
- Simultaneous Data Acquisition:
- AFM: Acquire height and deflection channels. Pause scanning. Switch to Force Volume mode over a 10x10 grid on a 10x10 µm² region. Set a maximum force of 0.8-1 nN and approach/retract speed of 2-5 µm/s.
- Confocal: Acquire a z-stack of LifeAct-GFP fluorescence in the identical region.
- Data Processing:
- Use AFM software to convert force curves to Young's modulus maps using a Hertz/Sneddon model (assuming a Poisson's ratio of 0.5).
- Overlay stiffness maps with fluorescence images using correlative software.
Protocol 2: Single-Molecule Force Spectroscopy of Drug-Target Engagement
Objective: To measure the binding force and kinetics between a drug candidate and its live cell surface target.
Materials: See "The Scientist's Toolkit." Procedure:
- AFM Tip Functionalization:
- Clean cantilever (Si₃N₄, k ~0.02 N/m) in UV-ozone for 20 min.
- Incubate in 1% (v/v) (3-Aminopropyl)triethoxysilane (APTES) in toluene for 2 hrs.
- Wash in toluene and dry with N₂.
- Activate with 2.5% glutaraldehyde in PBS for 30 min.
- Incubate in 50 µg/mL of the target protein (e.g., recombinant HER2 ectodomain) in PBS overnight at 4°C.
- Quench with 1 M ethanolamine-HCl (pH 8.5) for 10 min. Rinse and store in PBS at 4°C.
- Cell Sample Preparation: Culture target cells to ~70% confluence in a fluid cell-compatible dish.
- SMFS Measurement:
- Mount functionalized probe and calibrate in medium.
- Approach the cell surface at a point distant from the nucleus.
- Set parameters: Approach/retract speed: 1 µm/s, contact force: 200 pN, contact time: 100-500 ms.
- Perform 500-1000 force curves at multiple cell locations.
- Data Analysis:
- Identify unbinding events as retraction curve ruptures.
- Plot rupture force histogram; fit with Worm-Like Chain (WLC) or Bell-Evans model to obtain k_off.
- Use blocking controls (soluble ligand) to confirm specificity.
Visualization Diagrams
The Scientist's Toolkit: Research Reagent Solutions
Table 4: Essential Materials for AFM Live-Cell Experiments
| Item | Function & Critical Specification | Example Product/Catalog |
|---|---|---|
| AFM with Liquid Cell | Enables imaging in physiological buffer with temperature/CO₂ control. Must have low-noise deflection sensor. | Bruker BioFastScan, JPK NanoWizard with BioCell. |
| Soft Cantilevers | For live-cell imaging & force mapping. Spring constant (k): 0.01 - 0.1 N/m, tipless for bead attachment. | Bruker PNPS-A, Olympus BL-AC40TS. |
| Functionalization Kit | For SMFS: Provides linkers (PEG, silanes) to conjugate biomolecules to tip. | Bruker Tip Functionalization Kit, nanoTether Chemistry. |
| Glass-Bottom Culture Dishes | High optical clarity for correlative microscopy. #1.5 cover glass thickness (170 µm). | MatTek P35G-1.5-14-C, ibidi µ-Dish 35 mm. |
| Temperature & CO₂ Controller | Maintains cell viability during long experiments (>1 hr). | PeCon stage top incubator, Life Imaging Services Okolab. |
| Cell Culture Medium (Phenol Red-Free) | Maintains pH and health during imaging without interfering fluorescence. | Gibco FluoroBrite DMEM. |
| Calibration Samples | For cantilever spring constant (k) and deflection sensitivity. | Bruker PFQNM-LC-A Calibration Sample, soft polymer grating. |
| Actin/ Cytoskeleton Labels | For correlative microscopy (e.g., LifeAct, SiR-Actin). Must be photostable. | Cytoskeleton Inc. SiR-Actin Kit, ibidi Fluorescent Cell Dyes. |
| Recombinant Target Proteins | For tip functionalization in SMFS drug binding studies. High purity, lyophilized. | Sino Biological, R&D Systems. |
Within the broader thesis of employing Atomic Force Microscopy (AFM) for live cell imaging in liquid, selecting the appropriate imaging mode is paramount to obtaining high-resolution, physiologically relevant data while preserving cell viability. This note details the three fundamental modes, their operational principles, advantages, limitations, and specific protocols for imaging live cells in liquid environments.
Core Modes: Principles and Quantitative Comparison
The choice of mode governs the tip-sample interaction force, directly impacting resolution, sample integrity, and data type.
Table 1: Quantitative Comparison of Fundamental AFM Modes in Liquid
| Parameter | Contact Mode | Tapping Mode (AC Mode) | PeakForce Tapping (PFT) Mode |
|---|---|---|---|
| Tip-Sample Interaction | Continuous, repulsive physical contact. | Intermittent, oscillating contact at resonance. | Periodic, precisely controlled, sub-100 pN force taps. |
| Primary Feedback Signal | Static cantilever deflection (force). | Oscillation amplitude reduction. | Peak force value during each tap. |
| Typical Lateral Resolution | ~1-5 nm | ~5-10 nm | ~1-3 nm |
| Typical Vertical Noise Floor | ~50-100 pm | ~100-200 pm | < 50 pm |
| Typical Applied Force | 0.1 - 10 nN | 0.1 - 1 nN | 10 - 100 pN (precisely set) |
| Shear/Lateral Forces | High (significant risk). | Very Low. | Negligible. |
| Sample Softness Limit | Stiff samples (> kPa). | Moderately soft samples (~100 Pa). | Very soft samples (< 10 Pa). |
| Simultaneous Quantitative Mapping | No (force must be derived). | No (limited to phase imaging). | Yes (Adhesion, Modulus, Deformation, Dissipation). |
| Cell Viability & Minimal Perturbation | Poor | Good | Excellent |
Detailed Experimental Protocols for Live Cell Imaging
Protocol 1: Preparation of Functionalized AFM Tips for Adhesion Studies
Objective: To functionalize AFM tips with specific ligands (e.g., RGD peptides) for probing cell receptor interactions. Materials: See "The Scientist's Toolkit" below. Procedure:
- Cleaning: Plasma clean silicon nitride (Si₃N₄) tips for 5 minutes.
- Aminosilanzation: Expose tips to 2% (v/v) 3-aminopropyltriethoxysilane (APTES) in toluene for 1 hour, followed by thorough toluene and ethanol rinses. Cure at 100°C for 10 min.
- Linker Attachment: Incubate tips in 2.5% glutaraldehyde in PBS for 30 minutes. Rinse with PBS and deionized water.
- Ligand Conjugation: Incubate tips in 50 µg/mL RGD-peptide solution in PBS for 1 hour at room temperature.
- Quenching & Storage: Quench unreacted aldehydes with 1 M ethanolamine hydrochloride (pH 8.5) for 10 min. Rinse with PBS and store at 4°C in PBS until use (within 24 hours).
Protocol 2: Imaging Live Cells in Culture Medium Using PeakForce Tapping
Objective: To obtain topographical and nanomechanical maps of live adherent cells with minimal perturbation. Materials: Live cell culture (e.g., HEK293, fibroblasts), functionalized or bare biocompatible tip (e.g., SNL-10), cell culture medium, fluid AFM cell, CO₂-independent medium or perfusion system. Procedure:
- Cell Preparation: Seed cells on a sterile, glass-bottom Petri dish or dish designed for AFM. Culture to ~60-70% confluence.
- AFM Setup: Mount the dish on the AFM scanner stage. Using a pipette, carefully add pre-warmed (37°C) CO₂-independent imaging medium to cover cells.
- Tip & Fluid Cell Assembly: Mount the functionalized or bare tip. Carefully assemble the fluid cell, avoiding bubbles.
- Engagement Parameters: Align the laser and calibrate the cantilever sensitivity in liquid. Set the PeakForce Setpoint to a very low value (50-150 pN). Set PeakForce Frequency to 0.5-2 kHz.
- Imaging: Engage automatically. Simultaneously collect Height, PeakForce Error, Adhesion, and DMT Modulus channels. Scan at 0.5-1 Hz with 256-512 samples/line.
- Viability Check: Post-imaging, confirm cell viability via standard assays (e.g., calcein AM staining).
Protocol 3: Force-Volume Mapping for Comparative Stiffness Analysis
Objective: To spatially map the elastic modulus of a cell surface and surrounding substrate. Procedure:
- Follow Protocol 2 for setup and engagement, using a sharp, stiff tip (e.g., 0.1-0.6 N/m).
- Switch to Force Volume mode. Define a grid (e.g., 32x32 points) over the region of interest.
- At each point, perform a full force-distance curve with a maximum force of 300 pN and a ramp rate of 0.5-1 µm/s.
- Fit the retraction portion of each curve using the Derjaguin–Muller–Toporov (DMT) model in the AFM software to calculate the reduced elastic modulus.
- Compile results into a 2D stiffness map.
Visualization of Mode Selection Logic
Title: Decision Logic for Selecting AFM Mode in Liquid
The Scientist's Toolkit: Essential Research Reagents & Materials
Table 2: Key Reagent Solutions for Live Cell AFM
| Item | Function & Explanation |
|---|---|
| Silicon Nitride (Si₃N₄) Tips (e.g., SNL, DNP) | Bio-inert, soft cantilevers (0.01-0.6 N/m) for imaging cells without damage. |
| CO₂-Independent Medium (e.g., Leibovitz's L-15) | Maintains pH without a controlled atmosphere during open-dish AFM imaging. |
| APTES (3-Aminopropyltriethoxysilane) | Silane coupling agent for creating an amine-terminated surface on silicon tips for functionalization. |
| Polyethylene Glycol (PEG) Linkers | Spacer molecules to separate bioactive ligands from the tip surface, reducing nonspecific binding. |
| RGD Peptide Solution | A common integrin-binding ligand for functionalizing tips to study cell adhesion forces. |
| Glutaraldehyde (2.5% in PBS) | Crosslinker for covalently attaching amine-containing ligands to APTES-treated surfaces. |
| Bovine Serum Albumin (BSA) 1% Solution | Used to passivate tips and substrates, blocking nonspecific interactions. |
| Calcein AM Viability Stain | Fluorogenic dye to confirm cell membrane integrity and viability post-AFM imaging. |
| Cell-Tak or Poly-L-Lysine | Adhesive coatings for immobilizing non-adherent cells or stabilizing fragile samples. |
Within the broader thesis on Atomic Force Microscopy (AFM) for live cell imaging in liquid research, this application note details the concurrent acquisition of nanoscale topography, nanomechanical properties, and specific molecular recognition data. This multimodal approach, uniquely enabled by AFM, provides an unparalleled systems-level view of live cell surface dynamics, crucial for mechanistic studies in pharmacology and drug development.
Table 1: Comparative Metrics of Multimodal AFM Imaging on Live Cells
| Modality | Spatial Resolution | Force Sensitivity | Quantifiable Parameters | Typical Acquisition Time (per cell) |
|---|---|---|---|---|
| Topography (Contact Mode) | 1-10 nm (lateral) 0.1-0.5 nm (vertical) | 10-100 pN | Height, Roughness (Ra, Rq), 3D Morphology | 2-5 minutes |
| Nanomechanics (Force Volume/QI) | 50-200 nm (lateral) | 5-50 pN | Young's Modulus (Elasticity), Adhesion, Deformation, Dissipation | 5-15 minutes |
| Molecular Recognition (TREC/Recognition Imaging) | 5-15 nm (ligand mapping) | 20-200 pN | Binding Probability, Unbinding Force, Receptor Density & Distribution | 10-20 minutes |
| Combined Multimodal (e.g., QI with functionalized tip) | 10-50 nm (correlated) | 10-100 pN | All above, with spatial correlation maps | 15-30 minutes |
Table 2: Representative Data from Integrated Studies (Live Cancer Cell Line)
| Cell Surface Receptor | Measured Elasticity (kPa) | Mean Unbinding Force (pN) | Binding Event Density (events/µm²) | Observed Topographical Feature Correlation |
|---|---|---|---|---|
| EGFR (Epithelial Growth Factor Receptor) | 1.8 ± 0.4 | 55 ± 15 | 120 ± 25 | Co-localized with membrane protrusions (>100 nm height) |
| Integrin α5β1 | 3.2 ± 1.1 | 97 ± 22 | 85 ± 20 | Enriched on substrate-adherent regions (lower roughness) |
| CD44 (Hyaluronan receptor) | 2.5 ± 0.7 | 42 ± 10 | 200 ± 45 | Uniform distribution, no direct correlation with stiffness |
Detailed Protocols
Protocol 1: Cantilever Functionalization for Combined Mechanics & Recognition Imaging
Objective: To attach a specific biomolecule (e.g., an antibody or ligand) to an AFM cantilever for simultaneous elasticity and recognition mapping.
Materials & Reagents:
- Silicon Nitride cantilever (k ≈ 0.01-0.06 N/m for QI).
- PEG-based crosslinker (e.g., heterobifunctional NH2-PEG-NHS).
- Target-specific ligand (e.g., recombinant protein, antibody Fab fragment).
- Ethanolamine hydrochloride (1M, pH 8.5) for blocking.
- Phosphate Buffered Saline (PBS, pH 7.4).
Procedure:
- Cantilever Cleaning: Plasma clean cantilevers for 5 minutes to activate surface.
- Amination: Vapor-phase silanization with (3-Aminopropyl)dimethylethoxysilane (APDMES) for 1 hour to create an amine-terminated surface.
- Crosslinker Attachment: Incubate cantilevers in 1 mM NH2-PEG27-NHS crosslinker solution in chloroform for 2 hours. The NHS ester end binds to the amine on the cantilever.
- Ligand Conjugation: Rinse and transfer cantilevers to a droplet containing 50-100 µg/mL of the target ligand in PBS (pH 7.4). Incubate for 1 hour. The maleimide or NHS ester on the free end of the PEG crosslinker binds the ligand.
- Quenching: Block unreacted groups by incubating in 1M ethanolamine (pH 8.5) for 10 minutes.
- Storage: Store functionalized cantilevers in PBS at 4°C for immediate use. Validate functionality via force spectroscopy on a positive control surface.
Protocol 2: Correlated Topography, Mechanics, and Recognition Imaging on Live Cells
Objective: To acquire spatially registered maps of cell height, local stiffness, and specific receptor distribution in liquid culture.
Materials:
- AFM with temperature and CO₂ control stage for live cells.
- Functionalized cantilever from Protocol 1.
- Live cells (e.g., HEK293, HeLa) cultured on a 35 mm Petri dish or glass-bottom dish in appropriate medium.
- Imaging buffer: CO₂-independent medium or PBS supplemented with 10 mM HEPES.
Procedure:
- Cell Preparation: Culture cells to 50-70% confluency. Before imaging, replace medium with pre-warmed (37°C) imaging buffer.
- AFM Mounting: Mount dish on the stage. Engage the functionalized cantilever.
- System Calibration: Perform thermal tune to determine spring constant. Calibrate the optical lever sensitivity on a clean, rigid area of the dish.
- Parameter Setup (Quantitative Imaging Mode):
- Set a 50 x 50 point grid over a target cell.
- Define a maximum force setpoint (0.5-2 nN) to avoid cell damage.
- Set Z-length to 1-2 µm to capture full force curve.
- Approach rate: 10-50 µm/s; Retract rate: 10-50 µm/s.
- Enable both topography and force curve recording channels.
- Recognition Imaging Trigger: During retraction in each pixel, monitor the force curve for a characteristic "unbinding" event (sudden jump). Flag pixels where an unbinding event occurs within a defined force window (e.g., 40-120 pN for your receptor).
- Data Acquisition: Start automated scanning. The system will generate:
- A height map.
- An elasticity map (from fitting the approaching force curve slope).
- An "event map" showing locations of specific binding.
- Live Cell Maintenance: Maintain temperature at 37°C throughout. Limit total scan time per cell to <30 minutes to ensure viability.
The Scientist's Toolkit: Key Research Reagent Solutions
Table 3: Essential Materials for Integrated Live Cell AFM
| Item | Supplier Examples | Function in Experiment |
|---|---|---|
| Soft Bio-Friendly Cantilevers (e.g., MLCT-BIO-DC) | Bruker, Olympus, NanoAndMore | Low spring constant (0.01-0.1 N/m) minimizes cell damage during contact. |
| Heterobifunctional PEG Crosslinkers (e.g., NH2-PEG27-NHS) | Creative PEGWorks, Iris Biotech | Spacer molecule that tethers ligand to tip, provides flexibility for proper binding. |
| Recombinant Ligands/Fab Fragments | R&D Systems, Sino Biological | High-purity, monovalent binding partners for specific, low-avidity recognition imaging. |
| Temperature & CO₂ Control Stage | PeCon, Tokai Hit | Maintains live cell health and physiology during extended liquid imaging sessions. |
| Functionalization Jig & UV Ozone Cleaner | Novascan, BioForce Nanosciences | For reproducible cantilever cleaning and controlled chemical modification. |
Visualizations
Title: Multimodal AFM Workflow for Live Cell Analysis
Title: Probe Functionalization & Cell Surface Interaction
This application note, framed within a thesis on Atomic Force Microscopy (AFM) for live cell imaging in liquid, details the core hardware components and protocols essential for successful nanoscale biomechanical investigations. The ability to probe living cells under physiologically relevant conditions is transformative for biomedical research and drug development, requiring meticulous optimization of the cantilever, fluid cell, and environmental control systems.
Core Component Specifications & Quantitative Comparison
Table 1: Cantilever Selection Guide for Live Cell Imaging in Liquid
| Parameter | Silicon Nitride (Si₃N₄) Cantilevers | Silicon (Si) Cantilevers | Ultra-Short Cantilevers (USC) | Functionalized Cantilevers |
|---|---|---|---|---|
| Typical Spring Constant (k) | 0.01 - 0.1 N/m | 0.1 - 5 N/m | 0.1 - 0.6 N/m | Varies with coating |
| Resonant Frequency in Liquid (f₀) | 1 - 12 kHz | 10 - 150 kHz | 200 - 600 kHz | Dependent on base lever |
| Tip Geometry | Pyramidal, 3-sided; Radius ~20 nm | Sharpened; Radius <10 nm | Pyramidal or conical | Coated; radius may increase |
| Key Advantages | Low force constant, bio-inert, transparent | High resonance, high spatial resolution | Reduced hydrodynamic drag, fast imaging | Specific molecular recognition (e.g., ligand-coated) |
| Primary Imaging Modes | Contact Mode, Force Spectroscopy | TappingMode, PeakForce Tapping | High-speed imaging, TappingMode | Single-Molecule Force Spectroscopy (SMFS) |
| Typical Reflective Coating | None (inherently reflective) or Gold (Au) | Aluminum (Al) or Gold (Au) | Gold (Au) | Gold (Au) for functionalization |
Table 2: Commercial Liquid Cell/Heater System Specifications
| System Component | Model A (Standard) | Model B (Advanced Heater) | Model C (Closed-Loop Control) |
|---|---|---|---|
| Temperature Range | Ambient - 60°C | 15°C - 80°C | 4°C - 80°C |
| Stability | ±1.0°C | ±0.5°C | ±0.1°C |
| Heating Rate | ~1°C/min | Up to 10°C/min | Programmable, up to 10°C/min |
| Fluid Volume | ~50-100 µL | ~30-60 µL | ~30-60 µL |
| Gas Mixing/CO₂ | No | Optional 5% CO₂ inlet | Integrated gas mixer & sensor (O₂, CO₂) |
| Perfusion Capability | Basic inlet/outlet ports | Multi-port for continuous flow | Automated, syringe-pump controlled perfusion |
Experimental Protocols
Protocol 1: Assembly and Priming of a Liquid Cell for Live Cell Imaging
Objective: To prepare a sterile, bubble-free liquid cell environment for imaging adherent mammalian cells. Materials: AFM liquid cell with O-rings, compatible cantilever holder, sterile phosphate-buffered saline (PBS), cell culture medium, 1 mL syringes, sterile tubing, 70% ethanol.
- Sterilization: Disassemble the liquid cell and O-rings. Clean all components with 70% ethanol and allow to air dry in a laminar flow hood.
- Cantilever Mounting: Mount a sterile, appropriate cantilever (e.g., Si₃N₄, k ~0.06 N/m) into the holder. Use UV light for 15 minutes for additional sterilization.
- Cell Sample Placement: Place the sterile glass-bottom Petri dish containing adherent cells on the AFM scanner stage.
- Cell Assembly: Carefully lower the cantilever holder into the liquid cell base. Align and place the assembly over the dish, ensuring the O-ring seals against the dish surface without crushing the cells.
- Priming: Using a syringe connected to the fluid inlet port, slowly introduce pre-warmed (37°C), degassed cell culture medium. Tilt the assembly to help bubbles escape through the outlet port. Continue until all tubing and the cell volume are completely filled with liquid and no bubbles are visible.
- Mounting: Secure the entire liquid cell assembly onto the AFM head, ensuring electrical and optical connections are intact.
Protocol 2: Calibrating Cantilever Spring Constant in Liquid
Objective: To accurately determine the spring constant (k) of a cantilever in fluid, essential for quantitative force measurements. Materials: AFM with liquid cell, calibration cantilever kit (of known k), thermal tuning software.
- Thermal Method Setup: Assemble the liquid cell with the test cantilever immersed in the desired buffer (e.g., PBS). Allow the system to thermally equilibrate for 20 minutes.
- Power Spectral Density (PSD) Acquisition: With the cantilever freely oscillating, engage the thermal tuning function. Record the thermal noise spectrum (PSD) over a suitable frequency range (e.g., 0-100 kHz).
- Fitting & Analysis: Fit the fundamental resonance peak in the PSD to a simple harmonic oscillator model. The software will calculate the k using the equipartition theorem: k = k_B T / <δq²>, where k_B is Boltzmann's constant, T is temperature, and <δq²> is the mean-square deflection.
- Verification: Optional: Verify using the added mass method or against a pre-calibrated cantilever in liquid.
Protocol 3: Conducting a Temperature-Dependent Cell Stiffness Experiment
Objective: To measure the change in apparent Young's modulus of a live cell in response to a temperature ramp. Materials: AFM with a temperature-controlled liquid cell (Model B or C), heater controller software, soft Si₃N₄ cantilever (k ~0.03 N/m), cells cultured on a dish, CO₂-independent medium.
- Initial Setup: Follow Protocol 1 to assemble the cell with pre-warmed (20°C) medium.
- Baseline Measurement: Set the cell temperature to 20°C. Allow 15 minutes for stabilization. Perform Force Volume or a grid of single-point force curves on multiple cells (n>10) to establish baseline stiffness.
- Temperature Ramp: Program the heater controller to ramp from 20°C to 40°C at a rate of 1°C/min.
- Data Acquisition: At every 2°C interval, pause the ramp for 2 minutes for thermal equilibration, then acquire a new set of force curves on the same cells/locations.
- Analysis: For each force curve, fit the retract portion with an appropriate contact mechanics model (e.g., Hertz, Sneddon) to extract the apparent Young's modulus. Plot modulus vs. temperature.
Visualization: Experimental Workflow
Title: Workflow for Quantitative Live-Cell AFM Experiment
The Scientist's Toolkit: Essential Research Reagent Solutions
Table 3: Key Materials for Liquid Cell AFM Experiments
| Item | Function/Benefit | Example/Note |
|---|---|---|
| Functionalized Cantilevers | Enable specific molecular recognition force spectroscopy (SMFS) to study receptor-ligand interactions on cell surfaces. | PEG-linked ligand tips, antibody-coated tips. |
| Bio-Inert, Degassed Buffer | Maintains cell viability and prevents nanobubble formation on the cantilever, which causes imaging artifacts. | CO₂-independent, HEPES-buffered medium, pre-degassed. |
| Temperature Controller w/ Sensor | Precisely regulates and monitors local temperature for studies of thermal responses or maintaining 37°C physiology. | In-line sensor feedback is critical for accuracy. |
| Perfusion System (Syringe Pump) | Allows continuous media exchange for long-term health, drug addition, or waste removal during experiments. | Multi-syringe pumps enable complex stimulation protocols. |
| Cantilever UV Sterilization Chamber | Provides effective, non-damaging sterilization of cantilevers and holders prior to cell experiments. | Essential for preventing microbial contamination. |
| Calibrated Polystyrene Beads | Used for cantilever functionalization or as standardized samples to verify system performance in liquid. | ~5µm diameter beads for single-cell force measurements. |
Within the thesis on Atomic Force Microscopy (AFM) for live cell imaging in liquid, understanding the probe-sample interaction is paramount. This interaction dictates the balance between achieving high-resolution topographical data and maintaining cell viability. The forces exerted by the probe—including van der Waals, electrostatic, solvation, and mechanical contact forces—can induce significant perturbation, altering native cell morphology and physiology. This document details the core principles, quantitative metrics, and practical protocols for characterizing these interactions and minimizing perturbation to obtain biologically relevant data.
Quantitative Forces in Liquid AFM
Table 1: Typical Force Magnitudes in Live Cell AFM
| Force Type | Approximate Magnitude (in liquid) | Dependence | Primary Impact on Live Cell |
|---|---|---|---|
| Van der Waals | 0.1 - 1 nN | Probe material, tip-sample distance | Attractive; can cause snap-to-contact, indentation. |
| Electrostatic (DLVO) | 0.01 - 0.5 nN | Ionic strength, surface potential | Repulsive or attractive; modulated by buffer. |
| Solvation/Hydration | 0.05 - 0.3 nN | Water structure, hydrophobicity | Repulsive barrier near surface. |
| Capillary | Negligible in fully immersed liquid | N/A | Eliminated in liquid imaging. |
| Applied Contact Force | 50 - 500 pN (optimal) | Setpoint, feedback gain | Direct indentation, potential membrane rupture. |
| Lateral Shear Force | 10 - 200 pN | Scan speed, friction | Can disrupt cytoskeleton, cause peeling. |
Table 2: Effect of Imaging Parameters on Resolution & Perturbation
| Parameter | Increased Effect | Decreased Effect | Recommended Range for Cells |
|---|---|---|---|
| Setpoint Force | Perturbation: Indentation, stress. | Resolution: Loss of detail, tip slips. | 50-200 pN (Q.I./PeakForce) |
| Scan Speed | Perturbation: Shear forces, dragging. | Resolution: Thermal drift, noise. | 0.5 - 2 lines/sec |
| Feedback Gains | Perturbation: Oscillation, instability. | Resolution: Poor tracking, lag. | Optimized via PID tuning. |
| Tip Sharpness | Resolution: Lateral resolution. | Perturbation: High local pressure. | 2-20 nm radius (silicon nitride) |
| Cantilever k | Perturbation: For a given deflection, higher force. | Resolution: Sensitivity to small forces. | 0.01 - 0.1 N/m |
Core Experimental Protocols
Protocol 1: Calibration of Cantilever Sensitivity and Spring Constant in Liquid
Objective: Accurately convert photodiode voltage to force (in nN). Materials: See "Scientist's Toolkit" (Table 3). Procedure:
- Thermal Tune Method:
- Engage the probe far from any surface in the imaging buffer.
- Obtain the power spectral density (PSD) of cantilever thermal fluctuations.
- Fit the PSD to a simple harmonic oscillator model to obtain the resonance frequency and quality factor (Q).
- Calculate the spring constant (k) using the equipartition theorem: ( k = kB T / \langle x^2 \rangle ), where ( kB ) is Boltzmann's constant, T is temperature, and ( \langle x^2 \rangle ) is the mean square deflection.
- InvOLS Calibration:
- Approach the tip onto a rigid, clean surface (e.g., glass coverslip).
- Obtain a force-distance curve with a hard contact region.
- The slope of the deflection vs. piezo displacement in the contact region is the inverse optical lever sensitivity (InvOLS) in nm/V.
- Force Calculation: Force (F) = Deflection (d) * k, where d = InvOLS * Photodiode Voltage.
Protocol 2: Force Mapping to Assess Cell Mechanics and Minimize Perturbation
Objective: Determine local Young's modulus and identify a safe imaging setpoint. Materials: Live cells cultured on dish, AFM with liquid cell, tipless cantilever (k ~ 0.01 N/m) with attached colloidal probe (4-5 μm sphere). Procedure:
- Approach: Position the colloidal probe above the nucleus-free peripheral cytoplasm.
- Acquisition: Perform a grid (e.g., 32x32) of force-distance curves over a 10x10 μm area. Use a maximum force of 300-500 pN and a 1 Hz approach/retract rate.
- Analysis:
- Fit the retraction portion of each curve with the Hertz/Sneddon model for a spherical indenter.
- Generate an elasticity (Young's modulus) map.
- Calculate the average modulus (E) for the cell body (typically 0.5 - 20 kPa).
- Setpoint Determination: Set the imaging force to < 10% of the maximum force used in mapping (e.g., < 50 pN) to remain in the linear, non-destructive regime.
Protocol 3: Intermittent Contact (Tapping) Mode Optimization in Liquid
Objective: Achieve stable, low-perturbation imaging of membrane structures. Materials: Sharp silicon nitride tip (k ~ 0.1 N/m, f₀ ~ 10-30 kHz in liquid). Procedure:
- Tune Cantilever: Excite and identify the fundamental resonance peak in liquid.
- Set Drive Amplitude: Use an amplitude (A₀) of 5-20 nm.
- Engage: Approach using a low setpoint ratio (A_sp/A₀ = 0.7-0.8).
- Optimize Feedback: Adjust gains to maintain setpoint with minimal oscillation. Scan at 1-2 Hz.
- Monitor Viability: Correlate with optical microscopy to ensure no cell retraction or blebbing.
Visualization: Pathways and Workflows
Title: AFM Live Cell Imaging Experimental Workflow
Title: Force Balance Determines Imaging Outcome
The Scientist's Toolkit
Table 3: Essential Research Reagent Solutions & Materials
| Item | Function in Live Cell AFM | Example/Note |
|---|---|---|
| Soft Cantilevers | Minimize applied force for a given deflection. Essential for mapping. | Silicon Nitride, k = 0.01 - 0.1 N/m (e.g., Bruker MLCT-Bio, Olympus BL-AC40TS). |
| Colloidal Probes | Spherical tip for reliable force curves & modulus mapping; reduces local pressure. | 2-10 μm silica or polystyrene sphere glued to tipless lever. |
| Bio-Friendly Buffers | Maintain cell viability, control electrostatic forces (ionic strength). | HEPES-buffered saline, CO₂-independent medium, PBS (no Ca²⁺/Mg²⁺ for some cells). |
| Functionalization Kits | For tip modification: ligand coupling, adhesion molecule attachment. | PEG linkers, silanization chemistry, NHS-ester based kits. |
| Temperature Controller | Maintain physiological temperature; critical for viability and drift reduction. | Heated stage or enclosure, objective heater. |
| Live-Cell Dyes | Correlative fluorescence to verify viability and identify structures. | Calcein-AM (viability), CellMask (membrane), Hoechst (nucleus). |
| PDMS Dishes | Soft, compliant substrates that mimic in-vivo conditions. | Alternatively, collagen/gelatin-coated glass-bottom dishes. |
| Cantilever UV Cleaner | Sterilize and remove organic contaminants before use. | 20-30 minute UV ozone treatment. |
From Setup to Discovery: Step-by-Step Protocols and Real-World Applications
Effective Atomic Force Microscopy (AFM) of live cells in liquid hinges on meticulous sample preparation. The triad of cell adhesion, viability, and appropriate substrate selection is critical for generating high-resolution, physiologically relevant data. This protocol, framed within a thesis on live-cell AFM, details best practices to ensure robust and reproducible experimental outcomes for researchers in cell biology and drug development.
Substrate Choice and Functionalization
The substrate must provide a flat, rigid surface for AFM scanning while promoting specific, healthy cell adhesion.
Quantitative Comparison of Common AFM Substrates
Table 1: Characteristics of Common Substrates for Live-Cell AFM
| Substrate Material | Typical Roughness (Ra) | Recommended Coating for Cell Studies | Key Advantage | Primary Limitation |
|---|---|---|---|---|
| Glass (e.g., #1.5 Coverslip) | 0.5 - 1.0 nm | Poly-L-Lysine, Fibronectin, Collagen | Excellent optical clarity for correlative microscopy | Requires functionalization for most cell types |
| Plastic (e.g., PS, TC-treated) | 2.0 - 5.0 nm | Often pre-coated (e.g., with collagen) | Biocompatible; good for high-throughput | Higher roughness can limit resolution |
| Mica (Muscovite) | < 0.1 nm | Functionalized with APTES, then ECM proteins | Atomically flat, cleavable surface | Non-biological surface requires chemical modification |
| Silicon/SiO₂ | < 0.5 nm | ECM proteins via silane chemistry | Extremely flat, rigid; ideal for force spectroscopy | Expensive, opaque (unless on wafer) |
| Gold-coated Glass | 1.0 - 3.0 nm | ECM proteins via thiol-based self-assembled monolayers (SAMs) | Enables electrochemical control and specific coupling | Cost, coating stability over time |
Protocol: APTES-Functionalization of Mica for Cell Adhesion
Objective: To create an amine-terminated surface on freshly cleaved mica for subsequent covalent or electrostatic binding of extracellular matrix (ECM) proteins. Materials: Muscovite mica disks, (3-Aminopropyl)triethoxysilane (APTES), anhydrous toluene, ethanol, nitrogen stream. Procedure:
- Mica Cleavage: Use adhesive tape to cleave the top layers of a mica disk to expose a fresh, atomically flat surface.
- Silane Solution Preparation: In a dry environment, prepare a 2% (v/v) solution of APTES in anhydrous toluene.
- Functionalization: Immediately place the cleaved mica disk into the APTES-toluene solution. Incubate for 30 minutes at room temperature under an inert atmosphere (e.g., in a sealed container with nitrogen).
- Washing: Rinse the disk thoroughly with anhydrous toluene (3x), followed by ethanol (3x) to remove unbound silane.
- Curing: Dry the disk under a gentle stream of nitrogen. Cure the surface at 110°C for 10 minutes to stabilize the silane layer.
- Sterilization: Prior to cell seeding, sterilize the APTES-mica with UV light for 30 minutes per side.
Optimizing Cell Adhesion and Spreading
Controlled adhesion is essential to prevent cell detachment during AFM scanning.
Protocol: Coating Substrates with Extracellular Matrix (ECM) Proteins
Objective: To adsorb a uniform layer of ECM protein (e.g., fibronectin) onto a substrate to promote integrin-mediated cell adhesion. Materials: Fibronectin solution (from bovine plasma), Dulbecco's Phosphate Buffered Saline (DPBS), sterile culture dish. Procedure:
- Dilution: Dilute fibronectin to a working concentration of 5-20 µg/mL in sterile DPBS. The optimal concentration must be empirically determined for each cell line.
- Coating: Apply enough solution to completely cover the substrate surface (e.g., 100 µL for a 15 mm coverslip). Ensure no bubbles are present.
- Incubation: Incubate at 37°C for 1 hour, or at 4°C overnight for a more uniform coating.
- Rinsing: Carefully aspirate the protein solution and rinse the substrate 2-3 times with sterile DPBS to remove unbound protein.
- Seeding: Proceed immediately with cell seeding. Do not allow the coated surface to dry.
Ensuring Cell Viability During AFM Experiments
Maintaining physiological conditions is paramount for live-cell imaging.
Quantitative Viability Parameters
Table 2: Critical Parameters for Maintaining Live-Cell Viability During AFM
| Parameter | Optimal Range | Monitoring Method | Consequence of Deviation |
|---|---|---|---|
| Temperature | 35 - 37°C (mammalian) | Heated stage with feedback control, thermocouple | <35°C: Reduced metabolism. >37°C: Heat shock response. |
| pH | 7.2 - 7.4 (in CO₂-independent medium) | Phenol red in medium, specialized pH probes | Acidosis/Alkalosis: Alters protein function, compromises viability. |
| Osmolarity | 280 - 320 mOsm/kg | Osmometer | Hypotonic: Cell swelling. Hypertonic: Cell shrinkage. |
| Humidity | >95% (to prevent evaporation) | Enclosed fluid cell, humidified gas if used | Evaporation: Increases salt concentration, cools sample. |
| Scanning Duration | ≤ 60 min per cell (typical) | Timed experiments, viability stains | Prolonged scanning: Photothermal/mechanical stress. |
Protocol: Live-Cell Seeding and AFM Chamber Assembly
Objective: To seed cells onto a functionalized substrate and assemble the sample in the AFM fluid cell while maintaining sterility and viability. Materials: Trypsin-EDTA, complete cell culture medium, CO₂-independent imaging medium (e.g., Leibovitz's L-15), AFM fluid cell, vacuum grease, cell viability dye (e.g., Calcein AM). Procedure:
- Cell Harvesting: Harvest sub-confluent cells using standard trypsinization protocol. Neutralize trypsin with complete medium.
- Seeding: Centrifuge, resuspend cells in complete medium at a density of 50,000 - 100,000 cells/mL. Seed onto the prepared substrate and incubate (37°C, 5% CO₂) for the adhesion time determined for your cell line (typically 4-24 hours).
- Pre-Assembly Viability Check (Optional): Replace medium with imaging medium containing 1 µM Calcein AM. Incubate 30 min. Image with fluorescence microscopy to confirm >95% viability.
- AFM Chamber Assembly: a. Rinse the cell-seeded substrate gently with pre-warmed (37°C) imaging medium. b. Apply a thin bead of vacuum grease to the O-ring groove of the fluid cell. c. Invert the fluid cell and carefully lower it onto the substrate, ensuring cells are centered. d. Apply gentle, even pressure to seal. e. Fill the fluid cell inlet port with pre-warmed imaging medium, ensuring no air bubbles are trapped in the liquid path. f. Mount the assembled cell onto the AFM stage pre-equilibrated to 37°C.
The Scientist's Toolkit: Research Reagent Solutions
Table 3: Essential Materials for Live-Cell AFM Sample Preparation
| Item | Function & Rationale |
|---|---|
| #1.5 Glass Coverslips (25 mm) | Optimal thickness for correlative optical microscopy (corrected objectives). Provides a rigid, flat base. |
| Poly-L-Lysine Solution (0.01%) | Positively charged polymer for non-specific electrostatic enhancement of cell adhesion to glass/silicon. |
| Fibronectin, Bovine Plasma | Key ECM protein. Promotes specific, integrin-mediated adhesion and signaling for many cell types. |
| APTES (Silane Coupling Agent) | Creates a reactive amine layer on mica/SiO₂ for covalent tethering of ECM proteins. |
| Leibovitz's L-15 Medium | CO₂-independent imaging medium. Maintains pH with air equilibrium, eliminating the need for a gas chamber. |
| Calcein AM Viability Dye | Cell-permeant esterase substrate. Live cells convert it to fluorescent calcein (green), indicating metabolic activity. |
| Heated AFM Stage with Petri Dish Heater | Maintains physiological temperature (37°C) throughout scanning to preserve native cell function. |
| Liquid Cell with O-ring Seal | Encloses sample in a controlled liquid environment, preventing evaporation and contamination. |
Experimental Workflow and Signaling Pathways
Title: Workflow for Live-Cell AFM Sample Preparation
Title: Cell Adhesion Pathway and AFM Interaction
A Practical Protocol for Live Cell AFM Imaging in Buffer or Culture Media
Live-cell Atomic Force Microscopy (AFM) in liquid environments represents a transformative approach in biophysical research, enabling the direct, real-time observation of cellular morphology, mechanics, and dynamics under near-physiological conditions. This protocol is framed within a broader thesis that advocates for the standardization of liquid-phase AFM to bridge the gap between high-resolution nanostructural data and functionally relevant cellular states. For drug development, this allows for the direct assessment of compound effects on cell membrane integrity, stiffness, and receptor dynamics, providing quantitative biophysical endpoints complementary to conventional assays.
Key Research Reagent Solutions and Materials
Table 1: Essential Materials for Live-Cell AFM in Liquid
| Item | Function/Brief Explanation |
|---|---|
| AFM with Liquid Cell | A scanner and fluid cell compatible with inverted optical microscopy. Enables imaging in liquid without sample drift. |
| Cantilevers (Biolever Mini, BL-AC40TS) | Sharp, low spring constant (≈0.1 N/m) probes. Minimize cell damage while maintaining resolution. |
| Temperature Control Stage | Maintains cells at 37°C and 5% CO₂ for prolonged culture media imaging. Critical for viability. |
| Cell Culture Media (e.g., CO₂-Independent Media) | Prevents pH drift during imaging outside a CO₂ incubator. Contains necessary nutrients and buffers. |
| Imaging Buffer (e.g., PBS, HEPES) | Simple salt solution for controlled experiments without metabolic variables. |
| Functionalized Probes (e.g., PEG-tip, ConA-tip) | For force spectroscopy; PEG spacer reduces unspecific binding, ConA binds glycoproteins. |
| Petri Dish with Glass Bottom (35mm) | Provides optical clarity for correlative light microscopy and a flat substrate for AFM scan. |
| Cell-Compatible Adhesive (e.g., Cell-Tak) | Promotes weak cell adhesion, preventing detachment during scanning but not mimicking rigid substrates. |
| Antibiotics/Antimycotics | Added to media for long-term (>1 hour) imaging to prevent contamination. |
Detailed Experimental Protocol
Sample Preparation
Objective: To immobilize live cells weakly on a substrate compatible with buffer or culture media.
- Substrate Coating: Apply 20-50 µL of Cell-Tak (diluted per manufacturer's instructions) to a 35mm glass-bottom dish. Incubate for 20 minutes at room temperature. Rinse twice with sterile water.
- Cell Seeding: Trypsinize and resuspend cells (e.g., HEK293, fibroblasts) in their appropriate culture medium. Seed sparsely (≈ 30-40% confluency) onto the coated dish. Allow cells to adhere for 15-30 minutes in the incubator.
- Media Exchange: For imaging in culture media, replace with 2 mL of fresh, pre-warmed, CO₂-independent medium. For imaging in buffer, gently rinse cells twice with pre-warmed PBS or HEPES (pH 7.4), then add 2 mL of the chosen buffer.
- Dish Mounting: Securely mount the dish onto the AFM temperature control stage. Allow the system to thermally equilibrate for 15 minutes before probe engagement.
AFM Setup and Cantilever Calibration
- Cantilever Selection & Mounting: Use a silicon nitride cantilever with a nominal spring constant of 0.07-0.1 N/m. Clean the cantilever holder and chip with ethanol and plasma clean for 5 minutes if possible.
- Spring Constant Calibration: Perform thermal tune calibration in air prior to liquid immersion to determine the precise spring constant (k) using the AFM software's built-in routine.
- Liquid Immersion: Carefully lower the cantilever holder into the liquid, avoiding bubbles. Allow the deflection signal to stabilize (≈10 min).
- Optical Lever Sensitivity (OLS): Engage on a clean area of the bare glass substrate and perform a force-distance curve to determine the OLS (in nm/V) in liquid.
Imaging Parameters for Live Cells
Objective: To achieve stable imaging with minimal perturbation to cell viability.
Table 2: Recommended AFM Imaging Parameters
| Parameter | Setting for Morphology (Contact Mode) | Setting for Soft Tapping Mode* |
|---|---|---|
| Scan Size | 20 x 20 µm to 50 x 50 µm | 20 x 20 µm to 50 x 50 µm |
| Resolution | 256 x 256 or 512 x 512 pixels | 256 x 256 pixels |
| Scan Rate | 0.5 - 1.0 Hz | 0.3 - 0.6 Hz |
| Setpoint | Maintain constant force < 0.5 nN | Amplitude setpoint ≈ 85-90% of free amplitude |
| Feedback Gains | Proportional: 0.5-1.0, Integral: 0.5-2.0 | Proportional: 0.3-0.6, Integral: 0.5-1.5 |
| Operating Temperature | 37°C | 37°C |
*Note: For very soft cells, Tapping Mode in liquid (AC mode) is preferred to reduce lateral shear forces.
- Engagement: Position the probe above a cell periphery. Engage using low setpoint/force parameters.
- Optimization: Start with a small scan area (e.g., 10x10 µm). Adjust scan rate and gains to achieve stable tracking with minimal noise. Increase area gradually.
- Time-Lapse Imaging: For dynamics, initiate sequential scanning. Limit total duration to 60-90 minutes for optimal viability in buffer.
Cell Viability Validation Protocol (Post-Imaging)
- Staining: Add 2 µM Calcein AM (viability dye) and 1 µM Ethidium homodimer-1 (death dye) directly to the imaging dish.
- Incubation: Incubate for 15-30 minutes at 37°C.
- Analysis: Using correlative epifluorescence, count calcein-positive (live, green) and ethidium-positive (dead, red) cells in the scanned vs. unscanned regions. Viability should be >85% for a valid experiment.
Data Presentation: Quantitative Metrics
Table 3: Representative Quantitative Data from Live-Cell AFM
| Cell Type | Imaging Medium | Measured Parameter | Typical Value (Mean ± SD) | Biological Insight |
|---|---|---|---|---|
| MDCK II | DMEM (+HEPES) | Young's Modulus (Apparent) | 1.2 ± 0.4 kPa | Baseline epithelial stiffness in full media. |
| HUVEC | PBS Buffer | Membrane Roughness (Rq) | 8.5 ± 2.1 nm | Topographic stability in non-nutritive buffer decreases over time. |
| Primary Neuron | Neurobasal Media | Process Height | 152 ± 35 nm | High-resolution mapping of neurite structures. |
| MCF-7 | Leibovitz's L-15 | Adhesion Force (ConA probe) | 45 ± 12 pN | Quantification of glycoprotein binding dynamics. |
| Cardiomyocyte | Tyrode's Solution | Beat-Induced Vertical Displacement | 300 ± 50 nm | Correlative contractility measurement. |
Workflow and Pathway Diagrams
Diagram Title: Live-Cell AFM Experimental Workflow
Diagram Title: Linking AFM Data to Biological Pathways and Thesis
Within the broader thesis on Atomic Force Microscopy (AFM) for live cell imaging in liquid, this document details application notes and protocols for quantifying key nanomechanical properties: elasticity (Young's modulus), adhesion, and viscoelasticity. These parameters are critical biomarkers for understanding cell state, pathology (e.g., cancer metastasis), and drug response in physiological conditions.
Key Mechanical Properties & Quantitative Data
The following table summarizes typical values and significance of measured properties.
Table 1: Typical Nanomechanical Properties of Mammalian Cells
| Cell Type / Condition | Young's Modulus (Elasticity) [kPa] | Adhesion Force [pN] | Apparent Viscosity [kPa·s] | Key Measurement Technique | Biological Significance |
|---|---|---|---|---|---|
| Normal Epithelial (e.g., MCF-10A) | 1.5 - 3.0 | 50 - 200 | 0.5 - 2.0 | Force Spectroscopy (FS) | Baseline for healthy, adherent phenotype. |
| Metastatic Cancer (e.g., MDA-MB-231) | 0.5 - 1.2 | 100 - 400 | 0.2 - 1.0 | FS & Stress Relaxation | Softer, more adhesive, less viscous cells promote invasiveness. |
| Cytoskeletal Disrupted (e.g., Latrunculin A) | 0.3 - 0.8 | 20 - 100 | 0.1 - 0.5 | FS & Creep Compliance | Confirms actin's dominant role in stiffness. |
| Drug-Treated (e.g., Blebbistatin) | 0.7 - 1.5 | 80 - 180 | 0.8 - 2.5 | FS & Dynamic Oscillation | Inhibits myosin II, reducing active tension. |
| Stem Cells (Undifferentiated) | 0.8 - 2.0 | 150 - 300 | 0.3 - 1.2 | FS | Softer cells often associated with pluripotency. |
| Activated Immune Cells | 2.5 - 5.0 | 200 - 500 | 1.5 - 3.0 | FS & Stress Relaxation | Stiffening upon activation for effector functions. |
Experimental Protocols
Protocol 1: AFM Force Spectroscopy for Elasticity & Adhesion on Live Cells
Objective: To measure the apparent Young's modulus and adhesion forces of single live cells in culture medium.
Materials & Reagents:
- AFM System: Bio-AFM with liquid cell and temperature controller.
- Cantilevers: Silicon nitride probes with colloidal tip (e.g., 5 µm diameter sphere). Typical spring constant: 0.01 - 0.1 N/m.
- Cell Culture: Adherent cells grown on 35 mm Petri dishes or glass-bottom dishes.
- Imaging Buffer: CO2-independent medium or PBS with 10 mM HEPES, pH 7.4.
- Calibration Tools: Standard for spring constant (thermal tune) and deflection sensitivity (on rigid substrate).
Procedure:
- Probe Functionalization (Optional for specific adhesion): Coat colloidal tip with desired protein (e.g., fibronectin, 10 µg/mL, 1 hr) for receptor-specific adhesion measurements.
- System Setup: Mount dish on AFM stage, add pre-warmed imaging buffer. Mount cantilever and align laser.
- In-liquid Calibration: Perform thermal tune to determine spring constant (
k). Record force curve on a clean, rigid area of the dish to get deflection sensitivity (InvOLS). - Cell Location: Use optical microscope or contact mode AFM imaging at low force to locate a cell of interest.
- Force Curve Acquisition:
- Position tip over the cell's peri-nuclear region.
- Set approach/retract parameters: 5-10 µm ramp size, 1-2 µm/s velocity, 0.5-1 nN trigger force.
- Acquire a minimum of 50-100 curves per cell at multiple points.
- Data Analysis:
- Adhesion: Calculate from the minimum force in the retract curve.
- Elasticity: Fit the extend curve's contact region (typically last 200-500 nm) with the Hertz/Sneddon model for a spherical indenter.
Protocol 2: Stress Relaxation Test for Viscoelasticity
Objective: To characterize the time-dependent mechanical response by applying a constant strain and monitoring force decay.
Procedure:
- Follow Protocol 1 steps 1-4.
- Ramp Programming: Use a two-segment ramp.
- Segment 1: Approach at 5 µm/s until a defined setpoint force (e.g., 0.5 nN) is reached.
- Segment 2: Immediately hold the piezo at the position where the setpoint was triggered for a dwell time (
t_hold) of 10-60 seconds.
- Data Recording: Record force versus time during the entire hold period.
- Data Analysis: Fit the force relaxation curve
F(t)to a standard linear solid (SLS) or power-law rheology model (e.g.,F(t) = F0 * t^(-β)) to extract characteristic relaxation times and fluidity indices.
Protocol 3: Dynamic Frequency Sweep (Optional, Advanced)
Objective: To measure the complex modulus (G* = G' + iG'') over a frequency range.
Procedure:
- Position the tip on the cell as in Protocol 1.
- Superimpose a small oscillatory displacement (2-5 nm amplitude) on the quasi-static ramp.
- Sweep the oscillation frequency (e.g., 0.1 - 100 Hz) while recording the amplitude and phase lag of the cantilever's response.
- Analyze using the Johnson-Kendall-Roberts (JKR) or Hayes-based model to calculate storage modulus
G'(elastic component) and loss modulusG''(viscous component).
The Scientist's Toolkit
Table 2: Essential Research Reagent Solutions for AFM Cell Mechanics
| Item | Function & Relevance |
|---|---|
| Bio-AFM with Liquid Cell & Heated Stage | Enables stable, high-resolution imaging and force measurement under physiological conditions (37°C, liquid). |
| Colloidal Probe Cantilevers (e.g., 5µm SiO2 sphere) | Provides well-defined geometry for quantitative modeling (Hertz), reduces local stress concentrations vs. sharp tips. |
| Functionalization Reagents (Sulfo-SANPAH, BS3, PEG linkers) | For covalent coating of tips with proteins/ligands to study specific receptor-mediated adhesion. |
| Pharmacological Modulators (e.g., Latrunculin A, Blebbistatin, Jasplakinolide) | Tools to disrupt or stabilize actin/myosin cytoskeleton, validating mechanical origins of measured signals. |
| Matrices for Cell Culture (Collagen I, Fibronectin, Poly-L-Lysine) | Standardizes substrate stiffness and chemistry to control baseline cell mechanical state. |
| Fluorescent Dyes (e.g., SiR-Actin, Cell Tracker) | For correlative AFM-fluorescence microscopy, linking mechanics to cytoskeletal structure. |
| Advanced Analysis Software (e.g., AtomicJ, PUNIAS, custom MATLAB/Python) | Essential for batch-processing force curves, applying contact models, and statistical analysis. |
Visualized Pathways and Workflows
Application Notes
Dynamic process imaging via Atomic Force Microscopy (AFM) enables the quantitative, high-resolution visualization of live cellular activities under physiological conditions. This approach is central to a broader thesis on AFM for live-cell imaging in liquid, which posits that correlative AFM-optical microscopy is indispensable for linking nanoscale topographical and mechanical dynamics with specific molecular events. For drug development, this allows for the direct assessment of compound effects on fundamental cellular processes in real time.
Key Insights:
- Membrane Remodeling: AFM force-volume mapping and fast imaging (>1 fps) reveal that cholesterol depletion (e.g., via MβCD) increases membrane stiffness (Young's modulus increase of ~50-200%) and disrupts the formation of ordered lipid domains, directly impeding endocytic initiation.
- Endocytosis: Clathrin-mediated endocytosis (CME) sites exhibit distinct topographical depressions (~100-200 nm diameter) and increased lateral stiffness. Pharmacological inhibition (e.g., Dynasore, Pitstop 2) reduces pit formation rates by 70-80% and stalls pit dynamics, which can be quantified via time-lapse AFM.
- Cell Migration: Leading-edge dynamics are characterized by cyclical protrusions (lamellipodia) and retractions. AFM maps show these areas are significantly softer (e.g., 1-5 kPa) than the cell body (10-20 kPa). Disruption of actin polymerization (e.g., with Latrunculin A) reduces protrusion velocity by over 90% and homogenizes mechanical contrast.
Table 1: Quantitative Effects of Pharmacological Interventions on Dynamic Processes
| Cellular Process | Intervention/Agent | Key Measurable Parameter | Control Value | Post-Intervention Value | Implication |
|---|---|---|---|---|---|
| Membrane Stiffness | Methyl-β-Cyclodextrin (MβCD) | Apparent Young's Modulus | 10 - 50 kPa (cell-type dependent) | Increase by 50 - 200% | Cholesterol is critical for membrane fluidity and softness. |
| Clathrin-Mediated Endocytosis | Dynasore (Dynamin Inhibitor) | Endocytic Pit Formation Rate | 0.5 - 2 pits/µm²/min | Reduction of 70 - 80% | Dynamin GTPase activity is essential for scission. |
| Actin-Driven Migration | Latrunculin A (Actin Depolymerizer) | Leading Edge Protrusion Velocity | 5 - 15 µm/min | Reduction > 90% | Actin polymerization is the primary motor for membrane protrusion. |
| Focal Adhesion Maturation | Y-27632 (ROCK Inhibitor) | Mature Focal Adhesion Size | > 5 µm² (length) | Significant reduction, more transient | Rho/ROCK signaling stabilizes adhesions for traction. |
Experimental Protocols
Protocol 1: Correlative AFM-Fluorescence Imaging of Clathrin-Mediated Endocytosis in Live Cells
Objective: To simultaneously visualize the topographical formation of clathrin-coated pits (CCPs) and the recruitment of fluorescently tagged clathrin light chain (CLC).
Materials: See "The Scientist's Toolkit" below. Cell Preparation:
- Culture HeLa or Cos-7 cells on 35 mm glass-bottom dishes.
- Transfect with a plasmid encoding GFP-tagged clathrin light chain (GFP-CLCa) using a standard transfection reagent (e.g., Lipofectamine 3000) 24-48 hours prior to imaging.
- Prior to imaging, replace medium with pre-warmed, CO₂-independent live-cell imaging medium.
AFM-Fluorescence Setup:
- Mount dish on a correlative AFM-fluorescence microscope stage equipped with environmental control (37°C).
- Locate a GFP-expressing cell using epifluorescence with low-intensity illumination.
- Engage a soft cantilever (k ~ 0.1 N/m) in contact or gentle tapping mode in liquid.
- Synchronization: Set the fluorescence microscope to acquire a GFP image (1-2 sec exposure) immediately following each completed AFM scan (e.g., 256x256 pixels, 1-2 Hz line rate).
Data Acquisition & Analysis:
- Record time-lapse series for 10-15 minutes.
- Align AFM height images and fluorescence channels using fiduciary markers or software-based correlation.
- Identify nascent CCPs in fluorescence; measure corresponding pit depth and width in the AFM height channel over time.
- Quantify the temporal delay between fluorescence signal appearance and topographical deformation.
Protocol 2: Mapping Spatiotemporal Mechanics during Cell Migration
Objective: To acquire high-resolution maps of Young's modulus at the leading edge of a migrating cell.
Materials: See "The Scientist's Toolkit" below. Cell Preparation:
- Seed NIH/3T3 fibroblasts at low density on a collagen-I coated dish 24 hours before the experiment to promote spreading and migration.
- Serum-starve cells for 4-6 hours, then add fresh medium with 10% FBS 1 hour before imaging to stimulate migration.
Force-Volume Imaging:
- Engage a pyramidal-tipped, soft cantilever (k ~ 0.06 N/m) in liquid.
- In the software, define a force-volume grid (e.g., 32x32 points) over a region of interest (e.g., 20x20 µm) encompassing the leading lamella.
- Set force curve parameters: extend/retract velocity 5-10 µm/s, maximum trigger force 0.5-1 nN, sampling rate > 2 kHz.
- Acquire the force map. This may take 5-15 minutes depending on grid size and speed.
Data Processing:
- Use the AFM analysis software to batch-process all force curves. Fit the retract curve's contact region with the Hertz/Sneddon model for a pyramidal tip.
- Generate a spatial map of Young's modulus.
- Correlate stiff and soft regions with optical phase-contrast images to identify areas of active protrusion, stable adhesion, or retraction.
The Scientist's Toolkit
| Research Reagent / Material | Function in Experiment |
|---|---|
| Soft Cantilevers (e.g., MLCT-Bio, Biolever Mini) | Essential for live-cell imaging. Low spring constant (0.01 - 0.1 N/m) minimizes cell damage. Silicon nitride tips are standard. |
| Glass-Bottom Culture Dishes (No. 1.5 Coverslip) | Provide optical clarity for correlative fluorescence microscopy and a flat substrate for AFM scanning. |
| Live-Cell Imaging Medium (CO₂-Independent) | Maintains pH without a CO₂ incubator during imaging, crucial for long-term viability on the AFM stage. |
| GFP-Clathrin Light Chain (CLC) Plasmid | Fluorescent reporter to genetically label clathrin-coated structures, enabling correlation with AFM topography. |
| Dynasore | Cell-permeable, reversible inhibitor of dynamin GTPase activity. Used to acutely block the scission stage of CME. |
| Methyl-β-Cyclodextrin (MβCD) | Extracts cholesterol from the plasma membrane. Used to disrupt lipid raft integrity and alter membrane mechanics. |
| Latrunculin A | Binds actin monomers, preventing polymerization. Used to disrupt the actin cytoskeleton and halt cell migration. |
| Poly-L-Lysine or Collagen-I Coating | Treats dish surfaces to enhance cell adhesion and spreading, which is critical for stable AFM imaging. |
Visualization Diagrams
Title: Correlative AFM-Fluorescence Live Imaging Workflow
Title: Signaling Pathway for Actin-Driven Membrane Protrusion
Application Notes
Atomic Force Microscopy (AFM) enables the quantitative, real-time monitoring of dynamic biomechanical and morphological changes in living cells exposed to drug candidates or toxins. This provides functional data complementary to molecular assays, offering insights into mechanisms of action, off-target effects, and cytotoxicity long before classical endpoint assays.
Key Applications:
- Cardiotoxicity Screening: Monitoring the progressive softening and structural disassembly of cardiomyocytes exposed to chemotherapeutic agents (e.g., doxorubicin) serves as an early functional biomarker of toxicity.
- Oncology Drug Efficacy: Measuring the increased stiffness of cancer cells (e.g., in response to microtubule-stabilizing agents) correlates with cytoskeletal engagement and apoptotic induction.
- Neurotoxicity & Neuroprotection: Quantifying neurite retraction or soma softening in neural cell models upon toxin exposure (e.g., β-amyloid peptides), and its inhibition by neuroprotective compounds.
- Receptor Signaling Dynamics: Using functionalized AFM tips to map and quantify the binding kinetics (on-rate, off-rate, affinity) of drug-target interactions (e.g., ligand-receptor) on live cell surfaces.
Quantitative Data Summary
Table 1: Representative AFM-Measured Cellular Responses to Therapeutics/Toxins
| Cell Type | Stimulus (Concentration) | Exposure Time | Key AFM Parameter Change | Magnitude of Change | Biological Interpretation |
|---|---|---|---|---|---|
| HL-1 Cardiomyocyte | Doxorubicin (1 µM) | 60 minutes | Young's Modulus (Elasticity) | Decrease from ~12 kPa to ~4 kPa | Cytoskeletal degradation, early cardiotoxicity. |
| MCF-7 Breast Cancer | Paclitaxel (100 nM) | 90 minutes | Young's Modulus (Elasticity) | Increase from ~2 kPa to ~6 kPa | Microtubule stabilization, apoptosis initiation. |
| PC-12 Neuron | β-amyloid (25-35) oligomers (5 µM) | 120 minutes | Neurite Height / Morphology | Retraction > 50% | Synaptic toxicity, neurite degeneration. |
| HEK293 (overexpressing GPCR) | Agonist ligand (varies) | 2-10 minutes | Adhesion Force (via functionalized tip) | Force decrease of 40-60% | Receptor internalization following activation. |
Table 2: Comparison of AFM with Other Live-Cell Analysis Methods
| Method | Spatial Resolution | Temporal Resolution | Mechanical Data | Throughput | Key Advantage for Drug Discovery |
|---|---|---|---|---|---|
| AFM | Nanometer | Seconds to Minutes | Yes (Direct) | Low | Quantitative nanomechanics on living cells. |
| Fluorescence Microscopy | Diffraction-limited (~200 nm) | Milliseconds to Seconds | No (Inferred) | Medium-High | High-speed molecular tracking. |
| Impedance-Based (e.g., RTCA) | N/A (Population average) | Minutes | No | High | Label-free, real-time population kinetics. |
| Super-Resolution Microscopy | < 50 nm | Seconds to Minutes | No | Low | Molecular-scale structural detail. |
Experimental Protocols
Protocol 1: AFM-Based Cardiotoxicity Screening of Cardiomyocytes
Objective: To quantify the real-time loss of cellular stiffness in adherent cardiomyocytes as an early indicator of drug-induced cardiotoxicity.
Materials:
- Cell Culture: HL-1 cardiomyocyte cell line, supplemented Claycomb medium.
- AFM System: Bruker Dimension FastScan or JPK NanoWizard 4, equipped with a liquid cell and temperature controller (set to 37°C).
- Cantilevers: Silicon nitride cantilevers (e.g., Bruker MLCT-Bio-DC), nominal spring constant 0.03 N/m, calibrated via thermal tune.
- Drug Solution: Doxorubicin hydrochloride, prepared at 1 mM stock in DMSO, diluted to 1 µM final in pre-warmed, pH-balanced imaging medium (e.g., Leibovitz's L-15).
Procedure:
- Cell Preparation: Plate HL-1 cells on fibronectin-coated glass-bottom Petri dishes 48 hours prior. Achieve 70-80% confluency for isolated cells.
- AFM Calibration & Setup: Calibrate the cantilever's spring constant and sensitivity in fluid. Position the dish on the AFM stage and locate a healthy, spread cardiomyocyte using the integrated optical microscope.
- Baseline Measurement: Engage the cantilever on the cell soma (avoiding nucleus). Acquire a force map (e.g., 8x8 grid, 10 µm²) or 5-10 sequential force curves at a single point. Calculate the Young's Modulus using a Hertz/Sneddon model (assuming a Poisson's ratio of 0.5 and a conical tip shape).
- Drug Perfusion & Time-Lapse AFM: Initiate continuous perfusion with pre-warmed imaging medium. Acquire a force curve at a fixed cell position every 60 seconds for 20 minutes to establish a stable baseline. Switch the perfusate to the 1 µM doxorubicin solution without disturbing tip engagement.
- Real-Time Monitoring: Continue acquiring force curves at the same location every 60-120 seconds for 60-120 minutes. Record changes in indentation depth and slope at constant force.
- Data Analysis: For each time point, batch-process force curves to extract Young's Modulus. Plot modulus vs. time. Statistical significance is determined by comparing the mean modulus from the final 10 minutes of drug exposure to the baseline period (paired t-test, p < 0.05).
Protocol 2: Ligand-Receptor Binding Kinetics on Live Cells using Functionalized AFM Tips
Objective: To measure the binding affinity and kinetics of a drug candidate to its membrane-bound receptor on living cells.
Materials:
- Cell Culture: HEK293 cells stably expressing the target receptor (e.g., EGFR).
- AFM System: As above, with precise force control.
- Cantilevers: Sharp, gold-coated silicon nitride cantilevers (e.g., NanoWorld Arrow TL1).
- Functionalization Reagents: PEG linker (e.g., NHS-PEG-Acetal), ligand/drug molecule with primary amine, sodium cyanoborohydride, ethanolamine.
Procedure:
- Tip Functionalization: a. Clean cantilevers in UV-ozone cleaner for 20 minutes. b. Incubate in ethanolamine hydrochloride (to passivate surface) for 1 hour. c. Rinse and incubate in NHS-PEG-Acetal linker solution for 2 hours. d. Rinse and activate the terminal acetal group in citric acid solution. e. Incubate with the amine-containing ligand/drug molecule (50-100 µg/mL) in the presence of sodium cyanoborohydride overnight at 4°C. f. Block remaining aldehydes with ethanolamine. Store in PBS at 4°C.
- Cell Preparation: Plate cells 24 hours prior. Use on the day of experiment at ~50% confluency.
- Binding Force Spectroscopy: a. Calibrate the functionalized cantilever. b. Approach the cell surface at a controlled speed (e.g., 1 µm/s). Upon contact, apply a constant force (200-500 pN) for a defined dwell time (50-500 ms) to allow bond formation. c. Retract the tip at the same speed. Record the force-distance curve. d. Repeat 100-500 times at different locations on the cell.
- Blocking Control: Repeat step 3 after pre-incubating cells with a high concentration (10x Kd) of soluble ligand for 30 minutes. Specific binding events should vanish.
- Data Analysis: Identify unbinding events as peaks in the retraction curve. Plot adhesion probability vs. dwell time to obtain the on-rate (kon). Plot rupture force distribution; its mode increases with log(retraction speed), allowing calculation of the *off-rate* (koff) via dynamic force spectroscopy models. The dissociation constant Kd = koff / kon.
The Scientist's Toolkit
Table 3: Key Research Reagent Solutions for AFM Live-Cell Drug Response Assays
| Item | Function / Application |
|---|---|
| Temperature-Controlled Liquid Cell | Maintains cells at 37°C and physiological pH during prolonged AFM imaging in culture medium. |
| Bio-Lever AFM Cantilevers (Low k) | Ultra-soft cantilevers (0.01-0.1 N/m) for sensitive force measurement without damaging live cells. |
| Polyethylene Glycol (PEG) Crosslinkers | Spacer molecule for tip functionalization; separates ligand from tip to allow natural receptor binding orientation. |
| Leibovitz's L-15 Imaging Medium | CO2-independent medium for stable pH during open-air AFM experiments. |
| Fibronectin / Poly-L-Lysine | Coating reagents to promote strong cell adhesion to substrates, preventing detachment during scanning/perfusion. |
| Pharmacological Agonists/Antagonists | Tool compounds for validating pathway-specific mechanical responses (e.g., Cytochalasin D for actin disruption). |
Visualizations
Title: AFM Detects Cytoskeleton-Driven Drug Response
Title: Real-Time AFM Cardiotoxicity Assay Protocol
Within the broader thesis on advancing Atomic Force Microscopy (AFM) for live cell imaging in liquid environments, correlative AFM-Fluorescence Microscopy (AFM-FM) emerges as a transformative multimodal platform. It simultaneously provides quantitative nanomechanical mapping from AFM and specific molecular localization from FM. This integration is critical for drug development, enabling researchers to link structural and mechanical phenotypes, such as membrane stiffness or receptor clustering, directly to biochemical signaling events in real time.
Key Applications and Quantitative Insights
Correlative AFM-FM elucidates complex cellular processes. Key applications include studying mechanotransduction pathways, receptor-ligand interactions, and the real-time effects of drug candidates on cell mechanics and morphology.
Table 1: Quantitative Data from Correlative AFM-FM Studies
| Cellular Process/ Target | AFM Measurement | Fluorescence Probe/Readout | Key Quantitative Finding | Biological/Drug Development Insight |
|---|---|---|---|---|
| EGFR Activation | Apparent Young's Modulus (Elasticity) | Anti-EGFR Alexa Fluor 488 | Stiffness decreased by 40-60% (from ~2.5 kPa to ~1.0 kPa) within 5 min of EGF stimulation. | Mechanical softening correlates with receptor internalization and downstream signaling initiation. |
| Cytoskeletal Drug Effect | Cortical Tension | Lifeact-mRuby (F-actin) | Treatment with Latrunculin-A (1 µM) reduced tension by ~70% and increased membrane roughness by 200%. | Directly quantifies the efficacy of actin-disrupting compounds on cell mechanical integrity. |
| Apoptosis Induction | Cell Height & Adhesion | Annexin V-FITC (Phosphatidylserine exposure) | Early apoptotic cells (Annexin V+) showed a 30% decrease in height and a 50% increase in adhesion force. | Provides multimodal biomarkers for early-stage cell death in response to chemotherapeutics. |
| Nuclear Mechanoresponse | Nuclear Indentation Modulus | GFP-Lamin A/C | Increased lamin A/C expression raised nuclear stiffness from ~5 kPa to ~12 kPa. | Links nuclear structural protein expression to resistance to mechanical stress, relevant in metastasis. |
Experimental Protocols
Protocol 1: Sample Preparation for Live-Cell Correlative AFM-FM
Objective: To prepare cells for simultaneous AFM mechanical interrogation and fluorescence observation.
- Cell Seeding: Seed cells (e.g., HeLa, MCF-7) onto 35mm glass-bottom dishes (No. 1.5 coverglass) at 50-70% confluence 24h prior.
- Fluorescence Labeling: For live-cell imaging, transfert cells with a fluorescent construct (e.g., GFP-tagged protein) or incubate with a vital dye (e.g., 50 nM MitoTracker Deep Red for 30 min). For fixed-cell imaging, proceed with standard immunofluorescence staining post-experiment.
- Buffer Exchange: Prior to mounting, replace culture medium with a suitable imaging buffer (e.g., CO₂-independent medium or PBS with glucose) to maintain pH and minimize background fluorescence.
- Mounting: Securely mount the dish onto the combined AFM-FM stage. Ensure the objective is correctly immersed if using a water-immersion lens.
Protocol 2: Integrated AFM-FM Workflow for Receptor Activation Studies
Objective: To correlate EGFR membrane dynamics with changes in local cellular stiffness.
- Initial FM Localization: Using the fluorescence channel, identify cells expressing EGFR-GFP or stained for EGFR. Focus on the cell periphery.
- AFM Cantilever Selection & Calibration: Use a soft, tipless cantilever (e.g., MLCT-Bio-DC, k ≈ 0.03 N/m). Perform thermal tune calibration in liquid to determine exact spring constant and sensitivity.
- Correlative Alignment: Use the optical microscope's view to approach the cantilever to a region of interest (ROI) adjacent to a fluorescent cluster. Utilize registration markers on the dish or software-based coordinate mapping for precise correlation.
- Baseline AFM Measurement: Acquire a force-volume map (e.g., 10x10 points over a 10x10 µm area) or perform single-point force-distance curves on the selected ROI. Record baseline elasticity.
- Stimulation & Timelapse Acquisition: Add EGF ligand (e.g., 100 ng/mL) directly to the dish. Initiate a correlated timelapse: acquire a fluorescence image (e.g., every 30s) and an AFM force map (e.g., every 2 min) at the same XY coordinates for 15-20 minutes.
- Data Correlation: Analyze the time-series data. Plot fluorescence intensity (receptor clustering/internalization) versus the calculated apparent Young's Modulus from force curves.
Visualizations
Diagram Title: Correlative AFM-FM Live-Cell Experiment Workflow
Diagram Title: Linking AFM & FM Data to Live-Cell Biology
The Scientist's Toolkit: Essential Research Reagents & Materials
Table 2: Key Reagents and Materials for Correlative AFM-FM Experiments
| Item | Function/Description | Example Product/Criteria |
|---|---|---|
| Glass-Bottom Culture Dishes | Provides optical clarity for high-resolution FM and a flat surface for AFM scanning. | MatTek P35G-1.5-14-C or ibidi µ-Dish 35 mm, high, #1.5 coverglass. |
| Soft, Tipless Cantilevers | For force spectroscopy on live cells to prevent damage and ensure accurate mechanical data. | Bruker MLCT-Bio-DC (k~0.03 N/m) or Olympus BL-AC40TS-C2 (k~0.09 N/m). |
| Fluorescent Biosensors/Dyes | For specific labeling of cellular structures (actin, mitochondria, nuclei) or processes (Ca²⁺, apoptosis). | Lifeact-FP for actin; MitoTracker for mitochondria; Annexin V-FITC for apoptosis; Fluo-4 AM for calcium. |
| Live-Cell Imaging Buffer | Maintains cell viability and pH during experiments outside a CO₂ incubator. | Leibovitz's L-15 Medium or PBS supplemented with 10 mM glucose and 1% FBS. |
| Correlative Software Module | Enables precise overlay of AFM and FM data coordinates and synchronized acquisition. | Bruker JPK DirectOverlay, Asylum Research MFP-3D ORION with IGOR Correlator, or custom LabVIEW/µManager scripts. |
| Calibration Standards | For verifying AFM scanner dimensions and cantilever spring constants. | Bruker TGXYZ1/2 grid for XY; PS/PDMS reference samples for force constant; gratings for optical resolution. |
Solving Common Challenges: Tips for High-Quality, Reproducible Live Cell Data
In the context of Atomic Force Microscopy (AFM) for live cell imaging in liquid, achieving high-resolution, stable data is paramount. Mechanical drift and thermal noise are the primary adversaries, obscuring true biological dynamics and limiting quantitative analysis. This application note details proven strategies and protocols to mitigate these effects, enabling robust nanoscale observation of cellular processes in physiological environments.
Quantitative Impact of Drift and Noise
The following table summarizes key sources of instability and their typical magnitudes in liquid imaging.
Table 1: Common Sources of Instability in Liquid AFM
| Source | Typical Magnitude | Temporal Characteristic | Primary Impact |
|---|---|---|---|
| Thermal Drift (Scanner) | 0.5 - 10 nm/min | Slow, logarithmic decay | Image distortion, loss of registration. |
| Thermal Noise (Cantilever) | 0.05 - 0.5 nm RMS (in bandwidth) | High-frequency (>1 kHz) | Vertical and lateral noise floor, obscures fine detail. |
| Fluid Cell Temperature Fluctuation | ±0.1°C can cause >100 nm drift | Medium-to-slow (minutes) | Focal point and sample stage drift. |
| Acoustic/Seismic Noise | Variable, can excite resonances | Broadband (1-100 Hz) | Vertical noise, line artifacts in images. |
Key Stabilization Protocols
Protocol 1: System Thermalization and Drift Minimization
Objective: To reduce low-frequency scanner and stage drift to sub-nanometer per minute levels.
- Pre-equilibration: Assemble the fluid cell and scanner in the AFM at least 2 hours before the experiment. Fill with imaging buffer (e.g., PBS or culture medium) to accelerate thermal coupling.
- Active Temperature Control: Engage the manufacturer's environmental chamber or a custom-built thermal enclosure. Setpoint should be 1-2°C above lab ambient to minimize gradient-driven fluctuations. Stabilize for 45 minutes after reaching setpoint.
- Drift Pre-compensation: Engage the tip on a rigid substrate (e.g., mica or glass) in liquid. Using the AFM software’s drift compensation function, monitor the deflection/height signal for 10-15 minutes. Allow the software to calculate and apply drift correction vectors.
- Verification: Image a calibration grating (e.g., 200 nm pitch) in tapping mode. Capture sequential 1x1 µm images over 30 minutes. Analyze feature positions using cross-correlation to confirm drift is <1 nm/min.
Protocol 2: Passive and Active Thermal Noise Suppression
Objective: To lower the high-frequency noise floor of the cantilever, improving signal-to-noise ratio.
- Cantilever Selection: Use high-resonance frequency, low-spring constant cantilevers (e.g., 20-100 kHz in liquid, k=0.1-0.6 N/m) to minimize Brownian motion amplitude.
- Passive Damping: Employ a soft, vibration-isolation table. For critical low-noise measurements, place the entire AFM inside an acoustic enclosure.
- Active Damping (Where Available): If the instrument is equipped with active noise cancellation (e.g., acoustic, seismic), run the calibration routine with the fluid cell filled. Target noise reduction in the 1-500 Hz band.
- Optimize Feedback Parameters: In contact mode, increase gain to the maximum stable value to track topography. In tapping/peak force tapping, use the highest possible scan frequency compatible with feature resolution to average high-frequency noise.
Experimental Workflow for Stable Live-Cell Imaging
Diagram Title: Workflow for Stabilized Live-Cell AFM
Signaling Pathway Analysis in a Noisy Environment
Studying mechanotransduction (e.g., integrin-mediated signaling) requires exceptional stability to correlate force application with downstream events.
Diagram Title: Integrin Signaling Under AFM Force Probe
The Scientist's Toolkit: Research Reagent Solutions
Table 2: Essential Materials for Stable Liquid AFM Imaging
| Item | Function & Rationale |
|---|---|
| Thermally Stable Fluid Cells | Cells with low coefficient of thermal expansion (e.g., ceramic, specific polymers) minimize drift from thermal coupling with liquid. |
| Bio-compatible Cantilevers (SiN, low-k) | Sharp, soft levers (k~0.1 N/m) with reflective gold coating for high sensitivity in liquid with minimal cell damage. |
| Pre-Cleaned Calibration Gratings (e.g., TiO₂ on glass) | Inert, rigid substrates for pre-experiment drift measurement and system verification in liquid. |
| Temperature Monitoring Micro-sensor | Small, accurate sensor to place near sample for real-time monitoring of local buffer temperature. |
| Advanced Anti-vibration Platform | Multi-stage passive/active isolator specifically tuned for low-frequency (<10 Hz) seismic and acoustic noise. |
| Photo-thermal Cantilever Drive Kit | An alternative to piezo-acoustic excitation; reduces fluid-coupled noise and spurious cantilever excitations in liquid. |
| Live-Cell Compatible, Low-Fluorescence Buffer | Chemically-defined imaging medium that minimizes evaporation, bubble formation, and optical interference for correlative microscopy. |
| Software-based Drift Correction Tool | Post-processing package capable of frame-by-frame correlation and subtraction of linear/non-linear drift from time-lapse data. |
Within the critical research area of Atomic Force Microscopy (AFM) for live cell imaging in liquid, cantilever selection is a foundational determinant of experimental success. Imaging soft, dynamic, and mechanically heterogeneous biological samples like living cells requires a meticulous balance between force sensitivity, spatial resolution, and minimal invasiveness. This guide provides detailed application notes and protocols for selecting and applying cantilevers optimized for probing soft samples in physiological environments, directly supporting thesis research focused on elucidating cellular mechanics and real-time molecular interactions in drug development contexts.
Core Principles: Cantilever-Sample Interaction in Liquid
The interaction between a cantilever tip and a soft, hydrated sample is governed by the spring constant (k), resonance frequency, tip geometry, and the presence of coatings. For live cells, the applied force must be below the nanonewton threshold to avoid indentation or stimulation of physiological responses. The spring constant must be low enough to detect minute forces but high enough to overcome adhesion and hydrodynamic drag in liquid.
Quantitative Parameter Tables
Table 1: Cantilever Spring Constant & Parameter Guidelines for Live Cell AFM
| Sample Type / Measurement | Target Spring Constant (k) | Resonance Frequency in Liquid (approx.) | Recommended Tip Geometry | Key Coating / Functionalization |
|---|---|---|---|---|
| Live Cell Topography | 0.01 - 0.1 N/m | 5 - 30 kHz | Sharp tip (r ~ 10-20 nm) or Super-sharp tip (r < 10 nm) for high-res | Silinization for hydrophilicity; Non-reactive (e.g., PEG) |
| Cell Adhesion / Single-Molecule Force Spectroscopy | 0.006 - 0.06 N/m | 2 - 15 kHz | Conical or Sharp tip | Specific: Streptavidin, Ni-NTA, Antibody; Linker: PEG |
| Young's Modulus Mapping (Force-Volume) | 0.01 - 0.06 N/m | 5 - 20 kHz | Spherical tip (r = 1-5 µm) for defined contact | Non-coated Si(3)N(4) or silica; Carbon coating for conductivity |
| Membrane Protein Dynamics | 0.02 - 0.08 N/m | 10 - 25 kHz | Ultra-sharp tip (r < 5 nm) | Functionalized with specific ligands or antibodies |
Table 2: Common AFM Cantilever Types for Soft Samples
| Model (Example) | Material | Typical k (N/m) | f₀ in Air (kHz) | f₀ in Liquid (kHz) | Tip Type | Primary Application in Cell Imaging |
|---|---|---|---|---|---|---|
| MLCT-Bio-DC | Si(3)N(4) | 0.03 | 25 | ~6 | Biolever Mini, sharp | Standard live cell imaging, low force |
| PNP-TR | Si(3)N(4) | 0.08 | 67 | ~17 | Triangular, sharp | High-res imaging, faster scanning |
| HQ:CSC38 | Si | 0.03 | 10 | ~3 | Super-sharp (r < 10nm) | Ultra-high resolution, membrane structures |
| OTR8 | Si(3)N(4) | 0.15 | 28 | ~7 | Spherical (2.5µm) | Nanomechanical mapping, elastic modulus |
Experimental Protocols
Protocol 1: Calibration of Spring Constant in Liquid for Soft Sample Imaging
Objective: Accurately determine the spring constant (k) and sensitivity of a cantilever in buffer solution prior to cell imaging. Materials: AFM with liquid cell, calibrated cantilever, clean glass slide or dish, PBS or appropriate imaging buffer, thermal calibration software. Procedure:
- Cantilever Mounting: Carefully mount the selected cantilever (e.g., MLCT-Bio-DC) in the holder. Avoid touching the chip or tip.
- Liquid Cell Assembly: Fill the liquid cell with degassed buffer. Insert the cantilever holder, ensuring complete immersion of the cantilever.
- Approach and Engagement: Approach the cantilever to a clean, rigid region of the glass substrate in liquid. Engage gently using low setpoint parameters.
- Thermal Tune Acquisition: With the tip disengaged or lightly in contact, acquire a thermal noise spectrum. Use a frequency range covering at least 3x the expected resonant peak in liquid.
- Analysis: Fit the fundamental resonance peak using the Sader method (pre-calibrated dimensions) or the built-in thermal tune method. The software calculates k based on the equipartition theorem. Record the inverse optical lever sensitivity (InvOLS) from a force curve on the rigid glass.
- Validation: Perform a force curve on the glass to ensure linear compliance region and consistent sensitivity value.
Protocol 2: Functionalization of Cantilever Tips for Specific Ligand Binding Studies on Live Cells
Objective: Coat an AFM tip with a specific ligand (e.g., an RGD peptide) to probe integrin receptors on a live cell surface. Materials: Si(3)N(4) cantilevers (e.g., PNP-TR), PEG linker with NHS ester and maleimide end groups, RGD peptide with cysteine, ethanolamine, PBS. Procedure:
- Cleaning: Plasma clean cantilevers for 5 minutes to create a hydrophilic, reactive surface.
- Aminosilanization: Vapor-phase deposit (3-aminopropyl)triethoxysilane (APTES) for 1 hour to create an amine-terminated surface.
- PEG Linker Attachment: Incubate tips in a 1-10 mM solution of heterobifunctional PEG linker (NHS-PEG-Maleimide) in dimethyl sulfoxide (DMSO) for 2 hours. The NHS ester reacts with surface amines.
- Quenching: Rinse and incubate in 1M ethanolamine solution for 10 minutes to quench unreacted NHS esters.
- Ligand Conjugation: Incubate tips in a 0.1 mM solution of cysteine-terminated RGD peptide in PBS for 1 hour. The maleimide group reacts with the thiol on cysteine.
- Storage: Rinse thoroughly with PBS and store in PBS at 4°C. Use within 24 hours for live cell experiments.
- Control: Prepare control tips with only PEG or a scrambled peptide sequence.
The Scientist's Toolkit: Research Reagent Solutions
| Item | Function in Experiment |
|---|---|
| APTES (Aminosilane) | Creates a uniform amine-terminated monolayer on Si/Si(3)N(4) tips for subsequent covalent chemistry. |
| Heterobifunctional PEG Linker (e.g., NHS-PEG-Maleimide) | Spacer molecule that covalently links the tip to a ligand; reduces non-specific adhesion and provides molecular flexibility. |
| BSA (Bovine Serum Albumin) | Used as a blocking agent (1% solution) to passivate the cantilever chip and reduce non-specific protein/cell adhesion. |
| Carbon Nanosphere-coated Tips | Provides a defined spherical geometry (diameter selectable) for accurate nanomechanical property quantification. |
| PLL-PEG (Poly-L-Lysine grafted PEG) | Bottle-brush copolymer coating for cantilevers to achieve near-zero non-specific adhesion in complex biofluids. |
| Temperature-Stable Liquid Cell | Enables precise control of the imaging environment (37°C, 5% CO₂) for long-term live cell viability during scanning. |
Diagrams
Diagram Title: Decision Workflow for Live Cell AFM Cantilever Selection
Diagram Title: Stepwise Chemistry for Tip Functionalization
Key Considerations for Soft Samples
- Thermal Noise: In liquid, lower resonant frequencies increase thermal noise. Use cantilevers with higher Q-factors in liquid or implement active noise reduction.
- Coating Thickness: Any coating adds mass, lowering resonance frequency and potentially increasing hydrodynamic drag. Consider ultra-thin coatings like monolayer silanes.
- Force Control: Utilize force feedback modes like PeakForce Tapping or Quantitative Imaging (QI) to maintain a precise, user-defined maximum force on each tap, crucial for preserving cell viability.
- Drug Studies: For pre- and post-drug treatment imaging, consistency is paramount. Use the same cantilever type and calibration parameters to enable direct comparison of cellular topography and mechanics.
Within the broader thesis on Atomic Force Microscopy (AFM) for live cell imaging in liquid research, optimizing imaging parameters is paramount to achieving high-resolution, non-invasive visualization of dynamic cellular processes. This application note provides detailed protocols and data for selecting the setpoint, scan rate, and feedback gains to balance imaging force, temporal resolution, and sample viability.
Key Imaging Parameters & Quantitative Data
Table 1: Parameter Ranges for Live Cell AFM in Liquid
| Parameter | Typical Range | Functional Impact | Rationale |
|---|---|---|---|
| Setpoint Ratio | 0.8 - 0.95 (of free amplitude) | Controls imaging force; lower ratio increases force. | Maintains contact while minimizing indentation (< 300 nm) to avoid cell damage. |
| Scan Rate | 0.5 - 2.0 Hz | Determines temporal resolution and force application duration. | Lower rates reduce hydrodynamic drag and allow faithful tracking of soft samples. |
| Proportional Gain (P) | 0.1 - 0.5 | Responsiveness to topographical changes. | Prevents oscillations; too low causes lag, too high induces instability. |
| Integral Gain (I) | 0.5 - 3.0 | Corrects for steady-state error (e.g., drift). | Essential for maintaining setpoint on sloped or moving features. |
| Amplitude (A0) | 5 - 20 nm (in liquid) | Defines drive amplitude for AC modes (e.g., tapping). | Smaller A0 increases sensitivity but reduces signal-to-noise ratio. |
| Scan Angle | 90° (Fast axis: front-to-back) | Orientation of scan relative to cantilever. | Minimizes interaction of cantilever with previously scanned area. |
Table 2: Optimized Parameter Sets for Common Scenarios
| Imaging Objective | Setpoint Ratio | Scan Rate (Hz) | P Gain | I Gain | Notes |
|---|---|---|---|---|---|
| Topography (Adherent Cell) | 0.85 | 0.8 | 0.3 | 1.5 | Stable, low-force overview imaging. |
| High-Resolution Membrane | 0.90 | 0.5 | 0.2 | 2.0 | Very low force to visualize membrane proteins. |
| Dynamic Process (e.g., Ruffling) | 0.80 | 2.0 | 0.4 | 0.8 | Higher speed to capture motion; accept slightly higher force. |
| Very Soft Cell (e.g., Neuron) | 0.95 | 0.6 | 0.15 | 2.5 | Ultralow force to prevent deformation. |
Experimental Protocols
Protocol 1: Initial Setup and Calibration for Live Cell Imaging
Objective: Prepare the AFM and cell sample for stable imaging in liquid. Materials: See "The Scientist's Toolkit" below. Procedure:
- Cantilever Selection & Calibration: Use a soft cantilever (k ≈ 0.01 – 0.1 N/m). Calibrate the spring constant (k) and the optical lever sensitivity (OLS) in liquid prior to cell approach using the thermal tune method.
- Cell Preparation: Plate cells on a sterile, glass-bottom dish or coated coverslip 24-48 hours prior. On the day, replace medium with imaging buffer (e.g., CO2-independent medium, HEPES-buffered).
- System Equilibrium: Mount dish on the AFM stage and allow 30 minutes for thermal and mechanical equilibrium to minimize drift.
- Engagement in Liquid: Approach the cantilever to the substrate near a cell. Set drive amplitude (A0) to ~10 nm. Engage using a high setpoint ratio (0.98) to avoid crash.
- Substrate Reference Scan: Perform a slow, small scan (5 µm, 0.3 Hz) on the bare substrate to verify system stability and adjust gains (start with P=0.2, I=1.0).
Protocol 2: Iterative Optimization of Parameters on a Living Cell
Objective: Systematically adjust parameters to achieve clear, stable, and non-destructive imaging. Procedure:
- Initial Cell Scan: Move the probe to a region of interest on the cell periphery. Reduce setpoint ratio to 0.85. Initiate a slow scan (1 µm, 0.5 Hz).
- Gain Adjustment: Monitor the error signal (difference between setpoint and actual amplitude). Increase P gain until the error signal is minimized without high-frequency oscillations. Then increase I gain to correct for any low-frequency drift in the trace/retrace lines.
- Setpoint Optimization: Gradually increase the setpoint ratio (making it closer to A0) until the probe begins to lose contact (error signal spikes). Then decrease it by 5-10% for stable imaging. The goal is the highest setpoint (lowest force) that maintains contact.
- Scan Rate Optimization: Increase the scan rate incrementally. If the image becomes blurred or the trace/retrace lines diverge, the rate is too high for the chosen gains. Find the maximum rate before quality degrades.
- Validation: Perform a time-series at the optimized parameters. Monitor cell morphology over 10-20 minutes. If significant retraction or morphological change occurs, reduce force (increase setpoint) or scan rate further.
Protocol 3: Assessing Cell Viability Post-Imaging
Objective: Confirm that the optimized parameters do not adversely affect cell health. Procedure:
- Fluorescent Staining: After AFM imaging, incubate cells with a viability stain (e.g., Calcein-AM for live cells, Ethidium homodimer-1 for dead cells) per manufacturer protocol.
- Microscopy: Image the same scanned region using fluorescence microscopy.
- Analysis: Calculate the percentage of live cells in the scanned field versus a control (non-scanned) field. Viability should be >95% for optimal parameters.
Visualizations
Title: Live Cell AFM Parameter Optimization Workflow
Title: Parameter Optimization Trade-offs & Compensations
The Scientist's Toolkit: Essential Research Reagent Solutions
| Item | Function & Rationale |
|---|---|
| Soft Cantilevers (e.g., Silicon Nitride, 0.01 – 0.1 N/m) | Minimize indentation force on delicate live cells. Essential for maintaining viability. |
| Bio-Inert Liquid Cell | Sealed chamber for stable imaging in buffer, minimizing evaporation and thermal drift. |
| CO2-Independent / HEPES-Buffered Medium | Maintains physiological pH without requiring a controlled CO2 atmosphere during imaging. |
| Temperature Control System (Stage Heater) | Maintains cells at 37°C for mammalian studies, critical for normal physiology and dynamics. |
| Calcein-AM Viability Stain | Post-imaging validation of cell health. Fluoresces in live cells with intact esterase activity. |
| Functionalized Tips (e.g., PEG-Linkers) | For force spectroscopy protocols beyond topography, enabling specific molecular interaction studies. |
| Anti-Vibration Table & Acoustic Enclosure | Isolates the AFM from building and environmental noise, crucial for high-resolution imaging in liquid. |
| Software with Real-Time Gain Adjustment | Allows for iterative, on-the-fly optimization of feedback parameters during live scanning. |
Atomic Force Microscopy (AFM) enables high-resolution, real-time investigation of live cell mechanics, morphology, and dynamics under near-physiological conditions. A core thesis in this field posits that meaningful biomechanical data can only be extracted when cells are maintained in a fully viable, homeostatic state throughout often protracted scanning sessions. This application note details the critical environmental parameters—temperature, pH, CO₂, and osmolarity—and provides protocols for their stringent control, forming the experimental foundation for robust and reproducible AFM-based live-cell research.
Quantitative Parameter Ranges & Impact
Maintaining parameters within narrow physiological windows is critical for cell viability and function. Deviations lead to artefactual data and cell death.
Table 1: Optimal Physiological Ranges for Mammalian Cell Culture During Imaging
| Parameter | Optimal Range | Key Consequences of Deviation | Primary Impact on AFM Data |
|---|---|---|---|
| Temperature | 35.5 – 37.5°C | Low: Reduced metabolism, retracted processes. High: Protein denaturation, heat shock. | Altered membrane fluidity, stiffness (Young's modulus), and dynamics. |
| pH | 7.2 – 7.4 (Extracellular) | Acidic (<<7.2): Enzyme inhibition, apoptosis. Alkaline (>>7.4): Disrupted metabolism. | Changes in adhesion force, ion channel function, and cytoskeletal organization. |
| CO₂ | 5% (for bicarbonate buffers) | Low: Drift to alkaline pH. High: Drift to acidic pH. | Indirect via pH; causes time-dependent drift in cell properties during scan. |
| Osmolarity | 280 – 320 mOsm/kg | Hypo-osmotic: Cell swelling, lysis. Hyper-osmotic: Cell shrinkage, detachment. | Dramatic changes in cell volume and turgor pressure, dominating mechanical measurements. |
Detailed Experimental Protocols
Protocol 1: Integrated Environmental Control for AFM Stage
Objective: To maintain a stable physiological environment for cells immobilized on the AFM stage for >1 hour. Materials: AFM with liquid cell, stage-top incubator, objective heater, perfusion system, in-line heater, pH/CO₂ regulator, calibrated osmometer.
- Preparation: Culture cells on appropriate substrates (e.g., glass-bottom dishes). Pre-warm all media and buffers to 37°C.
- System Calibration:
- Place a temperature probe (e.g., fine-wire thermocouple) in the imaging medium at the sample position. Adjust the stage-top and objective heaters until a stable 37.0°C ± 0.2°C is achieved.
- For closed systems, pre-equilibrate media with 5% CO₂/95% air for at least 30 minutes. Verify pH using a micro-pH probe.
- Measure the osmolarity of the final imaging medium with an osmometer.
- Sealing & Equilibration: Mount the sample on the AFM stage. Assemble the liquid cell or open chamber with the perfusion lines. Begin a slow, continuous perfusion (0.5-2 mL/hr) of pre-equilibrated medium. Allow the system to equilibrate for 20-30 minutes before engaging the probe.
- Monitoring: For long scans (>2 hours), periodically pause to verify temperature via the probe and check for media evaporation or gas bubble formation.
Protocol 2: Using HEPES-Buffered Media for Open Systems
Objective: To enable stable pH during imaging in open-air AFM setups without CO₂ control. Materials: Phenol-red free imaging medium, 10-50 mM HEPES buffer, pH meter.
- Buffer Preparation: Prepare your standard cell culture medium (e.g., DMEM) without sodium bicarbonate.
- Add HEPES: Supplement the medium with 20-25 mM HEPES buffer.
- pH Adjustment: Titrate the medium to pH 7.4 at 37°C using sterile NaOH or HCl.
- Osmolarity Check: Measure and, if necessary, adjust osmolarity to ~300 mOsm/kg by adding sterile water or salts (e.g., NaCl).
- Validation: Confirm cell viability and normal morphology over the intended scan duration using this medium in a control experiment.
The Scientist's Toolkit: Research Reagent Solutions
Table 2: Essential Materials for Live-Cell AFM Environmental Control
| Item | Function & Rationale |
|---|---|
| Stage-Top Incubator | Encloses the sample, providing precise control of ambient temperature and, in advanced models, CO₂ concentration. |
| Objective Heater | Prevents heat sink from the microscope objective, a major source of local cooling for the sample. |
| Perfusion Pump & Tubing | Allows continuous exchange of medium to replenish nutrients, remove waste, and maintain gas/pH equilibrium. |
| In-Line Solution Heater | Warms perfusion media to stage temperature immediately before entering the dish, preventing thermal shock. |
| Bicarbonate Buffer System | The physiological pH buffer, requires 5% CO₂ environment. Essential for long-term health. |
| HEPES Buffer | A zwitterionic, CO₂-independent chemical buffer (pKa ~7.5) used to stabilize pH in open imaging systems. |
| Osmometer | Device to precisely measure the osmolarity of prepared media, ensuring it matches intracellular conditions. |
| Fluorescent Viability Dyes (e.g., Calcein-AM / PI) | Used in correlative assays to confirm cell health pre- and post-AFM scanning. |
Visualization of Environmental Control Workflow
Diagram Title: Live-Cell AFM Environmental Control Workflow
Concluding Remarks
The fidelity of AFM-based live-cell biomechanical studies is intrinsically tied to the stability of the cellular microenvironment. Implementing the integrated control of temperature, pH, CO₂, and osmolarity as outlined is not merely a technical detail but a fundamental requirement. These protocols ensure that observed changes in cell mechanics and morphology are attributable to experimental variables rather than environmental stress, thereby upholding the core thesis that AFM can yield biologically relevant insights into dynamic cellular processes.
Within the broader thesis on Atomic Force Microscopy (AFM) for live cell imaging in liquid environments, achieving and maintaining high-resolution image quality is paramount. Poor image quality directly compromises the validity of biomechanical and morphological data essential for biophysical research and drug development. This Application Note details systematic troubleshooting protocols, focusing on the primary adversaries: contamination and probe degradation.
Identifying and Addressing Contamination
Contamination is a frequent culprit in liquid-cell AFM, arising from the sample, buffer, probe, or fluid cell components.
Protocol: Systematic Contamination Source Identification
Objective: To isolate the source of particulate or organic contamination manifesting as streaks, spikes, or inconsistent topography.
Materials:
- Clean AFM fluid cell (or liquid holder)
- Multiple unused, certified clean AFM probes
- Ultrapure water (18.2 MΩ·cm)
- Freshly prepared, filtered (0.02 µm) imaging buffer
- Plasma cleaner (optional but recommended)
- Certified clean glass substrate or freshly cleaved mica
Procedure:
- Baseline Test on Inert Substrate:
- Mount a new, clean probe.
- Assemble the fluid cell with a clean glass slide as a dummy substrate.
- Fill the cell with ultrapure, filtered water.
- Engage and image a 10x10 µm area in contact mode with minimal force (< 0.5 nN). A clean scan should show a flat, featureless surface with RMS roughness < 0.2 nm.
Introduce Buffer:
- Flush the cell with 5 mL of filtered imaging buffer.
- Re-image the same area. New features indicate buffer contamination.
Introduce Sample Substrate:
- Replace the clean glass with your sample substrate (e.g., prepared mica).
- Fill with filtered buffer.
- Image a new area. New features may indicate substrate preparation issues.
Introduce Cells:
- Finally, introduce your live cell sample.
- The incremental protocol localizes contamination introduced at each step.
Quantitative Impact of Contaminants
Table 1: Common Contaminants and Their Impact on Image Metrics
| Contaminant Source | Typical AFM Artifact | Measurable Impact on Image Quality (RMS Roughness, Noise) | Suggested Remedial Action |
|---|---|---|---|
| Unfiltered Buffer | Random peaks, vertical spikes | Noise floor increase by 50-200% (>1 nm RMS on flat surface) | Filter all buffers through 0.02 µm syringe filter. |
| Dirty Probe/Cantilever | Repeating patterns, streaks | Directional noise amplitude increase of 2-5 nm | Use plasma cleaning (Ar/O₂, 1 min) for probes. |
| Residuals on Substrate | Large, irregular aggregates | Local roughness spikes > 10 nm RMS | Improve substrate cleaning (e.g., UV-Ozone treatment). |
| Cellular Debris | Gradual buildup during scan | Drift in baseline force, increasing adhesion (>50%) | Increase fluid exchange rate; use cleaner cell cultures. |
Diagnosing and Mitigating Probe Degradation
Probe degradation in liquid imaging is often chemical (etching) or mechanical (blunting, fouling), leading to loss of resolution and inaccurate force measurements.
Protocol: In-situ Probe Performance Assessment
Objective: To quantitatively monitor probe sharpness and cleanliness during a live-cell experiment.
Materials:
- AFM with thermal tune capability
- Standard sample for tip qualification (e.g., Tipless calibration grating with sharp spikes)
- On-axis optical microscope (or high-magnification camera)
Procedure:
- Pre-Experiment Baseline:
- In air, perform a thermal tune to determine the cantilever's spring constant (k).
- Image a tip qualification grating in tapping mode in liquid to assess initial radius. Estimate radius from known feature widths.
Periodic Re-check During Experiment:
- After 30-60 minutes of cell imaging, retract the probe.
- Translate the stage to a clean area of the substrate or a dedicated calibration grating.
- Perform a quick (5x5 µm) high-resolution image of the sharp features.
- Compare feature resolution and measured widths to the baseline.
Post-Experiment Validation:
- Repeat the thermal tune and detailed grating scan.
- A >20% increase in estimated tip radius or a >15% change in spring constant indicates significant degradation.
Quantitative Data on Probe Degradation
Table 2: Impact of Probe Degradation on Live-Cell Imaging Data
| Degradation Mode | Primary Cause in Liquid Imaging | Effect on Measured Cell Parameters | Typical Timeframe for Onset |
|---|---|---|---|
| Tip Blunting | Mechanical wear on substrate/cell wall | Apparent Young's modulus overestimation by 30-100%; loss of sub-micron features | 1-2 hours of continuous scanning |
| Carbonaceous Fouling | Adsorption of organic molecules from buffer/cells | Adhesion force increase by 200-500%; false-positive ligand binding signals | Minutes to hours |
| Chemical Etching | Dissolution of Si/SiN tip in ionic or pH-buffered solutions | Uncontrolled change in spring constant; complete loss of imaging capability | Hours (accelerated at pH >8 or <5) |
Integrated Troubleshooting Workflow
Diagram Title: AFM Image Quality Troubleshooting Decision Tree
The Scientist's Toolkit
Table 3: Essential Research Reagent Solutions for Liquid-Cell AFM
| Item | Function & Rationale |
|---|---|
| 0.02 µm Anopore Syringe Filters | Removes particulates and microbiological contaminants from imaging buffers that cause scanning artifacts. Essential for nanoscale resolution. |
| Plasma Cleaner (Argon/Oxygen) | Generates a reactive gas plasma to remove hydrocarbon contamination from probes and substrate surfaces, ensuring pristine initial conditions. |
| Ultrapure Water (Type I) | Serves as a contamination-free baseline fluid for system and stability checks. Low ionic strength minimizes electrostatic interactions during tests. |
| Tip Check Sample (e.g., TGZ series) | A calibration grating with sharp, known spikes. Allows quantitative in-situ estimation of tip radius and shape before/during/after experiments. |
| Functionalized Bead Kits (e.g., 6 µm silica) | For cantilever calibration via the added mass method in liquid, providing accurate spring constants essential for quantitative force spectroscopy on cells. |
| UV-Ozone Cleaner | Effective for removing organic contaminants from glass and mica substrates prior to cell seeding, promoting clean, reproducible sample surfaces. |
Benchmarking AFM: Strengths, Limitations, and Complementary Techniques
This application note is framed within the ongoing thesis research on optimizing Atomic Force Microscopy (AFM) for dynamic, high-resolution live cell imaging in physiological liquids. While AFM excels at mapping topographical and nanomechanical properties, it lacks inherent molecular specificity. Super-resolution fluorescence microscopy (SRM) breaks the diffraction limit to visualize specific biomolecules but provides no direct mechanical data. Their integration is pivotal for correlating nanostructure, molecular organization, and function in live cells, offering unprecedented insights for fundamental biology and targeted drug development.
Comparative Quantitative Analysis
The quantitative capabilities of AFM and SRM are distinct yet complementary. The following tables summarize their key parameters.
Table 1: Core Performance Characteristics
| Parameter | Atomic Force Microscopy (AFM) | Super-Resolution Microscopy (e.g., STED, PALM/STORM) |
|---|---|---|
| Resolution (XY) | ~0.5-2 nm (mechanical probe) | ~20-50 nm (optical, beyond diffraction limit) |
| Resolution (Z) | ~0.1 nm (height) | ~50-100 nm (typically) |
| Measurement Type | Topography, Mechanics (Elasticity, Adhesion), Force | Molecular Localization, Concentration, Co-localization |
| Labeling Required | No (native sample) | Yes (fluorescent dyes, proteins) |
| Live-Cell Imaging Speed | Moderate-Slow (seconds-minutes per frame) | Fast (milliseconds-seconds per frame) |
| Penetration Depth | Surface and ~<1 µm (indentation) | Up to tens of microns (depending on sample) |
| Key Live-Cell Metrics | Elastic Modulus, Membrane Dynamics, Receptor Forces | Protein Cluster Size, Diffusion Coefficients, Trafficking Pathways |
Table 2: Correlative Output from Integrated Experiments
| Cellular Process | AFM Data Output | SRM Data Output | Integrated Insight |
|---|---|---|---|
| Receptor Activation | Nanoscale force curves at specific locations; changes in local stiffness. | Precise spatial distribution and clustering of activated receptors (e.g., EGFR). | Correlates mechanical transduction with molecular clustering events. |
| Drug-Induced Cytoskeletal Remodeling | Alterations in global and local Young's modulus (kPa changes). | Reorganization of actin (Phalloidin) or microtubule networks. | Links bulk mechanical changes to specific architectural rearrangements. |
| Pore Formation (e.g., by toxins) | Detection and dimensional measurement of membrane breaches. | Localization of pore-forming proteins relative to membrane defects. | Confirms molecular identity of structures causing mechanical failure. |
Detailed Experimental Protocols
Protocol 1: Correlative AFM-SRM Imaging of Drug-Induced Membrane Stiffening in Live Cells
This protocol details the correlation between actin remodeling visualized by SRM and cortical stiffness measured by AFM.
Materials & Reagents:
- Cell Line: MCF-7 breast cancer cells.
- Fluorescent Label: SiR-Actin kit (Cytoskeleton, Inc.) for live-cell actin staining.
- Drug: Jasplakinolide (actin stabilizer).
- Substrate: Glass-bottom Petri dish (for SRM compatibility).
- AFM Probe: MLCT-Bio-DC probe (Bruker), k ≈ 0.03 N/m, for contact mode elasticity mapping.
- Imaging Medium: Phenol Red-free medium, buffered with HEPES.
Procedure:
- Cell Preparation: Seed cells in glass-bottom dish 48 hours prior. Incubate with 100 nM SiR-Actin for 1 hour before experiment.
- Super-Resolution Imaging (STED): Using a STED microscope, acquire a super-resolution image of the actin cytoskeleton in a region of interest (ROI). Note the coordinates.
- AFM Mounting: Transfer the dish to the AFM stage equipped with an environmental chamber (37°C).
- Coordinate Relocation: Use the AFM’s optical microscope (integrated or side-mounted) to relocate the same ROI using fiduciary marks.
- Baseline AFM Measurement: Perform force-volume mapping over a 20 x 20 µm area (32x32 points) on the cell surface to derive a baseline elastic modulus map.
- Drug Intervention: Gently perfuse medium containing 1 µM Jasplakinolide into the dish without disturbing the AFM tip position.
- Time-Lapse Correlative Imaging:
- Acquire STED images of actin in the ROI every 5 minutes.
- Immediately following each STED acquisition, perform a new AFM force-volume map in the identical location.
- Data Correlation: Align the temporal datasets. Correlate spatial features in the actin network (e.g., densification) with local increases in elastic modulus from AFM.
Protocol 2: Mapping Receptor Clustering and Subsequent Mechanical Response
This protocol combines single-molecule localization microscopy (SMLM) with AFM force spectroscopy.
Materials & Reagents:
- Cell Line: HEK293 cells transfected with EGFR-GFP or labeled with anti-EGFR Alexa Fluor 647.
- Stimulant: Epidermal Growth Factor (EGF).
- AFM Probe: Silicon nitride tip functionalized with EGF ligand via PEG linker.
- Imaging Buffer: For SMLM, use a switching buffer (e.g., with glucose oxidase/catalase for PALM).
Procedure:
- Functionalization: Covalently link EGF to the AFM cantilever using a heterobifunctional PEG crosslinker.
- SRM Pre-Imaging: For fixed cells: Stimulate with EGF, fix, and perform dSTORM imaging of EGFR to map nanoscale cluster distribution. For live cells: Use PALM on cells expressing EGFR-PA-GFP, activate a small ROI, and localize receptors pre-stimulation.
- AFM Force Probe Measurement: On a live cell, use the EGF-functionalized tip to perform adhesion force mapping or single-molecule force spectroscopy (SMFS) at specific locations (on cluster-rich vs. sparse areas identified from correlative SRM data).
- Triggered Stimulation & Sequential Imaging: On a live cell, first perform a baseline AFM adhesion map. Then, globally stimulate with soluble EGF. Monitor the dynamic changes in receptor distribution via live SMLM (if possible) or fixed-cell endpoint SMLM. Follow with a post-stimulation AFM adhesion map to measure changes in unbinding forces and frequency.
Visualization of Integrated Workflow and Biological Pathways
Integrated Correlative Microscopy Workflow
EGF Signaling to Mechanical Change
The Scientist's Toolkit: Essential Research Reagents & Materials
| Item Name | Category | Function in Correlative Experiment |
|---|---|---|
| SiR-Actin / SiR-Tubulin Kits (Cytoskeleton, Inc.) | Live-Cell Fluorescent Dye | Enables long-term, high-resolution live-cell imaging of cytoskeleton with minimal phototoxicity for SRM. |
| HaloTag / SNAP-tag Ligands (Promega, NEB) | Protein Labeling System | Allows specific, covalent labeling of target proteins with bright, photoswitchable dyes for SMLM. |
| PEG Crosslinkers (e.g., NHS-PEG-Maleimide) | AFM Probe Functionalization | Creates a flexible, biocompatible tether for immobilizing ligands (e.g., EGF) on AFM tips for force spectroscopy. |
| Glass-Bottom Dishes (#1.5 Coverslip) | Imaging Substrate | Provides optimal optical clarity for high-resolution SRM and a flat, rigid surface for AFM scanning. |
| MLCT-Bio-DC Cantilevers (Bruker) | AFM Probe | Gold-coated, bio-compatible tips with a low spring constant ideal for live-cell force spectroscopy and mapping. |
| Photoswitchable Buffers (e.g., GLOX) | Imaging Buffer | Essential chemical environment for inducing and maintaining photoswitching of fluorophores in dSTORM/PALM techniques. |
This application note supports the broader thesis that Atomic Force Microscopy (AFM) is an indispensable tool for live cell imaging in liquid environments. While electron microscopy (EM) provides unparalleled spatial resolution, it operates under high vacuum, necessitating extensive sample fixation that halts biological dynamics. AFM trades ultimate resolution for the capability to probe structural, mechanical, and functional properties of living systems in physiologically relevant, liquid conditions over time.
Comparative Data Analysis
Table 1: Core Comparison of AFM and Electron Microscopy for Biological Imaging
| Feature | Atomic Force Microscopy (AFM) | Electron Microscopy (EM: SEM/TEM) |
|---|---|---|
| Operating Environment | Liquid, air, vacuum | High vacuum (≥10⁻⁵ Pa) |
| Native State Imaging | Yes. Cells remain viable in buffer. | No. Requires fixation, dehydration, staining, and/or embedding. |
| Temporal Resolution | Seconds to minutes per image. Suitable for slow dynamics. | Minutes to hours for sample prep. No live dynamics. |
| Spatial Resolution | Height: Sub-nm (vertical). Lateral: ~1 nm (ideal), ~5-20 nm on soft samples. | TEM: ≤0.05 nm (theoretical), ~0.5-1 nm (biological). SEM: 1-10 nm. |
| Sample Penetration/Info | Surface topology, nanomechanics (elasticity, adhesion). | TEM: Internal ultrastructure. SEM: Surface topography (3D-like). |
| Key Metric for Live Cells | Young's Modulus: 0.1 - 100 kPa (cytoskeletal dynamics). Adhesion Force: 10-1000 pN (receptor-ligand binding). | Morphometric Data: e.g., organelle dimensions, membrane thickness (fixed state). |
Experimental Protocols
Protocol 1: AFM-Based Nanomechanical Mapping of Live Cells in Liquid
Objective: To quantify the spatiotemporal changes in cell stiffness (Young's modulus) in response to a drug (e.g., Cytoskeletal disruptor).
Materials (Scientist's Toolkit):
| Reagent/Material | Function |
|---|---|
| Functionalized AFM Cantilever (e.g., SiO₂ bead tip) | Probes cell surface with defined geometry and chemistry for reproducible force measurements. |
| Cell Culture Media (CO₂-independent) | Maintains pH and viability during imaging without a sealed incubator. |
| Poly-L-Lysine or Cell-Tak | Adhesive coating to immobilize cells on substrate without excessive fixation. |
| AFM Fluid Cell | Sealed chamber to hold liquid environment over sample. |
| Cytoskeletal Modulator (e.g., Latrunculin A) | Actin-depolymerizing agent used as a perturbation to validate mechanical sensitivity. |
Methodology:
- Sample Preparation: Plate cells on a glass-bottom dish coated with a gentle adhesive (Poly-L-Lysine). Incubate to ~70% confluence. Replace media with imaging buffer (e.g., CO₂-independent Leibovitz's L-15 medium).
- AFM Setup: Mount a soft, colloidal probe cantilever (spring constant: 0.01-0.1 N/m) in the fluid cell. Calibrate the spring constant (thermal tune method) and optical lever sensitivity.
- Engagement: Locate a cell optically. Engage the tip gently onto the cell periphery at a low setpoint (≤100 pN).
- Force Volume Mapping: Program a grid (e.g., 32x32 points) over a selected region (e.g., 20x20 µm). At each point, acquire a full force-distance curve with specified parameters (approach velocity: 1-5 µm/s, Z-range: 500-1000 nm, trigger force: 100-500 pN).
- Perturbation Experiment: After a baseline map, add drug (e.g., 1 µM Latrunculin A) directly to the fluid cell. Incubate for 15-30 minutes, then repeat mapping on the same cell.
- Data Analysis: Use a Hertzian contact model (for spherical tip) to fit the retraction curve's slope, extracting the Young's Modulus (E) at every pixel. Generate stiffness maps and histogram distributions.
Protocol 2: Correlative Light and Electron Microscopy (CLEM) for Context
Objective: To provide ultrastructural context for AFM-measured features by fixing and imaging the same cell with EM.
Materials (Scientist's Toolkit):
| Reagent/Material | Function |
|---|---|
| Glutaraldehyde (2.5%) | Primary fixative that crosslinks proteins, preserving structure for EM. |
| Osmium Tetroxide (1%) | Secondary fixative that stabilizes lipids and provides electron contrast. |
| Epoxy Resin (e.g., Epon) | Embedding medium for ultrathin sectioning for TEM. |
| Heavy Metal Stains (Uranyl acetate, Lead citrate) | Enhance scattering of electrons for contrast in TEM. |
| Fiducial Markers (e.g., gold nanoparticles) | Landmarks for precise correlation between AFM/LM and EM images. |
Methodology:
- Live-Cell AFM: Perform an AFM experiment (e.g., force mapping) as in Protocol 1. Note the coordinates of imaged cells using an optical grid.
- Rapid Fixation: Gently replace imaging buffer with pre-warmed 2.5% glutaraldehyde in 0.1M cacodylate buffer. Fix for 1 hour at room temperature.
- Post-Fixation & Staining: Rinse with buffer. Post-fix with 1% Osmium Tetroxide (1 hr), then stain en bloc with 1% uranyl acetate (1 hr).
- Dehydration & Embedding: Dehydrate through an ethanol series (30% to 100%) and embed in epoxy resin. Polymerize at 60°C for 48 hours.
- Sectioning & Imaging: Use an ultramicrotome to cut 70-100 nm thin sections. Collect on TEM grids. Stain with lead citrate. Image the exact cell of interest in TEM using the fiducials for correlation.
Visualizations
Diagram 1: Comparative Imaging Workflow
(Title: AFM vs EM Sample Preparation Pathways)
Diagram 2: AFM Live-Cell Mechanobiology Pathway
(Title: From Drug Perturbation to AFM Stiffness Map)
This document provides application notes and protocols within the broader thesis context of advancing Atomic Force Microscopy (AFM) for live cell imaging in liquid. A core challenge in this field is the quantitative interpretation of topographical data. While AFM provides unparalleled nanoscale resolution of surface morphology, assigning these features to specific, known subcellular structures (e.g., actin filaments, microtubules, nuclei, vesicles) requires rigorous validation. This protocol details methods for correlative microscopy, combining AFM with optical fluorescence techniques to achieve quantitative validation, thereby transforming AFM topography from a morphological map into a biologically meaningful dataset for researchers and drug development professionals.
Core Correlative Workflow Protocol
Objective: To spatially and quantitatively register high-resolution AFM topography with fluorescence images of labeled cellular structures.
Protocol:
A. Cell Preparation and Plating:
- Substrate: Use 35 mm glass-bottom dishes (No. 1.5 coverslip, 0.17 mm thickness) coated with 10 µg/mL fibronectin for 1 hour at 37°C.
- Cell Line: HeLa or other adherent cells, cultured in standard media (e.g., DMEM + 10% FBS).
- Transfection/Labeling: 24-48 hours before imaging, transfert cells with a fluorescent fusion protein (e.g., Lifeact-mRuby3 for F-actin, GFP-tubulin for microtubules) OR use live-cell compatible dyes (e.g., SiR-actin, MitoTracker Deep Red). For fixed-cell validation, use standard immunofluorescence protocols post-AFM imaging.
B. Instrument Setup for Correlative Imaging:
- Microscope: Use an integrated AFM-inverted fluorescence microscope system. Ensure the optical objective is compatible with the glass-bottom dish.
- AFM Probe Selection: Use ultra-short, sharp cantilevers (e.g., BL-AC40TS-C2, Olympus) for high-resolution imaging in liquid. Typical spring constant: 0.09 N/m. Calibrate the spring constant and sensitivity before experiments.
- Imaging Buffer: Use live-cell imaging medium (e.g., FluoroBrite DMEM, phenol-red free, + 10% FBS + 25mM HEPES) to maintain cell health and minimize fluorescence background.
C. Sequential Imaging Protocol:
- Optical Baseline: Locate a cell of interest using brightfield or low-fluorescence light. Acquire a high-quality fluorescence Z-stack (e.g., 0.3 µm steps) of the target structure using a 60x or 100x oil immersion objective.
- AFM Engagement: Switch to AFM mode. Carefully engage the cantilever in a region adjacent to the cell using low setpoints (< 100 pN) to avoid damaging the cell.
- AFM Topography Scan: Scan the region corresponding to the fluorescence field of view. Use AC (tapping) mode in fluid.
- Scan Rate: 0.5 - 1.0 Hz.
- Resolution: 512 x 512 pixels.
- Scan Size: Adapt to cell size (typically 20 x 20 µm to 50 x 50 µm).
- Post-Scan Fluorescence Verification: Immediately after the AFM scan, acquire another fluorescence image at the focal plane of the AFM scan to confirm no photobleaching or structural changes occurred during scanning.
D. Data Registration and Analysis:
- Software: Use correlation software (e.g., inbuilt microscope software, ImageJ with Correlia plugin, or custom MATLAB/Python scripts).
- Registration: Use fiduciary markers (e.g., fixed debris, substrate patterns) or distinct cellular features visible in both fluorescence and AFM height channels to create an affine transformation matrix.
- Quantitative Overlay: Apply the transformation to overlay the fluorescence channel onto the AFM topography. Measure the height, width, and spatial periodicity of topographical features that coincide with fluorescent signals.
Quantitative Data from Validation Studies
Table 1: Correlated Topographical Dimensions of Common Cellular Structures
| Cellular Structure (Fluorescence Label) | Measured AFM Height (Mean ± SD) | Measured AFM Width (FWHM) | Correlation Coefficient (Topo vs. Fluorescence) | Biological Reference / Notes |
|---|---|---|---|---|
| Actin Stress Fibers (Lifeact-GFP) | 8.2 ± 1.5 nm | 300 - 500 nm | 0.78 - 0.92 | Height corresponds to single filament bundles. Width is influenced by tip convolution. |
| Microtubules (GFP-Tubulin) | 24.5 ± 3.2 nm | 40 - 60 nm* | 0.85 - 0.95 | *Width near theoretical value due to cylindrical shape and high resolution. |
| Nuclear Periphery (Hoechst / Lamin) | 150 - 400 nm (above cytoplasm) | N/A | 0.90+ | Height varies with cell type and confluency. Clear topographical ridge correlates with lamina. |
| Mitochondria (MitoTracker) | 200 - 500 nm | 500 - 800 nm | 0.70 - 0.85 | Tubular structures are clearly resolved. Height sensitive to metabolic state. |
| Filopodial Protrusions (Lifeact) | 5 - 10 nm (above membrane) | 100 - 200 nm | 0.65 - 0.80 | Challenging due to dynamics and small size. Requires fast scanning. |
Table 2: Impact of Imaging Parameters on Correlation Accuracy
| Parameter | Optimal Setting for Correlation | Effect on Correlation Quality | Rationale |
|---|---|---|---|
| AFM Mode | AC (Tapping) Mode in Liquid | High | Minimizes lateral shear forces, preserving soft cellular structures for post-scan fluorescence. |
| Scan Speed | 0.5 - 1.0 Hz | Medium-High | Faster speeds reduce temporal drift between AFM and optical images but may lower resolution. |
| Setpoint / Force | As low as possible (< 100 pN) | Critical | High forces deform or displace soft structures, causing mismatch with fluorescence data. |
| Optical Resolution | 100x Oil, NA 1.4-1.49 | High | Essential for resolving structures at the scale of AFM features (< 200 nm). |
| Registration Method | Affine Transformation with 3+ fiducials | High | Corrects for scale, rotation, and offset between the two imaging modalities. |
The Scientist's Toolkit: Research Reagent Solutions
Table 3: Essential Materials for AFM-Optical Correlation Experiments
| Item | Product Example (Non-exhaustive) | Function in Protocol |
|---|---|---|
| Glass-bottom Dish | MatTek P35G-1.5-14-C or ibidi µ-Dish 35 mm high | Provides optimal optical clarity for high-NA objectives and a flat substrate for AFM engagement. |
| Live-Cell AFM Probe | Olympus BL-AC40TS, Scout 350 (Bruker), qp-BioAC (Nanosensors) | Sharp, soft cantilevers designed for minimal invasiveness and high resolution in liquid. |
| F-Actin Live-Cell Dye | SiR-actin (Spirochrome), Lifeact fusion proteins (mRuby3, GFP) | Specific, bright, and photostable labeling of actin cytoskeleton with minimal perturbation. |
| Live-Cell Imaging Medium | FluoroBrite DMEM (Gibco), CO2-independent Medium (+ HEPES) | Maintains pH without phenol red (which causes background), enabling clear fluorescence. |
| Fiducial Markers | TetraSpeck Microspheres (0.1 µm, Invitrogen), Aligned Gold Nanopatterns | Provides unambiguous reference points for perfect pixel-to-pixel registration of AFM and optical images. |
| Correlation Software | ImageJ/Fiji with "Correlia" plugin, NIS-Elements AR (Nikon), custom Python (scikit-image) | Performs the critical spatial transformation and overlay of multi-modal datasets. |
Visualization Diagrams
Diagram Title: AFM-Optical Correlation Workflow
Diagram Title: Quantitative Validation Pathways for AFM Data
Application Notes
Within live-cell Atomic Force Microscopy (AFM) research, the fundamental premise is that measurements reflect the native, dynamic state of the cell. A critical, often under-characterized, confounding variable is the mechanical and physiological disturbance induced by the scanning probe itself. This document outlines essential controls and protocols to rigorously assess and minimize probe-induced cellular disturbance, thereby validating the biological relevance of AFM-derived data in mechanobiology and drug discovery.
Quantitative Metrics for Disturbance Assessment
Table 1: Key Quantitative Metrics for Probe Impact Assessment
| Metric Category | Specific Parameter | Benchmark for Minimal Disturbance | Measurement Technique |
|---|---|---|---|
| Cell Viability | Membrane Integrity (Post-Scan) | >95% viable cells (vs. control) | Fluorescent live/dead assay (Calcein-AM/PI). |
| Morphology | Height/Volume Change | <5% deviation from pre-scan baseline. | AFM topography tracking; fluorescence imaging. |
| Cytoskeletal Integrity | Actin Network Displacement | No visible stress fiber rearrangement. | Confocal microscopy of phalloidin-stained cells. |
| Physiological Response | Intracellular Ca²⁺ Flux | No sustained (>30s) spike above baseline. | Genetically encoded or dye-based (Fluo-4) Ca²⁺ indicators. |
| Adhesion Stability | Detachment Events | Zero cell detachments during scan. | Optical microscopy correlative imaging. |
| Probe Force | Applied Imaging Force (Setpoint) | Typically 50-200 pN in contact mode; <100 pN in tapping mode in liquid. | AFM photodetector calibration and thermal tune. |
Experimental Protocols
Protocol 1: Pre- and Post-Scan Viability & Morphology Validation
- Cell Preparation: Plate cells on appropriate substrates (e.g., glass-bottom dishes) 24-48 hours prior to achieve ~70% confluency.
- Pre-Scan Staining: Incubate with 1 µM Calcein-AM in imaging buffer for 30 minutes at 37°C. Acquire baseline widefield fluorescence images to document cell morphology and confirm >99% viability.
- AFM Imaging: Perform AFM scan under the proposed experimental conditions (force, speed, mode).
- Post-Scan Analysis: Immediately re-acquire fluorescence images in the same fields of view. Add Propidium Iodide (PI, 1 µg/mL) to confirm membrane integrity.
- Data Analysis: Quantify the number of Calcein-positive/PI-negative cells pre- and post-scan. Use image analysis software to measure cell spread area and perimeter.
Protocol 2: Correlative AFM-Fluorescence for Cytoskeletal Monitoring
- Cell Transfection/Staining: Transfect cells with LifeAct-GFP or stain fixed actin with phalloidin-AF555.
- Setup: Use a correlative AFM-inverted fluorescence microscope. Locate a cell of interest and acquire a high-resolution confocal z-stack of the cytoskeleton.
- AFM Intervention: Perform AFM line scanning or imaging on the selected cell at varying forces.
- Real-Time Monitoring: Acquire time-lapse fluorescence images (e.g., every 10 seconds) during and after AFM scanning.
- Post-Scan Validation: Acquire a final high-resolution confocal z-stack. Analyze for local displacement or disassembly of actin fibers in the scanned region versus distal areas.
Protocol 3: Calcium Flux Response Assay
- Dye Loading: Incubate cells with 2-5 µM Fluo-4 AM in imaging buffer for 45 minutes at room temperature, followed by a 30-minute de-esterification period.
- Baseline Recording: On a fluorescence microscope, record 2 minutes of baseline Ca²⁺ signaling (ex: 488 nm) at 2 Hz frame rate.
- AFM Stimulus: Initiate AFM probe engagement and scanning, continuing fluorescence recording.
- Post-Stimulus Recording: Continue recording for at least 5 minutes after scanning ceases.
- Analysis: Plot fluorescence intensity (F/F₀) over time for the scanned cell and non-scanned neighbor controls. A disturbance is indicated by a sharp, sustained increase coinciding with probe contact.
Visualizations
Title: Experimental Workflow for Probe Disturbance Assessment
Title: Probe Contact Triggers Direct and Signaling Disturbance Pathways
The Scientist's Toolkit
Table 2: Essential Research Reagent Solutions for Disturbance Control Experiments
| Item Name | Function / Role | Example Product/Catalog |
|---|---|---|
| Calcein-AM | Cell-permeant viability dye; stains live cells green. | Thermo Fisher Scientific C3099 |
| Propidium Iodide (PI) | Cell-impermeant dead cell stain; red fluorescence upon DNA binding. | Sigma-Aldrich P4864 |
| Fluo-4 AM | Cell-permeant rationetric calcium indicator dye. | Thermo Fisher Scientific F14201 |
| LifeAct-GFP | Genetic construct for labeling F-actin without disrupting dynamics. | ibidi 60101 |
| Phalloidin (Fluorophore-conjugated) | High-affinity actin filament stain for fixed cells. | Cytoskeleton, Inc. PHDR1 |
| Cell Culture Medium (Phenol Red-free) | For fluorescence imaging to reduce background autofluorescence. | Gibco 31053028 |
| AFM Cantilevers (Soft) | High sensitivity, low spring constant (0.01-0.1 N/m) for minimal force. | Bruker MLCT-Bio-DC (0.03 N/m) |
| Temperature & CO₂ Controller | Maintains live-cell physiological health during long experiments. | PeCon or Tokai Hit stage top incubators |
This document outlines advanced protocols for the acquisition, processing, and statistical interpretation of atomic force microscopy (AFM) data in the context of live-cell imaging in liquid environments. The goal is to bridge the gap between single-point force measurements and robust, population-level biological insights, crucial for biomedical research and drug development.
Core Quantitative Data from AFM Force Spectroscopy
Table 1: Key Quantitative Parameters Extracted from Force-Distance Curves
| Parameter | Symbol | Unit | Biological/Physical Interpretation | Typical Range (Live Mammalian Cell) |
|---|---|---|---|---|
| Young's Modulus | E | kPa | Apparent cell stiffness, indicator of cytoskeletal state | 0.5 - 20 kPa |
| Adhesion Force | F_adh | pN | Strength of ligand-receptor or nonspecific binding | 50 - 2000 pN |
| Adhesion Energy | W_adh | aJ | Total work of detachment, integrates force over distance | 10 - 1000 aJ |
| Rupture Length | L_rupt | nm | Characteristic length of bond deformation at rupture | 10 - 100 nm |
| Tether Extraction Force | F_teth | pN | Force to pull membrane tethers, related to membrane tension | 20 - 100 pN |
| Sample Height | H | µm | Cell thickness or topography feature | 1 - 10 µm |
| Apparent Viscosity | η | Pa·s | Dynamic viscous response from force curve hysteresis | 0.001 - 0.1 Pa·s |
Table 2: Statistical Population Analysis Metrics
| Metric | Formula/Purpose | Use Case in Population Analysis |
|---|---|---|
| Median ± Median Absolute Deviation (MAD) | Median(x_i), MAD = median(|x_i - median(x)|) | Robust measure of central tendency & spread for non-normal data (common in cell mechanics). |
| Bootstrapped 95% CI | Resample data (n=1000+), calculate statistic, report 2.5-97.5 percentiles. | Estimating confidence intervals for mean adhesion force without assuming distribution. |
| Two-Sample Kolmogorov-Smirnov Test | D = max|F1(x) - F2(x)|; tests if two samples come from the same distribution. | Comparing the distribution of Young's modulus between treated and control cell populations. |
| Effect Size (Cohen's d for normal, Cliff's delta for non-normal) | d = (µ1 - µ2)/σ_pooled; delta = 2*(P(X>Y) - 0.5) | Quantifying the magnitude of a drug-induced change in stiffness, independent of sample size. |
Experimental Protocols
Protocol 3.1: AFM-Based Live-Cell Force Spectroscopy for Population Studies
Objective: To acquire statistically sufficient force-curve data from a population of live cells under physiological conditions to compare mechanical phenotypes.
Materials:
- AFM System: Equipped with a liquid cell and temperature/CO2 control (if needed).
- Cantilevers: Silicon nitride, tipless or spherical tip (radius 1-5 µm), nominal spring constant 0.01-0.1 N/m.
- Cell Culture: Adherent cells grown on 35 mm Petri dishes or glass-bottom dishes.
- Imaging Medium: Pre-warmed, CO2-independent, phenol-red-free medium or appropriate physiological buffer.
Procedure:
- Cantilever Calibration: Perform thermal tune in liquid to determine the exact spring constant (k) and the optical lever sensitivity (InvOLS).
- Cell Preparation: Seed cells at moderate density (~50-70% confluency) 24-48 hours prior. On the day, replace medium with fresh imaging medium.
- AFM Mounting: Mount dish on AFM stage, immerse cantilever, and allow thermal equilibration (15 min).
- Optical Navigation: Use integrated optical microscope to identify and select cells for measurement. Avoid nucleus center and very edges.
- Mapping Grid Definition: Over each selected cell, define a grid (e.g., 5x5 points over the cell body, excluding edges).
- Force Curve Acquisition Parameters:
- Trigger Point: 0.5 - 1 nN (to ensure consistent indentation).
- Approach/Velocity: 2-5 µm/s (to minimize hydrodynamic drag).
- Dwell Time: 0-1 s at trigger point.
- Retract Velocity: 1-5 µm/s (slower speeds can increase detected adhesion events).
- Points per Curve: 1024-4096.
- Curves per Location: 3-5 for averaging.
- Total Cells per Condition: n ≥ 30 (biological replicates from ≥3 independent cultures).
- Data Collection: Automate acquisition across multiple cells/conditions. Monitor cell health via optical imaging.
Protocol 3.2: Data Processing Pipeline for Population-Level Analysis
Objective: To convert raw deflection-displacement data into analyzed parameters for statistical comparison.
Procedure:
- Raw Data Conversion: Convert photodiode voltage vs. z-piezo position to force vs. tip-sample separation.
- Force, F = k * InvOLS * Deflection (V).
- Tip-Sample Separation = z-piezo position - deflection.
- Baseline Correction: Subtract a linear fit from the non-contact portion of the approach curve.
- Contact Point Detection: Use a threshold (e.g., force > 5x noise STD) or more advanced algorithms (e.g., tangent method) to identify the point of initial contact.
- Elastic Modulus Fitting: Fit the approach curve from contact point to trigger force with an appropriate contact mechanics model (e.g., Sneddon's model for a conical tip: F = (2E tan(α) / π(1-ν²)) δ², where α is half-opening angle, ν is Poisson's ratio assumed ~0.5, δ is indentation).
- Adhesion Analysis: Identify adhesion events on the retract curve.
- Adhesion Force: Minimum force value on retract curve.
- Adhesion Energy: Calculate the negative area under the retract curve from the baseline to the last rupture event.
- Rupture Lengths: Note the separation at each discrete rupture event.
- Data Aggregation: For each cell, calculate the median value of each parameter from all curves on that cell. The cell median is the primary data point for population statistics.
- Statistical Testing: Apply non-parametric tests (e.g., Mann-Whitney U test for two groups, Kruskal-Wallis with Dunn's post-hoc for >2 groups) to compare cell-median values across experimental conditions. Report effect sizes.
Visualizations
The Scientist's Toolkit: Essential Research Reagents & Materials
Table 3: Key Research Reagent Solutions for AFM Live-Cell Studies
| Item | Function in Experiment | Example/Notes |
|---|---|---|
| Functionalized Cantilevers | Enable specific molecular interaction studies. | Tips coated with fibronectin, collagen, or an antibody to probe specific receptor-mediated adhesion. |
| Polyethylene Glycol (PEG) Linkers | Passivate cantilever surface to reduce nonspecific adhesion. | Used as a spacer in functionalization protocols. |
| Pharmacological Agents for Validation | Modulate cellular structures to validate AFM readouts. | Cytoskeleton disruptors (Latrunculin A for actin, Nocodazole for microtubules); blebbistatin for myosin. |
| Fluorescent Dyes/Reporters | Correlate AFM mechanics with live-cell fluorescent imaging. | Actin (SiR-actin), membranes (CellMask), viability (Calcein-AM). |
| Temperature & Gas Control System | Maintain cell viability during prolonged experiments. | Stage-top incubator or microscope enclosure with 37°C and 5% CO2 control. |
| Calibration Standards | Verify AFM system and cantilever performance. | Polydimethylsiloxane (PDMS) slabs of known stiffness; cleaned glass slides for adhesion checks. |
| Analysis Software | Process thousands of force curves for population statistics. | Custom scripts (Python, Igor Pro, MATLAB) or commercial packages with batch processing (e.g., JPK Data Processing, Bruker NanoScope Analysis). |
Conclusion
Atomic Force Microscopy has matured into an indispensable tool for live cell imaging, offering unparalleled nanoscale topographic and mechanical data in native liquid environments. This guide has synthesized the foundational principles, methodological workflows, troubleshooting tactics, and comparative validation necessary for its effective application. The convergence of AFM with fluorescence microscopy and advances in high-speed scanning and data analysis are pushing the boundaries, enabling the real-time observation of molecular-scale cellular processes. For biomedical research and drug development, this translates to a powerful capacity to visualize and quantify the direct mechanical and morphological effects of drugs, pathogens, and genetic modifications on living cells, paving the way for novel mechanistic insights and therapeutic strategies. The future lies in further integrating AFM data with omics-level information, creating a holistic, multi-parameter view of cellular function in health and disease.